
Drying eggshells in the oven might sound simple, but it’s a process that can unlock a world of benefits. Whether you want to make calcium powder for your garden, create homemade supplements, or use eggshells in crafts, proper drying is essential.
Many people toss out eggshells without realizing how valuable they are. When dried correctly, eggshells become safe, long-lasting, and easy to use for different projects.
But just placing eggshells in the oven is not enough. If you don’t follow the right steps, you might end up with shells that are too brown, still damp, or even unsafe due to bacteria. People often make mistakes, like not cleaning the shells well or setting the oven too hot.
This article will show you, step by step, how to dry eggshells in the oven safely and efficiently. You’ll also learn why drying is important, which common errors to avoid, and how to use your dried eggshells in practical ways.
Let’s dive into the complete guide on oven-drying eggshells, with tips, examples, and everything you need to get started.
Why Dry Egg Shells In The Oven?
Many people wonder why they should bother drying eggshells at all. The answer lies in hygiene, storage, and usability. Here’s why drying eggshells in the oven is so important:
- Kills Bacteria: Raw eggshells can carry Salmonella and other germs. Oven heat kills these, making the shells safer for humans, pets, or plants.
- Longer Storage: Moist eggshells can attract mold and become smelly. Dried shells are shelf-stable and odorless.
- Easier to Crush: Dried shells break down quickly, allowing you to grind them into fine powder for gardening or supplements.
- Versatile Uses: From calcium powder to pest control and art projects, dried eggshells are more useful than raw or wet shells.
- No Wasted Nutrients: Drying preserves the calcium carbonate and trace minerals, so you get the full benefit of the shells.
Oven drying is fast, consistent, and safe compared to air-drying, which can take days and still leave bacteria behind.
Essential Supplies And Preparation
Before you start, gather the right materials. This makes the process smoother and safer.
What You Need
- Raw eggshells: Any amount, from a single breakfast to a week’s collection.
- Baking sheet: Preferably with raised edges.
- Parchment paper or silicone mat: Prevents sticking and makes cleanup easy.
- Sieve or colander: For rinsing shells.
- Oven mitts: For safety.
- Airtight container: For storage after drying.
Prepping The Egg Shells
- Collect shells: Rinse eggshells right after use. Let them drain in a bowl or on a towel.
- Remove membranes: The thin, soft layer inside the shell can hold moisture and odor. Peel it away gently with your fingers or a spoon.
- Wash thoroughly: Place shells in a sieve and rinse under cold running water. Remove any leftover egg white or yolk.
- Dry slightly: Let shells air-dry for 5–10 minutes. This step is not mandatory, but it prevents water from dripping in your oven.
A common mistake is skipping the washing step. Even if the shell looks clean, invisible residue can cause bad smells during drying.
Step-by-step Guide: How To Dry Egg Shells In The Oven
Drying eggshells is easy, but doing it right makes a big difference. Here’s the process, explained clearly.
Step 1: Preheat The Oven
Set your oven to 200°F (95°C). This is hot enough to dry and sanitize but not so hot that it burns the shells.
- Lower temperatures take longer and might not kill bacteria.
- Higher temperatures can brown the shells, making them harder to grind and less attractive for crafts.
Step 2: Arrange The Egg Shells
Spread the clean, membrane-free eggshells in a single layer on a baking sheet lined with parchment paper or a silicone mat. Don’t stack the shells. Crowding prevents even drying.
- Tip: If you have many shells, use two sheets or dry them in batches.
Step 3: Bake The Shells
Place the baking sheet on the middle oven rack. Bake for 10 to 15 minutes.
- Check the shells after 10 minutes. They should look dry and brittle but not brown.
- If they are still moist or flexible, bake for 5 more minutes.
- Some ovens have hot spots. Rotate the baking sheet halfway through if you notice uneven drying.
Step 4: Cool Down
Remove the baking sheet using oven mitts. Let the shells cool completely on the tray. Hot shells are fragile and can burn your fingers.
- Pro tip: Cooling on the tray helps any leftover moisture evaporate.
Step 5: Store Or Grind
Once cooled, the shells are ready to use. Store them whole in an airtight jar, or crush them into a powder using a food processor, blender, or mortar and pestle.
- For gardening: Coarse pieces are fine.
- For supplements or baking: Grind to a fine powder for best absorption.
How Drying Time And Oven Temperature Affect Egg Shells
Many people wonder if they can speed up the process by using higher heat. Here’s what actually happens at different temperatures and times.
| Oven Temperature | Drying Time | Result |
|---|---|---|
| 150°F (65°C) | 25–30 min | Dry, but may not kill all bacteria |
| 200°F (95°C) | 10–15 min | Dry and sanitized, best for most uses |
| 250°F (120°C) | 7–10 min | Very dry, can brown or crack shells |
| 300°F (150°C) | 5–7 min | Risk of burning, uneven drying |
Key insight: Staying around 200°F is safest. Higher heat is not faster if it damages the shells or makes them hard to use.

Credit: ourlittlesuburbanfarmhouse.com
Common Mistakes To Avoid
Even simple tasks can go wrong. Here are mistakes many beginners make and how to avoid them:
- Skipping the wash: Eggshells can look clean but still hold bacteria and smells.
- Leaving the membrane: This thin skin traps moisture and can rot, causing mold.
- Using too much heat: Shells burn or turn brown, losing nutrients and looking unattractive.
- Not spreading shells out: Piled shells dry unevenly, leaving some damp.
- Underbaking: Damp shells can develop mold in storage.
- Storing shells while hot: This traps steam, leading to soggy shells and possible bacteria growth.
Tip: Always let the shells cool fully before grinding or storing them.
How To Use Dried Egg Shells
After drying, eggshells have many practical uses. Here are some of the most common and effective ways to use them:
For Gardening
- Soil amendment: Crushed shells add calcium carbonate, helping prevent blossom end rot in tomatoes and peppers.
- Pest control: Sprinkle crushed shells around plants to deter slugs and snails.
- Compost boost: Eggshells break down slowly, adding minerals to your compost pile.
For Homemade Calcium Supplements
Eggshells are about 95% calcium carbonate. When ground finely, they can be added to smoothies, baked goods, or taken as a supplement.
- Recommended dose: No more than 1/2 teaspoon of powder per day.
- Safety tip: Always dry and grind shells to a fine powder before consuming. Talk to a doctor before adding supplements to your diet.
For Pet Food
- Birds and reptiles need extra calcium. Sprinkle a small amount of eggshell powder on their food.
- Dog food: Some homemade dog food recipes include eggshell powder for strong bones.
For Household And Crafts
- Scrubbing powder: Crushed shells mixed with soap help clean pots and pans.
- Natural abrasive: Use eggshell powder to clean coffee pots, thermos flasks, or vases.
- Art projects: Eggshell mosaics are popular in crafts. Dried shells are easier to paint and glue.
Example: Eggshells In Gardening
A home gardener noticed her tomato plants had soft, brown bottoms—a sign of calcium deficiency. She started adding dried, crushed eggshells to her planting holes and saw a big improvement within two seasons. The shells broke down slowly, feeding the plants naturally.
Storing Dried Egg Shells
Proper storage keeps your dried eggshells usable for months or even years. Here’s what to do:
- Use airtight containers: Mason jars, plastic tubs, or glass jars work well.
- Keep in a cool, dry place: Avoid humidity, which can cause shells to get damp again.
- Label the jar: Write the date and intended use (garden, supplement, crafts).
If you want to store eggshell powder, make sure it’s completely dry before sealing. Moisture can lead to clumping or spoilage.
Troubleshooting: When Things Go Wrong
Even with the best instructions, problems can happen. Here’s how to fix the most common issues:
Shells Smell Bad
- Cause: Not washed well or membrane left inside.
- Fix: Always clean and remove membranes before drying.
Shells Are Still Damp After Baking
- Cause: Oven too cool, shells crowded, or not baked long enough.
- Fix: Spread shells in a single layer and bake for a few more minutes.
Shells Turn Brown Or Black
- Cause: Oven too hot or left in too long.
- Fix: Lower the oven temperature and check shells after 10 minutes.
Powder Feels Gritty Or Chunky
- Cause: Shells not dried fully or not ground fine enough.
- Fix: Dry shells again at 200°F for 5 minutes, then grind longer.
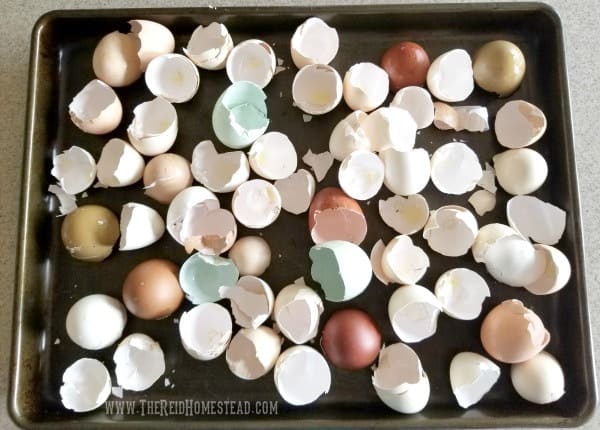
Credit: thereidhomestead.com
Data: Egg Shell Composition And Benefits
Eggshells are not just waste; they are a valuable source of minerals. Here’s a breakdown of what’s in a typical chicken eggshell:
| Component | Percentage | Benefit |
|---|---|---|
| Calcium carbonate | 94–97% | Bone health, soil improvement |
| Magnesium carbonate | 0.8% | Plant growth, metabolism |
| Calcium phosphate | 1% | Cell growth, animal health |
| Organic matter | 1–2% | Minor nutrients, structure |
Insight: The high percentage of calcium carbonate makes eggshells especially valuable for both human and plant nutrition.
Safety Considerations
Drying eggshells in the oven is generally safe, but there are a few points to remember:
- Sanitization: Oven heat kills most bacteria, but always wash shells first.
- Allergies: Rare, but some people may react to eggshell powder. Start with a small amount.
- Pets and children: Keep dried shells out of reach until ready to use, especially if they are ground to a fine powder.
Some people believe that eggshells can carry diseases even after baking. Studies show that heating at 200°F for 10–15 minutes makes shells safe for most uses. For more on food safety, see this Wikipedia article on eggshells.
Alternatives To Oven Drying
If you don’t have an oven, you can still dry eggshells, but each method has pros and cons.
Air Drying
- How: Spread washed shells in a single layer on a tray. Leave in a warm, dry place for 2–3 days.
- Pros: Uses no electricity.
- Cons: Takes longer and may not kill all bacteria.
Microwave Drying
- How: Place shells in a microwave-safe dish. Heat on high for 2–3 minutes.
- Pros: Very fast.
- Cons: May cause shells to pop or burn, uneven drying.
Dehydrator
- How: Use the lowest heat setting (about 150°F). Dry for 1–2 hours.
- Pros: Gentle and consistent drying.
- Cons: Requires special equipment.
Oven drying remains the most reliable method for most people.
Practical Tips For Best Results
Over years of drying eggshells, a few advanced tips can help you get perfect results every time.
- Batch process: Save shells for a week, then dry a big batch at once. This saves energy and time.
- Crush before drying: If you want fine powder, break shells into small pieces before baking. This shortens drying time and makes grinding easier.
- Use a coffee grinder: For ultra-fine powder, a clean coffee grinder works better than a food processor.
- Mix with vinegar: For garden use, soaking dried, crushed shells in vinegar releases more calcium for plants.
- Don’t use shells from boiled eggs: Boiling cooks the membrane into the shell, making it harder to remove and slowing drying. Use raw eggshells for best results.

Credit: zerowastechef.com
Real-world Example: Making Calcium Powder For A Family Garden
Marina, a home gardener, wanted to save money on fertilizers. She collected eggshells for a month, then dried them in her oven at 200°F for 12 minutes. She crushed the shells and added the powder to her tomato beds. Not only did her plants grow stronger, but she also noticed fewer slug problems.
Marina now shares dried eggshells with her gardening friends, showing how simple kitchen waste can become a valuable resource.
Comparing Drying Methods: Oven Vs. Air Vs. Microwave
To help you decide, here’s a quick comparison of the main drying methods:
| Method | Time Needed | Sanitization | Ease |
|---|---|---|---|
| Oven | 10–15 minutes | Excellent | Very easy |
| Air Dry | 2–3 days | Poor | Easy, but slow |
| Microwave | 2–3 minutes | Good | Requires caution |
Most people choose the oven for speed and safety.
Frequently Asked Questions
What Temperature Should I Use To Dry Eggshells In The Oven?
The best temperature is 200°F (95°C). This is high enough to dry and sanitize the shells without burning them. Avoid higher temperatures, as they can brown the shells and destroy some nutrients.
Do I Need To Remove The Membrane Before Drying Eggshells?
Yes. The inner membrane holds moisture and can cause bad smells or mold. Peel it out after rinsing the shells for the best results.
How Do I Grind Dried Eggshells Into Powder?
Once the shells are completely dry, use a food processor, blender, or coffee grinder. For finer powder, blend in small batches and sift the result to remove larger pieces.
Are Dried Eggshells Safe For Pets?
Dried, clean, and ground eggshells are safe for most pets in small amounts. Dogs, birds, and reptiles can all benefit from calcium. Always consult your vet before adding new supplements.
Can I Use Eggshells From Boiled Eggs?
It’s possible, but not ideal. Boiling makes the membrane stick to the shell, which can slow drying and cause odor. Raw eggshells, cleaned and dried, work much better.
Drying eggshells in the oven is simple, fast, and opens up many ways to reuse something most people throw away. With the right steps, you can create a safe, versatile product for your home, pets, or garden. Start saving those shells, and see the benefits for yourself.