
An above ground pool can bring endless fun and a perfect escape from the heat. But when you notice a leaning post, a wobbly frame, or a post that has started to sink, it’s easy to panic. Fixing an above ground pool post might feel overwhelming, but with the right steps, anyone can restore stability and enjoy a safe swimming season.
This guide will give you clear instructions, helpful tips, and expert insights to help you fix your above ground pool post with confidence.
Why Above Ground Pool Posts Matter
Above ground pool posts, sometimes called uprights or vertical supports, are the backbone of your pool’s structure. They keep the pool walls straight and strong, support the weight of the water, and prevent the frame from collapsing. If one or more posts fail, the entire pool can become unsafe. Even a small tilt or bend can lead to problems like:
- Wall buckling and water leaks
- Liner damage from uneven pressure
- Increased risk of pool collapse
- Injury to swimmers or people nearby
Regularly checking your posts and fixing any problems quickly is essential for long-term pool safety and enjoyment.
Common Causes Of Above Ground Pool Post Problems
Before you start fixing, it helps to know why posts get damaged or unstable. Here are the most common reasons:
- Improper installation — The ground wasn’t leveled, or posts weren’t set deep enough.
- Soil movement — Rain, flooding, or freeze-thaw cycles can shift the soil.
- Corrosion or rust — Metal posts may corrode over time, especially if exposed to water and chemicals.
- Physical impact — Lawn mowers, falling branches, or rough play can hit and bend posts.
- Water leaks — If water seeps under the pool, it can wash away soil and cause posts to sink.
- Aging materials — Plastic or metal posts can weaken with age, sun, and weather.
Understanding the root cause will help you choose the right repair method and prevent future issues.
Tools And Materials You’ll Need
Fixing an above ground pool post requires a few key tools and materials. Having everything ready will make the process smoother and safer.
- Shovel — For digging around the post and adjusting the ground
- Level — To check that the post is straight
- Measuring tape — For precise adjustments
- Socket wrench or screwdriver — For loosening and tightening bolts
- Replacement post (if needed) — Match the size and material to your pool
- Crushed stone or sand — For leveling the base and improving drainage
- Bag of concrete mix (for serious sinking)
- Rust-resistant spray paint — To protect metal posts after repair
- Work gloves and safety glasses — For your protection
- Support braces or wooden blocks — To temporarily hold the pool wall in place
Some repairs may need extra items, such as a rubber mallet, hose for wetting sand, or a drill for stubborn bolts.
Safety Precautions Before You Start
Fixing a pool post involves heavy objects and sometimes water. Take these precautions for your safety:
- Drain the pool water below the repair area if needed. If your post is very unstable or the wall is bulging, it’s safest to drain at least halfway.
- Work with a partner. Pools are heavy, and it’s safer to have help.
- Turn off power to any pool equipment before starting.
- Keep children and pets away from the work area.
- Wear gloves and safety glasses to avoid injuries from sharp metal edges.
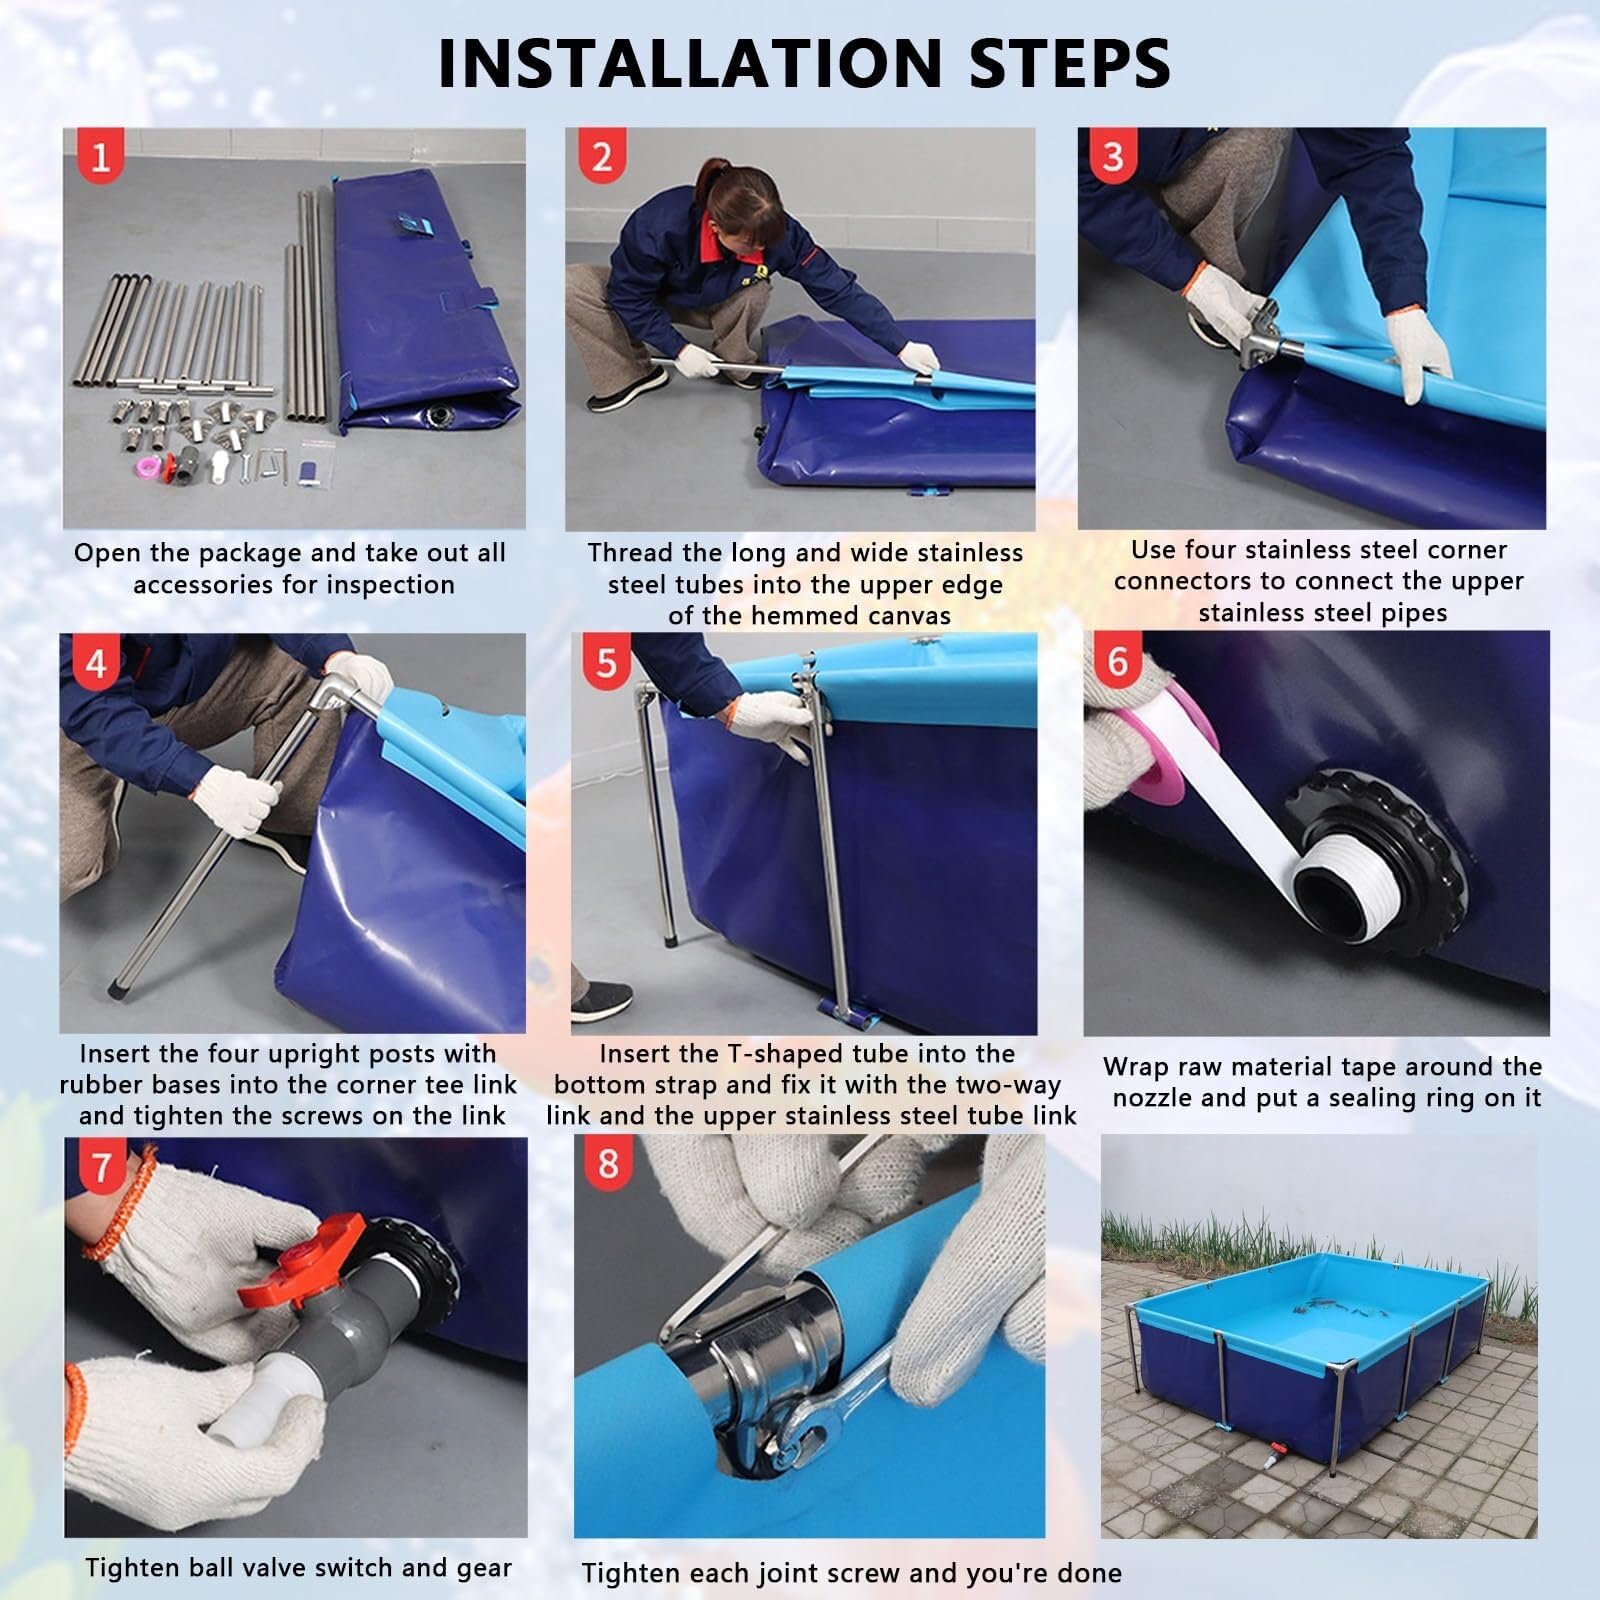
Credit: www.amazon.com
Assessing The Damage
Before you grab your tools, you need to understand the full problem. Take time to inspect your pool post and the surrounding area.
- Visual check: Look for leaning, bowing, or visibly broken posts.
- Check for rust or cracks: Examine metal posts for corrosion and plastic posts for cracks.
- Test stability: Gently push the post. Does it move? Is it loose at the base?
- Inspect the ground: Is the soil washed out, muddy, or sunken? Are there signs of erosion or water pooling?
- Check the pool wall: Look for buckling, gaps, or liner stretching.
Write down your findings. Sometimes, the visible problem is just part of a bigger issue, like widespread ground settling. This step will help you decide if you need a quick fix or a more serious repair.
How To Fix A Leaning Or Sinking Above Ground Pool Post
Most pool post problems fall into two main categories: leaning (post tilting but still attached) and sinking (post has dropped into the ground). Here’s how to fix each scenario.
Fixing A Leaning Post
If your post is leaning but not broken, you can often fix it without replacing the whole post.
- Drain Water if Needed
- Lower the water level below the area you’ll be working on. This reduces pressure on the wall and makes it safer to adjust the post.
- Support the Pool Wall
- Place wooden blocks or a strong brace inside the pool, pressing against the wall near the leaning post. This prevents the wall from collapsing when you remove the post.
- Loosen the Post Bolts
- Use a socket wrench or screwdriver to loosen (but not fully remove) the bolts attaching the post to the top and bottom rails.
- Straighten the Post
- Gently push the post back into a straight, vertical position using a level to check it. If the base is uneven, you may need to dig around it to allow movement.
- Level the Base
- Remove soil, add sand or crushed stone, and pack it tightly under the post until the post stands upright. Check with the level again.
- Tighten the Bolts
- Secure the post to the rails, ensuring everything is snug and straight.
- Backfill and Compact
- Fill in soil around the base. Tamp it down firmly to prevent future movement.
- Repaint Metal Posts
- If you disturbed paint or found rust, clean the area and spray with rust-resistant paint.
- Remove Braces and Refill Pool
- Once the post is stable, remove supports and refill the pool to the proper level.
Expert Tip: Always check neighboring posts when you see one leaning. Soil shifts can affect more than one post.
Fixing A Sinking Post
A sinking post usually means the ground beneath is too soft, wet, or has washed away. This needs a stronger fix.
- Drain More Water
- Lower the water level so there is no pressure on the wall near the sinking post.
- Support the Wall
- Brace the wall securely with strong wood or metal supports inside and outside the pool.
- Remove the Post
- Loosen and remove the bolts, then carefully lift the post away. If the post is rusted or broken, replace it.
- Rebuild the Base
- Dig out the soft soil. Fill the hole with a few inches of crushed stone or gravel. For very soft ground, pour a small concrete pad (let it cure 24–48 hours).
- Set the Post
- Place the post on the new base. Use a level to check it is perfectly upright.
- Reattach the Post
- Secure the post to the top and bottom rails, tightening bolts firmly.
- Backfill and Compact
- Add soil around the base and pack it down well. The tighter the soil, the less likely the post will sink again.
- Paint and Protect
- If using a metal post, spray the base with rust-resistant paint.
- Remove Bracing and Refill Pool
- Once stable, remove supports and return the water to its normal level.
Pro Insight: For pools in areas with frequent rain or soft soil, creating a wider base with gravel or concrete under every post can prevent future sinking.
Replacing A Broken Or Severely Rusted Post
Sometimes, a post is too damaged to repair. If your post is cracked, bent, or rusted through, replacement is the safest option.
- Find the Right Replacement
- Match the height, width, and material of your original post. Check your pool’s brand and model for compatible parts.
- Drain Water and Support Wall
- Lower the water and brace the wall as before.
- Remove the Old Post
- Unbolt and lift away the damaged post.
- Inspect the Top and Bottom Rails
- Check for bent or rusted rails. Replace or repair these if needed.
- Install the New Post
- Position the new post, make sure it’s vertical, and attach it to the rails.
- Reinforce the Base
- Add gravel or a concrete pad under the new post for extra support.
- Tighten All Connections
- Secure all bolts and check that the post is solid.
- Finish and Protect
- Paint metal posts, backfill the area, and refill the pool.
Non-Obvious Insight: Save the old post, if possible. Even a damaged post can be used as a template for future replacements or as a backup in emergencies.
Preventing Future Above Ground Pool Post Problems
Fixing a post is only part of the job. The best way to keep your pool safe and strong is to prevent new problems before they start. Here’s how:
- Level the Ground Carefully
- When installing or repairing, use a long level and check all directions. Even a small tilt can cause big problems later.
- Use Quality Fill Material
- Crushed stone or gravel drains better than soil and reduces the risk of sinking.
- Check for Drainage Issues
- Make sure water does not pool around the base of your posts. Add gutters, French drains, or sloped landscaping if needed.
- Inspect Posts Every Season
- Look for leaning, rust, or cracks in spring and fall. Early fixes are easier and cheaper.
- Paint Metal Posts Annually
- A quick coat of rust-resistant paint keeps moisture and chemicals away.
- Clear Debris and Plants
- Keep grass, weeds, and mulch away from the post base to prevent moisture buildup.
- Don’t Overload the Pool Edge
- Avoid sitting or climbing on the pool wall, as this puts stress on posts.
Little-Known Tip: In cold climates, leave a small gap between soil and the bottom of the post base. This allows for freeze-thaw movement and protects the post from heaving.
When To Call A Professional
Most above ground pool post fixes are DIY-friendly, but there are times when it’s best to call an expert:
- The pool wall is buckling or tearing.
- Multiple posts are leaning or sinking at once.
- The ground under the pool is washing away after a storm.
- You’re unsure how to safely drain or support the pool.
Professional pool installers have special tools and experience to handle large repairs. Calling for help can prevent bigger problems and protect your investment.
Cost Comparison: Diy Vs. Professional Repair
Sometimes, fixing a pool post yourself is cost-effective. Other times, hiring a pro is worth it. Here’s a look at typical costs.
| Repair Type | DIY Cost (USD) | Professional Cost (USD) |
|---|---|---|
| Leaning Post Adjustment | $20–$70 | $100–$250 |
| Sinking Post Reset (with gravel) | $40–$120 | $200–$400 |
| Full Post Replacement | $80–$180 | $300–$600 |
| Structural Wall Repair | Not Recommended | $500–$2000 |
DIY is usually cheaper, but only if you have the time, tools, and confidence to do the job safely.
Comparing Pool Post Materials
Not all pool posts are the same. Choosing the right material can make repairs last longer.
| Material | Strength | Rust Resistance | Common Lifespan | Maintenance Needed |
|---|---|---|---|---|
| Galvanized Steel | High | Moderate | 10–20 years | Paint yearly |
| Resin (Plastic) | Medium | Excellent | 15–25 years | Minimal |
| Aluminum | Medium | High | 15–30 years | Clean regularly |
Resin posts are popular for their rust resistance, but they can crack in very cold weather. Steel is very strong but needs regular painting. Aluminum offers a good balance but costs more.
Real-world Example: Fixing A Pool Post After Heavy Rain
Imagine you wake up after a big storm and see one post leaning inward, with the ground wet and soft around it. Here’s what a homeowner did:
- Drained water below the post.
- Supported the wall with a 2×4 brace.
- Dug out the muddy soil and found a small hole under the post.
- Filled the hole with 4 inches of gravel, topped with a thin concrete pad.
- Let the concrete cure, then reset and leveled the post.
- Backfilled with soil and compacted it hard.
- Painted the post base and removed the brace.
- Pool was back to normal the next day.
This repair took two days and cost under $50 — much less than hiring a contractor.
Common Mistakes To Avoid
Many pool owners make the same errors when fixing posts. Here’s how to avoid them:
- Not draining enough water — Working with a full pool risks a wall collapse.
- Skipping wall bracing — Even a short wall section can buckle without support.
- Ignoring the cause — Fixing the post without fixing drainage or soil problems means the issue will return.
- Using poor fill material — Ordinary dirt or clay can wash away. Use crushed stone or gravel.
- Over-tightening bolts — This can crack plastic or bend metal. Tighten firmly but not excessively.
- Delaying repairs — Small problems grow quickly. Fix as soon as you notice an issue.
Seasonal Maintenance For Above Ground Pool Posts
Caring for your posts year-round prevents most big repairs. Here’s a simple seasonal checklist:
Spring
- Check all posts for straightness and rust.
- Paint metal posts if needed.
- Rake soil away from post bases for better drainage.
Summer
- Keep grass and weeds trimmed.
- Watch for wet spots after storms.
Fall
- Check for settling after heavy rain.
- Remove leaves and debris from around posts.
Winter
- In snowy regions, brush heavy snow off the pool top to reduce weight on posts.
- Inspect for frost heaving if you notice uneven posts in spring.

Credit: www.amazon.se
Choosing The Right Gravel Or Base Material
The type of base under your pool post can make a big difference in stability. Here’s a quick comparison:
| Base Material | Drainage | Compaction | Cost | Best Use |
|---|---|---|---|---|
| Crushed Stone (3/4″) | Excellent | High | Low | Most repairs |
| Play Sand | Good | Medium | Low | Minor leveling |
| Concrete Pad | Poor | Very High | Medium | Very soft soils |
| Topsoil | Poor | Low | Low | Not recommended |
Crushed stone is usually the best choice for most climates and soils.
Expert Tips For A Lasting Fix
- Always double-check your level before tightening bolts.
- If your pool is older than 10 years, check all posts even if only one is leaning.
- Apply a bead of waterproof sealant at the base of metal posts for extra protection.
- Take photos before and after repair for your records and warranty.
- If you live in a windy area, consider installing extra ground anchors for added stability.

Credit: kaypoolandspa.com
Where To Find Replacement Parts
If you need a new post, buy from your pool’s manufacturer, a local pool store, or a trusted online supplier. Bring your old post or measurements to ensure a perfect fit. Avoid generic or one-size-fits-all posts — a slight size difference can weaken the pool structure.
For more technical details on above ground pool construction and repair, the Swimming Pool Wikipedia page offers useful background information.
Frequently Asked Questions
What If More Than One Post Is Leaning Or Sinking?
If you see several leaning or sinking posts, your pool may have a wider problem like shifting soil or poor drainage. Fixing just one post won’t solve the whole issue. In this case, drain the pool, check all posts, and consider calling a professional for a full inspection.
Can I Fix A Pool Post Without Draining The Pool?
You can fix minor leaning if the pool is less than half full, but for most repairs, especially sinking or replacing a post, it’s safest to drain water below the repair area. This prevents wall collapse and makes work easier.
How Do I Know If A Post Needs Replacement Or Just Straightening?
If the post is only leaning but not cracked, bent, or heavily rusted, you can usually straighten and reset it. If there are visible cracks, deep rust, or the post feels weak, it’s best to replace it.
Will Fixing One Post Solve My Pool’s Problems?
Not always. If the ground or drainage is poor, other posts may fail soon. Always check for the cause of the problem and inspect all posts when you notice one is out of alignment.
How Long Does A Typical Pool Post Repair Take?
Most repairs take a few hours to a full day, depending on the problem. Replacing a post with concrete base may need 1–2 days for curing. Plan for extra time if you need to drain and refill the pool.
Fixing an above ground pool post may seem complex, but with careful steps and the right materials, you can restore your pool’s safety and enjoy it all summer long. Taking the time to do repairs properly will save you money and stress for years to come.