
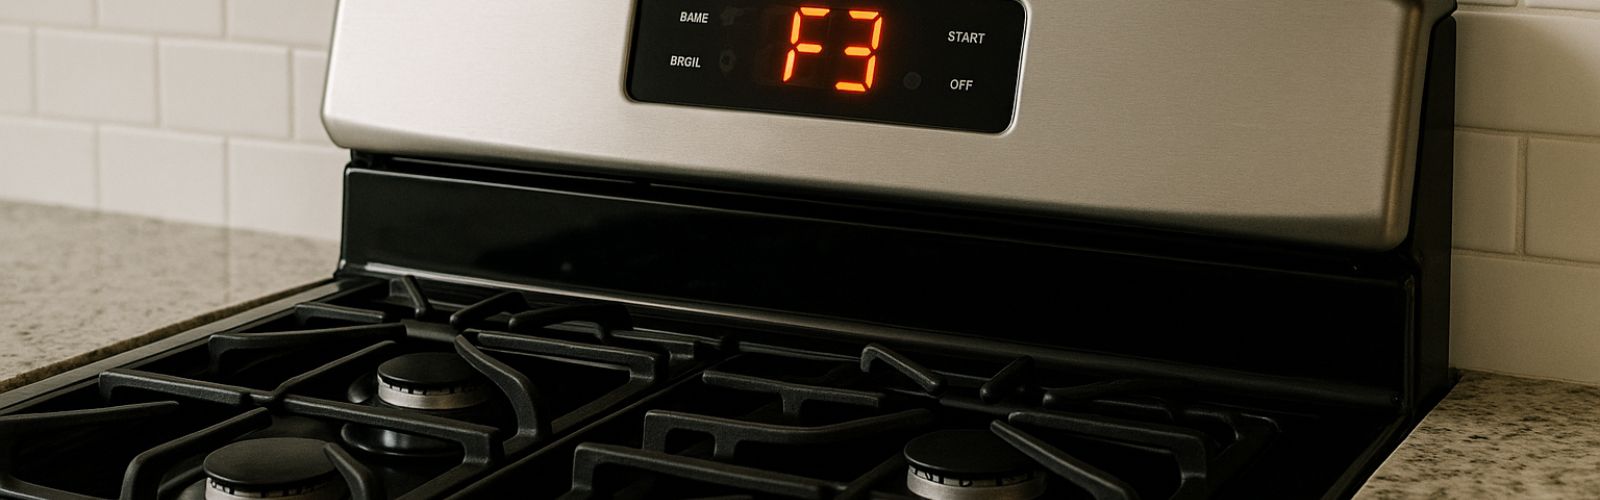
If your GE oven suddenly stops working and displays an F3 error code, you’re probably frustrated and worried about your next meal. This error is common, but it can be confusing if you’re not familiar with oven repairs. The good news is that the F3 code usually points to a specific group of problems, and most of them can be fixed at home with patience and basic tools. Understanding what the code means, why it appears, and how to fix it will help you get your kitchen back to normal faster and avoid expensive service calls.
In this article, you’ll learn what causes the F3 error, how to troubleshoot each possible issue, and how to repair or replace the parts involved. We’ll break down the three main reasons for the F3 code, show you step-by-step solutions, and share practical tips that most beginners overlook.
By the end, you’ll know how to handle the F3 error with confidence—even if you’ve never fixed an oven before.
What Does The F3 Error Code Mean On A Ge Oven?
When your GE oven shows an F3 error code, it’s telling you something is wrong with the oven temperature sensor circuit. This code is a signal from the oven’s control board that the sensor is reporting unsafe or unexpected temperatures. GE uses error codes to help owners and technicians quickly find the source of the problem, but the code doesn’t always tell you exactly which part is faulty. Instead, it suggests where to look.
Why The F3 Code Appears
The F3 error appears for one of three main reasons:
- Faulty oven temperature sensor
- Problems with the wiring or connection
- Defective control board
Each issue affects the sensor circuit in a different way. Sometimes, the sensor is broken or worn out. Other times, the wires connecting the sensor to the control board have become loose or damaged. In rare cases, the control board itself—sometimes called the ERC (Electronic Range Control)—isn’t reading the sensor’s signal correctly.
Understanding the difference between these causes is important. Replacing the wrong part wastes money and time. Next, we’ll look at each issue in detail, including how to test, diagnose, and fix the problem.
1. Faulty Oven Temperature Sensor
The temperature sensor is a small metal rod, usually about six inches long, located inside the oven on the back wall. Its job is to measure the oven’s internal temperature and send this information to the control board. If the sensor fails, the oven can’t maintain the right temperature, and the F3 code appears.
Signs Your Sensor Is Faulty
- The F3 code appears soon after you start the oven
- The oven heats unevenly or won’t get hot enough
- The temperature on the display does not match the real oven temperature
A sensor can fail due to age, repeated high temperatures, or electrical faults. Over time, the sensor’s ability to measure accurately decreases.
How To Test The Sensor
Testing the sensor is the first step. You’ll need a multimeter, a tool that measures electrical resistance.
- Unplug the oven or turn off power at the circuit breaker.
- Locate the sensor (usually inside the oven, back wall, upper corner).
- Remove the screws holding the sensor and gently pull it out.
- Disconnect the sensor from its wire harness.
- Set your multimeter to the ohms setting (Ω).
- Place the multimeter probes on each end of the sensor’s connector.
A working GE oven sensor should show about 1100 ohms at room temperature (21–24°C / 70–75°F).
Example Resistance Table
Here is a quick reference for sensor resistance at different temperatures:
| Temperature (°F) | Resistance (ohms) |
|---|---|
| 75 | 1080 |
| 250 | 1453 |
| 350 | 1654 |
| 550 | 2191 |
If your sensor reads much lower or higher than 1100 ohms at room temperature, it’s likely bad.
How To Replace The Sensor
If your test shows a faulty sensor, replacement is the best option. Here’s how to do it:
- Order a new sensor for your GE oven model (part numbers are usually in the user manual).
- Unplug the oven or shut off its power.
- Remove the sensor’s mounting screw(s).
- Pull the sensor out gently and disconnect the wiring harness.
- Connect the new sensor to the wiring harness.
- Reinstall the sensor and secure with screws.
- Restore power and test the oven.
Most sensors are affordable and easy to find online or at appliance stores. If you’re unsure about your model, check the oven’s label or manual.
Practical Tips
- Take a photo of the sensor wiring before removal, so you know how to reconnect it.
- If the sensor is stuck, gently wiggle it—don’t force, as wires can break.
- Always test the oven after replacing the sensor before baking anything.
Many people replace the sensor without testing, but it’s important to confirm it’s faulty. If the sensor is fine, the problem is likely in the wiring or control board.

Credit: danmarcappliance.com
2. Problems With Wiring Or Connection
Even if your oven sensor is working, the wiring that connects it to the control board can develop issues. Over time, wires may become loose, corroded, burned, or pinched. If the sensor’s signal can’t reach the control board, you’ll see the F3 code.
Common Wiring Problems
- Loose connectors: The sensor is connected to the oven’s control board through a wire harness. If a connector is loose, the circuit can break.
- Damaged wires: Heat, moisture, or rodents can damage the wires inside the oven cavity.
- Corroded contacts: Metal connectors may oxidize, causing poor signal transmission.
Some ovens are installed so tightly that wires get pinched during installation—a detail most beginners miss.
How To Check The Wiring
- Unplug the oven or turn off power.
- Remove the back panel of the oven (usually a few screws).
- Trace the sensor wires from the sensor to the control board.
- Look for broken, burnt, or disconnected wires.
- Wiggle the connectors gently to check for looseness.
- Use a multimeter to check for continuity (the wires should let electricity flow).
Example Of Continuity Test
Set your multimeter to the continuity setting. Touch one probe to the sensor end, and the other to the control board connector. If the multimeter beeps or shows a reading, the wire is good. If not, there’s a break.
How To Fix Wiring Problems
- Reconnect loose connectors. Make sure every plug is snug.
- Replace damaged wires. Buy high-temperature wire of the same gauge.
- Clean corroded contacts. Use a small brush or contact cleaner.
- Secure wires. Use zip ties to keep them away from hot surfaces.
Repairing wiring can be more tedious than replacing a sensor, but it’s often cheaper. Take your time, and don’t rush—rushing can break more parts.
Practical Insights
- Always check the wiring harness before replacing the sensor—sometimes the harness is the real problem.
- If you smell burning or see melted insulation, don’t use the oven until wires are replaced.
- Write down or photograph wire connections to avoid mistakes.
Most beginners focus only on the sensor and miss wiring checks. But a loose or corroded connector is a common, simple fix.
3. Defective Control Board
If the sensor and wiring are both good, the last suspect is the control board. The control board is the oven’s “brain”—it receives the sensor’s temperature signal and adjusts heating. If the board malfunctions, it may misread the sensor or send the wrong signals, causing the F3 code.
Why Control Boards Fail
- Power surges during storms or outages
- Moisture from spills or leaks
- Age and wear (electronic parts break down over time)
In some cases, the control board can be repaired by replacing a single burnt component. Other times, the whole board needs to be replaced.
How To Identify A Bad Control Board
- The oven displays F3 even after replacing the sensor and fixing wiring
- The oven acts strangely (buttons don’t work, lights flash, other error codes appear)
- The error appears even with the sensor unplugged
You can test the control board by plugging in a new sensor and checking if the error remains. If it does, the board is likely bad.
How To Replace The Control Board
- Order the correct control board for your GE oven model.
- Unplug the oven or turn off its power.
- Remove the back panel or control panel cover.
- Disconnect the wiring harnesses from the old control board.
- Remove the screws holding the board in place.
- Install the new board, reconnect all harnesses, and secure it.
- Replace the panel, restore power, and test the oven.
Replacing the board can cost more than a sensor or wiring, but it is often less than buying a new oven.
Data: Cost And Difficulty
Here’s a quick comparison of part costs and repair difficulty for the three main F3 causes:
| Part / Problem | Typical Cost (USD) | Repair Difficulty |
|---|---|---|
| Temperature Sensor | $15–$45 | Easy |
| Wiring/Connections | $0–$20 | Medium |
| Control Board | $120–$350 | Hard |
If you’re not comfortable working with electronics, it’s smart to call a professional for control board replacement.
Non-obvious Insight
Some control boards have removable “fuses” or relays. If you’re handy, you can sometimes fix the board by replacing a single small part—saving hundreds of dollars. Always check for visible damage (burn marks, broken solder joints) before buying a new board.
Steps To Fix The F3 Error Code
Now that you know the three main causes, here’s a step-by-step approach to fixing the F3 error:
- Unplug the oven or turn off power.
- Test the temperature sensor with a multimeter (should be ~1100 ohms at room temperature).
- If the sensor is bad, replace it and test the oven.
- If the sensor is good, check wiring and connections for damage or looseness. Repair as needed.
- If sensor and wiring are fine, suspect the control board. Replace if necessary.
- Test the oven after each step before moving to the next.
This order prevents wasted money and effort, and helps you find the exact problem.
Example Scenario
Suppose you test the sensor and find it reads 900 ohms (too low). Replace it. If the error disappears, you’re done. If not, check wiring. If all wiring is secure and the error remains, the control board is likely bad.
Tips For Success And Safety
- Always disconnect power before opening the oven. Working on a live appliance is dangerous.
- Label wires if you remove several at once. This prevents confusion during reassembly.
- Check your warranty. If your oven is new, repairs might be covered.
- Don’t guess. Use a multimeter to test parts before replacing them.
- Keep your manual handy. Model-specific instructions are important.
If you’re unsure, call a professional. Electricity and ovens can be dangerous if handled incorrectly.
When To Call A Technician
Fixing an F3 error is often a DIY job, but some cases require expert help. Call a technician if:
- You’re not comfortable working with electrical parts.
- The wiring is badly burned or melted.
- The control board is complex or expensive.
- The error returns after repairs.
A qualified technician can also test parts more thoroughly and may have access to advanced diagnostic tools.
Preventing Future F3 Errors
Once you’ve fixed your oven, a few habits can help prevent future problems:
- Don’t slam the oven door. Vibration can loosen sensors and wires.
- Clean spills quickly. Moisture and chemicals damage wiring and boards.
- Check wires during routine cleaning or maintenance.
- Use a surge protector for your kitchen appliances.
Regular care extends your oven’s life and reduces error codes.
Real-world Data: How Often Do F3 Errors Happen?
According to service surveys, sensor and wiring issues cause about 80% of F3 errors in home ovens. Control board failures are less common (15–20%) but more expensive. Most F3 errors are fixed with a new sensor or a wiring repair—good news for DIYers.
Common Mistakes When Fixing F3 Errors
- Skipping the wiring check. Many people replace the sensor but forget to check the wiring harness.
- Not testing the new sensor before reassembly.
- Guessing the problem instead of using a multimeter.
- Mixing up connectors on the control board during reinstallation.
- Forgetting to turn off power before starting work.
Avoiding these mistakes saves time, money, and frustration.

Credit: smartapplianceservices.com
Troubleshooting Table: Quick Reference
Use this table to quickly find what to check based on the symptoms you see:
| Symptom | What to Check | Likely Fix |
|---|---|---|
| F3 error appears on startup | Sensor resistance, wiring | Replace sensor or repair wiring |
| F3 appears during cooking | Sensor, loose wires (heat expands wires) | Check sensor and connections |
| Error remains after sensor replacement | Wiring, control board | Repair wiring or replace control board |
| Other error codes (F1, F2, etc.) | Control board | Replace control board |
Where To Find Official Parts And Support
Always buy parts from reputable dealers or directly from GE Appliances. This ensures compatibility and safety. For repair guides, wiring diagrams, and official support, check the manufacturer’s website or an authoritative source like the GE Appliances Wikipedia page.
Credit: www.appliancepartspros.com
Frequently Asked Questions
Why Does My Ge Oven Display F3 After Cleaning?
Moisture from cleaning sprays or steam can get into connectors and cause the F3 error. Let the oven dry completely. If the error stays, check the sensor and wiring for corrosion or loose connections.
Can I Reset The F3 Error Code By Unplugging The Oven?
Unplugging the oven may clear the error temporarily, but if the cause is not fixed, the error will return. Always diagnose and repair the actual problem (sensor, wiring, or control board).
How Long Does It Take To Fix The F3 Code?
Most sensor or wiring repairs take 30–60 minutes with basic tools. Replacing the control board can take 1–2 hours, especially if panels are hard to remove.
Is It Safe To Use The Oven With The F3 Error Showing?
No, the F3 code means the oven cannot measure temperature accurately. Using it could lead to overheating or undercooking food, and in rare cases, it may be a fire risk.
Where Can I Get A Replacement Sensor For My Ge Oven?
Replacement sensors are available at appliance parts stores, online retailers, and through the GE Appliances official website. Make sure to match your oven’s model number for compatibility.
Fixing the F3 error code on a GE oven is a practical project for most homeowners. By understanding the three main causes—sensor, wiring, and control board—you can tackle the problem confidently and safely. Take your time, use the right tools, and you’ll have your oven working again soon.