
Every home tells a story, and cabinets often play a big part. They stand in your kitchen, bathroom, or living room, working hard every day. Over time, scratches can appear. Maybe you dragged a pan out too quickly, or your kids played a bit rough.
Even careful people find these marks sooner or later. Scratches on cabinets can make the whole room feel older or less cared for. But the good news is that you don’t need to replace your cabinets or spend a fortune.
You can fix most scratches by yourself with the right steps and a bit of patience.
Many people think that repairing cabinet scratches is only for professionals. That’s not true. In fact, you can handle most repairs at home with simple tools and materials. This guide will show you how to fix scratches on cabinets, from small surface marks to deeper gouges.
You will also learn how to choose the best method for your cabinet’s material and finish. Along the way, you’ll discover tips that most beginners miss, so you get results that look clean and professional.
Understanding Cabinet Scratches
Before you start any repair, it’s important to know what you’re dealing with. Scratches on cabinets are not all the same. The right solution depends on the scratch depth, the type of cabinet material, and the finish.
Types Of Scratches
- Surface scratches: These are light marks that don’t go deep. You can feel them, but your nail doesn’t catch when you run it over the scratch.
- Shallow scratches: Your fingernail can feel the scratch. It’s a bit deeper, but it hasn’t reached the wood beneath the finish.
- Deep scratches or gouges: These cuts go into the wood or material itself. They are often visible even from a distance and may catch dirt or moisture.
Cabinet Materials
Cabinets come in many materials. Each reacts differently to scratches and repairs.
- Solid wood: Durable but can show marks clearly, especially on dark finishes.
- Veneer: A thin layer of wood over another material. Veneers can be tricky to repair if scratched deeply.
- Laminate: A plastic-like surface, often used in modern kitchens. Scratches may look white and be harder to hide.
- Painted cabinets: Scratches may remove the color, making the mark stand out.
- Stained cabinets: Scratches often appear lighter or darker than the surrounding wood.
Knowing your cabinet type helps you pick the best repair method.
What You Need To Fix Cabinet Scratches
Gathering the right tools and materials makes your work easier and gives better results. Below is a helpful comparison of common cabinet types and repair products.
| Cabinet Material | Best Repair Product | Special Precautions |
|---|---|---|
| Solid wood | Wood filler, stain pen | Test stain for color match |
| Veneer | Wax stick, touch-up marker | Avoid sanding through veneer |
| Laminate | Laminate repair paste | Use color-matched paste |
| Painted | Paint touch-up, putty | Let paint dry fully between coats |
| Stained | Stain pen, wax stick | Match stain carefully |
Common tools and supplies you may need:
- Soft cloths or rags
- Mild soap and water
- Fine-grit sandpaper (220–320 grit)
- Wood filler or putty
- Stain or paint touch-up markers
- Wax repair sticks
- Clear finish (polyurethane or lacquer)
- Small paintbrush
- Putty knife
- Mineral spirits (for cleaning, not for all surfaces)
- Gloves (to protect your hands)
Many hardware or home improvement stores have repair kits for cabinets. These can save time, but you still need to match the color and finish carefully.

Credit: www.reddit.com
How To Fix Light Surface Scratches
If your cabinets have light scratches, you’re in luck. These are the easiest to repair and often disappear with simple care.
Step 1: Clean The Area
Always start with a clean surface. Use a soft cloth with mild soap and water to wipe the scratched area. Dry it completely. Dirt or grease can make repairs less effective.
Step 2: Try A Simple Polish
For very minor scratches, a good furniture polish or a mix of olive oil and vinegar (1:1 ratio) can sometimes hide the mark. Rub it gently into the scratch with a soft cloth, using small circles. Wipe off the extra and check if the scratch is still visible.
Step 3: Use A Touch-up Marker
Furniture touch-up markers are made for fixing scratches on wood or stained cabinets. Pick a color close to your cabinet’s finish. Run the marker along the scratch, let it dry, then buff lightly with a clean cloth. Touch-up markers work best for surface-level scratches.
Step 4: Apply A Wax Repair Stick
Wax sticks fill in shallow scratches, making them less visible. Warm the stick in your hands, press it into the scratch, and smooth it with a plastic card or your finger. Buff the area gently after to blend the repair.
Pro tip: Always test your repair method on a hidden area first to check color match and finish.
How To Fix Shallow Scratches
Shallow scratches are deeper than surface marks but don’t reach the core of the cabinet material. Here’s how to fix them:
Step 1: Clean And Dry
Clean the area with mild soap and water, then dry it. Any grease or dust will prevent materials from sticking.
Step 2: Lightly Sand (if Needed)
If the scratch feels rough, gently sand it with fine-grit sandpaper. Sand just enough to smooth the edges. Don’t over-sand, especially on veneer or painted cabinets.
Step 3: Choose The Right Repair Product
- Stained wood: Use a stain pen or colored wax stick.
- Painted cabinets: Use matching paint. For better results, use a small artist’s brush.
- Laminate: Use a laminate repair paste in a matching color.
Step 4: Apply Product
Follow the instructions on your product. For stain pens, run the tip along the scratch and wipe away extra stain before it dries. For paint, dab on small amounts and build up the color slowly. For wax, press it into the scratch and smooth.
Step 5: Seal The Repair
Once dry, add a thin layer of clear finish if your cabinet has a glossy or semi-gloss finish. Use a small brush and keep the layer thin.
Non-obvious insight: On painted cabinets, many people forget to use a primer before touch-up paint. If your scratch goes through the paint layer, a drop of primer under the paint can prevent peeling later.
How To Fix Deep Scratches And Gouges
Deep scratches need more work, but you can still get good results without a pro.
Step 1: Clean And Assess
Clean the area well. Look closely—if the scratch is deep but not wide, a filler may do the job. If the scratch is wide or there’s missing material, you may need wood putty or filler.
Step 2: Apply Wood Filler Or Putty
Choose a filler that matches your cabinet type (wood, veneer, or painted). With a putty knife, press the filler into the scratch or gouge. Overfill it slightly, as it will shrink when dry.
Let it dry completely—this may take from 30 minutes to several hours depending on the product.
Step 3: Sand Smooth
Once the filler is dry, sand it smooth with fine-grit sandpaper. Wipe away dust with a damp cloth.
Step 4: Match The Color
- Stained wood: Use a matching stain. Apply with a small brush or cloth, and wipe off extra.
- Painted cabinets: Use matching paint. Apply thin coats, letting each one dry before the next.
- Laminate: Use a color-matched repair paste.
Step 5: Add Finish
Apply a clear finish over the repaired area to protect it and blend the shine with the rest of the cabinet. Let it dry fully before using the cabinet.
Non-obvious insight: Don’t rush the drying times. Many repairs look poor because the filler or paint wasn’t fully dry before sanding or adding more layers.
Special Methods For Different Cabinet Finishes
Cabinets come in many finishes. What works for one type may not work for another.
Painted Cabinets
- Use only paint matched to your cabinet’s color.
- For small chips, an artist’s brush gives more control than a regular brush.
- For larger areas, feather the edges of your touch-up so it blends better.
Stained Wood Cabinets
- Always test stain in a hidden spot.
- If the color is too dark, wipe it off quickly.
- If too light, apply a second layer after the first dries.
Laminate Cabinets
- Laminate is not wood, so wood fillers may not stick well.
- Use a special laminate repair paste or kit.
- For white scratches, sometimes a matching permanent marker can hide the mark.
High-gloss Or Lacquered Cabinets
- Use a clear, high-gloss finish to blend in repairs.
- Work in thin layers to avoid brush marks.
Veneer Cabinets
- Never sand aggressively or you’ll sand through the thin veneer layer.
- Wax sticks and touch-up markers are safest for veneer.
Fixing Scratches On Cabinet Hardware
Scratches are not just on the cabinet doors. Hardware like handles and hinges can also get scratched.
- For metal handles: Use a metal polish or a matching touch-up pen.
- For painted hardware: Touch up with matching paint.
- For deep gouges in hardware: It’s often easier to replace the hardware, as repairs may not last.
When To Call A Professional
Some damage goes beyond what you can fix at home:
- Large areas of missing veneer
- Deep gouges in laminate
- Water damage with swelling or soft spots
- Antique or valuable cabinets where matching is critical
Professionals have tools and skills to handle these repairs. If you’re not sure, get a quote before trying a DIY fix.

Credit: www.reddit.com
Preventing Scratches In The Future
Fixing scratches is good, but preventing them saves time and effort. Here are practical ways to protect your cabinets.
- Use soft-close hardware: Soft-close hinges and slides reduce impact and scratches from slamming.
- Install door bumpers: Small rubber or felt pads can stop doors from hitting the frame hard.
- Clean with care: Always use soft cloths, not abrasive sponges.
- Lift, don’t drag: When moving items in and out of cabinets, lift them instead of dragging across the surface.
- Apply furniture wax or polish: A thin layer protects the finish and makes cleaning easier.
- Train family members: Remind kids and guests to handle cabinets gently.
- Regular maintenance: Check for loose hardware or hinges that might cause scratches over time.
Common Mistakes To Avoid
Many people try to fix scratches quickly but make mistakes that make things worse. Here’s what to watch out for:
- Skipping the cleaning step: Dirt or grease under your repair will show up later.
- Using the wrong color: A poor match is often more obvious than the scratch itself.
- Over-sanding: This can damage the finish, especially on veneer.
- Rushing drying times: Let each product dry fully.
- Applying too much product: Thin layers give a smoother, less noticeable repair.
- Ignoring the finish: Not sealing the repair can lead to more damage.
Cost Of Fixing Scratches Yourself Vs. Hiring A Pro
Is it worth fixing scratches yourself? Here’s a look at the costs.
| Repair Type | DIY Cost (USD) | Pro Cost (USD) | Time Needed |
|---|---|---|---|
| Touch-up marker/wax | $5–$15 | $80–$150 (service call) | 10–30 min |
| Wood filler & stain | $10–$30 | $100–$200 | 1–2 hours |
| Laminate repair kit | $10–$25 | $120–$250 | 1 hour |
| Replace hardware | $15–$60 | $100–$200 | 30 min |
DIY is almost always cheaper, especially for small or medium scratches. Hiring a pro may be needed for large or tricky repairs.
Frequently Asked Questions
What Is The Fastest Way To Hide A Scratch On A Cabinet?
For small, light scratches, the quickest fix is a touch-up marker matched to your cabinet’s color. Just color in the scratch, let it dry, and buff lightly with a cloth. For even faster results, use a wax repair stick for shallow marks.
Can I Use Household Items To Fix Scratches On Cabinets?
Yes, for minor scratches, a mix of olive oil and vinegar (in equal parts) can sometimes make the scratch less visible. Rub it gently into the scratch, then wipe off the extra. For deeper scratches, you’ll need special products.
Will Fixing Scratches Change The Cabinet’s Color Or Shine?
If you match your repair product to your cabinet’s color and finish, the repair should blend well. Always test in a hidden spot first. Adding a clear finish at the end helps match the original shine.
What If My Cabinet Is Laminate And The Scratch Is White?
Laminate often shows white marks when scratched. Use a color-matched laminate repair paste or a permanent marker in the right color. Avoid sanding, as this can make the scratch worse.
How Do I Know When To Call A Professional For Cabinet Scratches?
If the scratch is very deep, covers a large area, or the cabinet has water damage or loose veneer, it’s best to get help from a pro. Also, if you have valuable or antique cabinets, a professional can ensure the repair doesn’t lower their value.
Fixing scratches on cabinets takes patience and a careful eye, but most people can get good results with basic tools and a little practice. Don’t rush, and always test your products in a hidden spot first. For more guidance, you can check resources like This Old House. With the right approach, your cabinets can look fresh and cared for again, making your whole space feel newer and brighter.
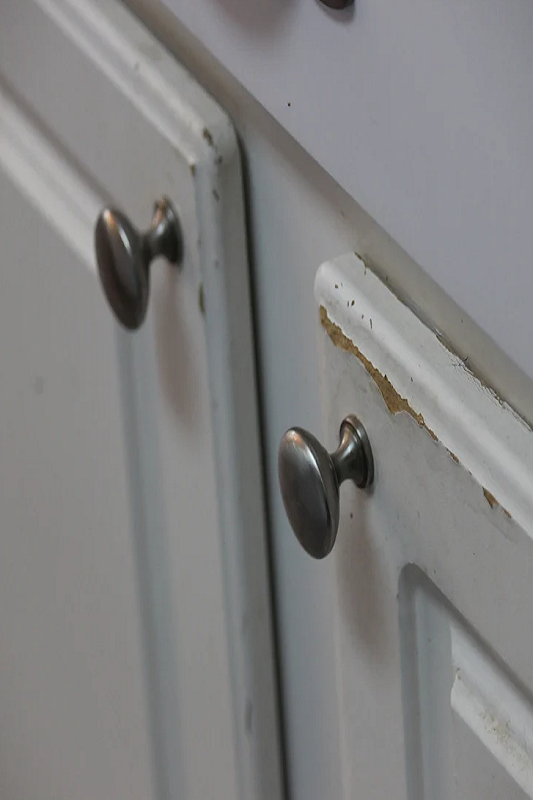
Credit: www.lilyanncabinets.com