
Water damage in cabinets is a common problem in kitchens and bathrooms. A small leak from a sink, a dishwasher overflow, or even just a spilled drink can cause serious harm to the bottom of your cabinet. Many people think this kind of damage is impossible to fix without replacing the whole cabinet. The good news? You can often repair a water damaged cabinet bottom yourself—saving money, time, and frustration.
Understanding how to fix water damage is not only about making things look better. If you leave the damage, it can get worse. Mold and mildew can start to grow, causing smells and even health problems. The wood can rot, and the cabinet can become weak, making it unsafe for your dishes or cleaning supplies.
Learning how to repair your cabinet bottom properly gives you back a clean, safe, and strong storage space.
This guide will walk you through everything you need to know. You’ll learn how to spot water damage, what tools and materials you need, how to prepare your workspace, and step-by-step methods for repair. You’ll also discover tips that many beginners miss—like how to prevent future leaks and ways to protect your cabinets for years to come.
Whether you’re dealing with a small stain or a soggy, sagging mess, you’ll find the solution here.
Why Cabinet Bottoms Get Water Damaged
Cabinet bottoms are especially at risk for water damage. They sit directly below sinks, pipes, and appliances that use water. Here are some main causes:
- Leaking plumbing under the sink is the biggest reason. Even a tiny drip can do big damage over time.
- Spills and splashes from washing dishes or cleaning can soak into the wood or particleboard.
- Poor caulking or sealing allows water to get behind or under the cabinet.
- Dishwasher leaks or overflows can pool water under nearby cabinets.
- Condensation from pipes can drip down and collect at the bottom.
Most modern cabinets use particleboard or MDF (medium-density fiberboard) for the bottom panel. These materials are very sensitive to water. They swell, warp, and lose strength quickly compared to solid wood or plywood.
Signs Of Water Damage In Cabinet Bottoms
It’s not always easy to spot water damage right away. Here are signs to look for:
- Swelling or bubbling in the cabinet floor
- Soft spots when you press down
- Discoloration (dark stains, yellowing, or fading)
- Musty smells (a sign of mold or mildew)
- Peeling veneer or laminate
- Loose or broken cabinet floor
- Visible mold or black spots
If you notice any of these, act quickly. The sooner you fix the problem, the less work you’ll have to do.
What You Need To Fix Water Damaged Cabinet Bottom
Having the right tools and materials makes the repair easier and more professional. Here’s what you’ll need:
Tools
- Screwdriver (to remove cabinet doors and hardware)
- Pry bar or putty knife (to lift out the damaged bottom)
- Measuring tape
- Saw (circular saw or hand saw)
- Drill and screws
- Clamps (optional, for holding new panels)
- Utility knife
- Hammer
- Sponge and bucket
Materials
- Replacement wood panel (plywood, MDF, or particleboard)
- Wood glue or construction adhesive
- Wood filler or epoxy (for minor repairs)
- Sealant or waterproof paint
- New laminate or shelf liner (optional)
- Sandpaper (medium and fine grit)
- Caulk
You may not need everything on this list. The tools and supplies depend on how bad the damage is and your repair method.
Step 1: Stop The Source Of Water
Never start repairs before you solve the cause of the water damage. If you don’t, your hard work will be ruined again soon.
- Check all pipes under the sink for leaks or drips.
- Look at the sink drain and the faucet connections.
- Inspect the caulk around the sink and countertop.
- Test your dishwasher and garbage disposal for leaks.
Fix any problem you find. Replace worn gaskets or tighten loose fittings. If you’re not sure, use a dry paper towel around the pipes and check for wet spots after running water.
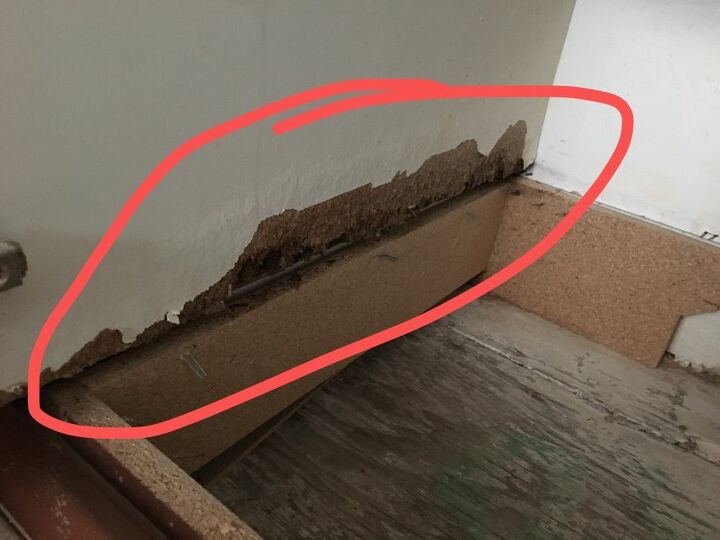
Credit: www.hometalk.com
Step 2: Empty And Prepare The Cabinet
Take everything out of the cabinet. Remove the doors and hardware if possible. This gives you more space to work and keeps your tools and supplies safe.
Wipe up any standing water with a sponge. Use a fan or hair dryer to dry the area as much as possible. Moisture left behind can cause mold to grow while you work.
If you see mold, wear a mask and gloves. Clean the area with a mixture of water and vinegar or a mild bleach solution. Let it dry completely before you start repairs.
Step 3: Assess The Damage
You need to know how deep the damage goes. Is it just the surface, or is the whole panel ruined?
Press down on the cabinet bottom. If it feels soft, spongy, or crumbly, you likely need to replace the whole panel. If it’s hard with only minor stains or swelling, you might be able to repair instead of replace.
Look at the sides of the cabinet and any support pieces. If they are also swollen or moldy, you may need to repair or replace those too.
Visual And Touch Test Table
Here’s a quick comparison of damage types and what they mean for your repair:
| Damage Sign | What It Means | Recommended Fix |
|---|---|---|
| Light stains/discoloration | Surface damage only | Clean and seal |
| Bubbling/peeling | Veneer or laminate affected | Peel off, sand, refinish |
| Soft/sagging spots | Panel is weakened | Replace bottom |
| Moldy smell/mold spots | Water present for a while | Clean and replace if severe |
Step 4: Remove The Damaged Cabinet Bottom
If you need to replace the cabinet bottom, carefully remove the old panel.
- Use a screwdriver to remove any screws holding the panel in place.
- If the panel is glued, gently use a putty knife or pry bar to lift it. Work slowly to avoid damaging the cabinet sides.
- Cut along the edges with a utility knife if needed.
- Remove any nails or staples.
Once out, clean up any debris, old glue, or moldy spots. Make sure the area is dry and clean before adding new material.
Common Mistake
Many people try to patch a badly damaged panel with filler or glue. If the wood is soft or crumbling, patching will not last. Replacing the panel is much stronger and safer.
Step 5: Cut And Fit A New Cabinet Bottom
Measure the space for your new panel. Measure length, width, and thickness. It’s important to get the thickness right so the new bottom fits snugly.
- Mark your measurements on the new panel (plywood is best for strength and water resistance).
- Cut with a saw. A circular saw makes straight cuts, but a hand saw works for small jobs.
- Test fit the panel in the cabinet. Trim edges as needed for a perfect fit.
Material Comparison Table
Choosing the right material makes a big difference in durability.
| Material | Water Resistance | Strength | Cost | Best For |
|---|---|---|---|---|
| Plywood | Good | Strong | Medium | Most kitchens |
| MDF | Poor | Medium | Low | Light use, low cost |
| Particleboard | Poor | Weak | Low | Temporary fix |
| Solid wood | Excellent | Very strong | High | High-end cabinets |
Tip: Use exterior-grade plywood for the best water resistance.

Credit: www.youtube.com
Step 6: Install The New Cabinet Bottom
Once you have a properly cut panel, it’s time to install it.
- Apply a bead of construction adhesive or wood glue along the cabinet frame where the panel will sit.
- Place the new panel in the cabinet, pressing down so it makes good contact.
- If possible, add a few screws from below or through the sides to hold it in place. Pre-drill holes to prevent splitting.
- Use clamps to hold the panel while the glue dries (optional but helpful).
- Wipe away any excess glue.
Let the glue set for at least a few hours or as recommended by the product instructions.
Non-obvious Insight
Most people forget to seal the edges of the new panel before installing. Brushing on a coat of wood sealer or waterproof paint along the cut edges can make a big difference in stopping future water damage.
Step 7: Finish And Protect The Cabinet Bottom
With your new cabinet bottom in place, take steps to protect it from future damage.
- Sand any rough edges or spots with fine grit sandpaper.
- Apply a sealant, waterproof paint, or clear polyurethane to the top and edges of the panel.
- Let it dry fully before putting anything back inside.
You can also add a laminate sheet or shelf liner on top. This makes cleaning easier and adds another layer of water resistance.
Extra Protection Methods
- Use silicone caulk around the edges where the panel meets the cabinet sides.
- Place a tray or waterproof mat under cleaning supplies or heavy bottles.
- Install a leak detector under the sink for early warning.
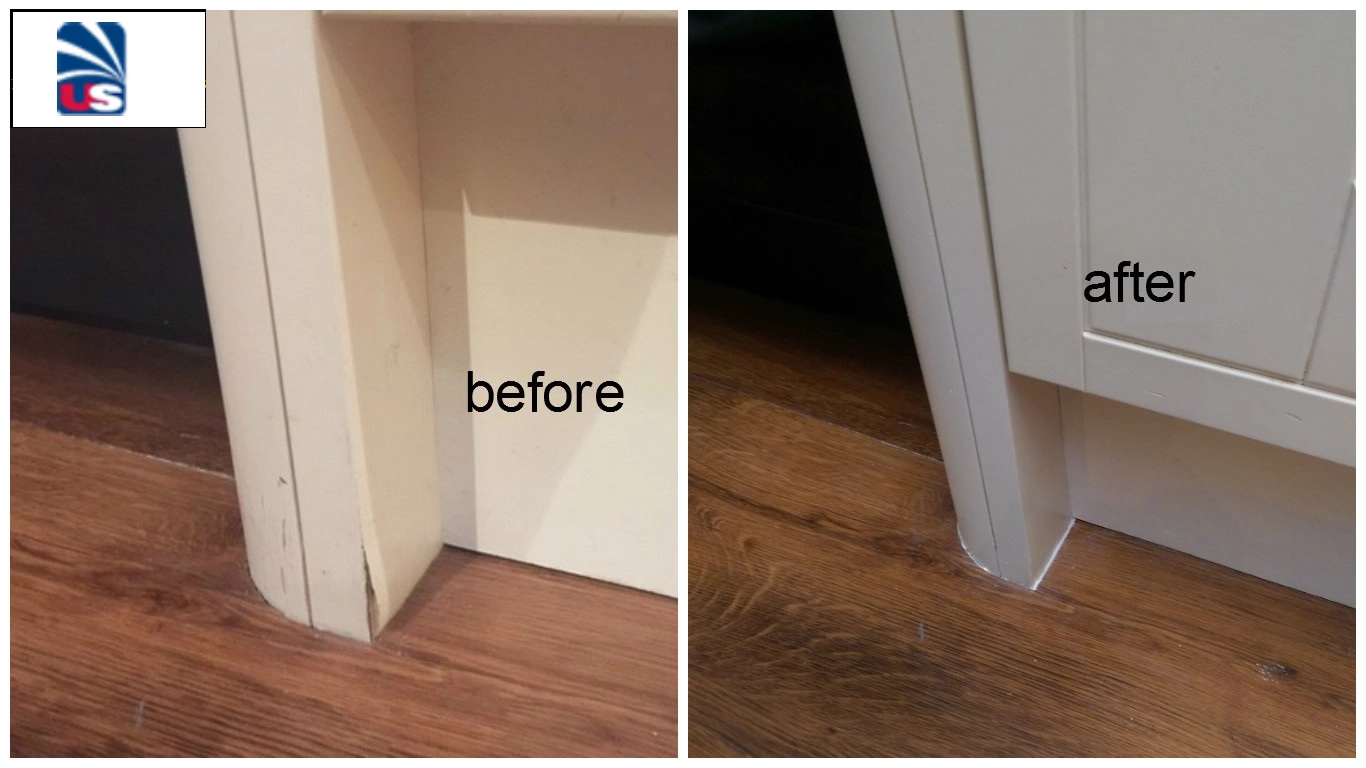
Credit: uskitchencabinet.com
Step 8: Reassemble And Restore
Once everything is dry and sealed, reattach the cabinet doors and hardware. Return your items to the cabinet, but check them for moisture or mold first.
If you removed moldy items, clean or replace them before putting them back.
Special Cases: Repairing Minor Water Damage
If your cabinet bottom is only slightly damaged, you may not need to replace it.
For Small Stains Or Light Warping
- Dry the area completely.
- Sand the surface with medium grit sandpaper to remove stains and smooth bubbles.
- Fill small cracks or holes with wood filler or epoxy.
- Let it dry and sand again for a smooth finish.
- Seal or paint the surface for protection.
For Peeling Laminate
- Carefully peel back the loose laminate.
- Clean and dry the area.
- Apply contact cement or wood glue under the laminate.
- Press down with a heavy object until set.
- Trim any loose edges.
For Mold Growth
- Wear gloves and a mask.
- Scrub the area with a mild bleach solution (1 part bleach to 10 parts water).
- Let it dry fully.
- Sand and seal if needed.
Preventing Future Water Damage
Fixing your cabinet is only half the job. Stopping future problems is just as important.
Regular Maintenance Tips
- Check pipes and fittings under your sink every month for leaks.
- Reseal caulk around the sink, backsplash, and countertop once a year.
- Wipe up spills immediately—don’t let water sit.
- Use a cabinet mat or liner to catch drips and spills.
- Don’t overload the cabinet with heavy bottles that could tip and spill.
Upgrade For Extra Protection
- Install water alarms under sinks and appliances. These small devices beep when they sense moisture.
- Use waterproof coatings on new cabinet bottoms.
- Switch to plywood instead of particleboard when building or repairing.
- Add a plastic drip tray under your cleaning supplies.
Real-life Example
A homeowner in Florida fixed a badly damaged cabinet bottom under her kitchen sink. After replacing the panel with waterproof plywood, she added a rubber mat and a small leak alarm. Two months later, a tiny leak started again—but the alarm went off right away.
She caught the problem before any damage happened. Simple steps like these can save hundreds of dollars and hours of work.
When To Call A Professional
Some water damage is too serious for DIY repair. Call a cabinetmaker or contractor if:
- The damage covers several cabinets or a large area.
- The cabinet frame or walls are also rotting or moldy.
- You find black, thick mold that keeps coming back.
- The cabinet supports heavy appliances (dishwasher, sink) and feels unsafe.
A professional can tell you if the cabinet is worth fixing or needs full replacement.
Cost Of Repair Vs. Replacement
It helps to know what you might spend. Here’s a simple cost breakdown for fixing a water damaged cabinet bottom:
| Repair Type | DIY Materials | Professional Service | Replacement Cost |
|---|---|---|---|
| Minor repair (filler, paint) | $10–$30 | $75–$200 | N/A |
| Replace cabinet bottom | $25–$75 | $150–$400 | N/A |
| Full cabinet replacement | N/A | N/A | $350–$1,000+ |
Doing it yourself saves money, especially for small repairs. For large or repeated damage, replacement or professional help may be better.
Common Mistakes And How To Avoid Them
Many beginners make simple errors that can cause more problems later. Here’s how to avoid them:
- Ignoring moisture: Always make sure the area is 100% dry before you repair.
- Skipping edge sealing: Unsealed edges soak up water quickly—always seal them.
- Using the wrong material: Particleboard is weak against water. Choose plywood or solid wood if possible.
- Not fixing the leak: Repairing the cabinet without solving the water source means you’ll have to do it all again soon.
- Rushing the job: Let glue, paint, and sealant dry completely between steps.
Extra Tips For A Stronger, Longer-lasting Cabinet
- Label pipes and shut-off valves under the sink. If a leak happens, you can stop it fast.
- Store large bottles in a plastic bin inside the cabinet—if something leaks, it’s contained.
- For old homes, check for hidden leaks behind the cabinet or wall.
- Use light-colored liners so you can spot new stains or leaks easily.
- Check under your sink every time you clean the kitchen.
Frequently Asked Questions
What Is The Best Material To Use For Replacing A Cabinet Bottom?
The best material is exterior-grade plywood. It is much more water-resistant than particleboard or MDF and is strong enough for heavy items. For high-end cabinets, solid wood is even better but more expensive.
How Do I Know If I Need To Replace The Whole Cabinet?
If the sides, back, and frame of the cabinet are soft, swollen, or moldy, replacing just the bottom may not be enough. In these cases, consider a full cabinet replacement. If only the bottom panel is damaged, replacing just that part is usually fine.
Can I Repair A Water Damaged Cabinet Bottom Without Removing It?
If the damage is minor (like stains or a small bubble), you can dry it, sand it, and seal it without removing the panel. For soft, sagging, or crumbling panels, removal and replacement are necessary for safety and strength.
How Can I Prevent Future Water Damage In My Cabinets?
Check for leaks regularly, reseal caulk, use a cabinet liner or mat, and consider a leak detector. Using more water-resistant materials and sealing edges will also help prevent damage.
Is It Safe To Use Bleach To Clean Mold Inside Cabinets?
Yes, you can use a mild bleach solution (1 part bleach to 10 parts water) to clean mold. Wear gloves and a mask, and let the area dry fully before repair. For large or stubborn mold, or if you have allergies, consider calling a professional.
Fixing a water damaged cabinet bottom is a practical project that most homeowners can handle with patience and the right tools. By taking your time and following these steps, you can restore your cabinet, avoid future problems, and keep your home safe and dry. For more detailed information and tips, you can visit Family Handyman.