
Every kitchen tells a story, and for many families, it’s the center of daily life. Over time, all that cooking, cleaning, and gathering can leave marks on your kitchen cabinets. Maybe you’ve noticed faded patches, rough areas, or spots where the finish has worn away. These worn spots might make your kitchen look tired, but the good news is you can fix them yourself. Restoring kitchen cabinets is not just about looks—it protects the wood and can even increase your home’s value. This guide will walk you through every step of fixing worn spots on kitchen cabinets, using simple language and real-life advice. Whether your cabinets are wood, laminate, or painted, you’ll find clear solutions and tips to bring them back to life.
Understanding Worn Spots On Kitchen Cabinets
Worn spots appear when the top layer of your cabinets—whether paint, stain, or clear finish—starts to break down. This usually happens in high-use areas, such as around handles, corners, and edges. The constant opening, closing, and cleaning slowly rub away the protective layer.
Moisture, grease, and sunlight can also speed up this process.
Common causes include:
- Daily use and friction
- Cleaning with harsh chemicals
- Exposure to water or steam
- Direct sunlight fading the surface
Worn spots are more than just a cosmetic problem. If left untreated, they can lead to further damage, like water soaking into the wood, which can cause swelling or even mold.
Assessing The Damage
Before you start fixing anything, take a close look at your cabinets. Not all worn spots are the same, and the right repair depends on the type and depth of the damage.
Types Of Cabinet Surfaces
- Solid wood: Durable but needs proper care. Scratches and worn spots can usually be sanded and refinished.
- Veneer: A thin layer of real wood on top of a cheaper core. Sanding must be gentle to avoid removing the veneer.
- Laminate: A plastic-like layer. Can’t be sanded, but scratches can sometimes be filled or painted.
- Painted: Shows wear easily, especially around handles. Needs careful touch-ups.
How To Check The Severity
- Run your hand over the spot. Is it just dull, or does it feel rough?
- Look for color changes. Is the area lighter or darker?
- Press gently with your fingernail. Does the finish flake off, or does the wood feel soft?
- Smell the area. Any musty or sour smell could mean moisture damage.
Small, shallow worn spots are easier to fix. If the wood is soft, warped, or moldy, you may need professional help.
Gathering The Right Materials And Tools
Working with the right supplies makes the job easier and gives better results. You don’t need fancy equipment, but quality products matter.
Basic materials:
- Mild soap or degreaser
- Clean, lint-free cloths
- Fine sandpaper (220 to 320 grit)
- Wood filler or putty (for deep spots)
- Matching stain, paint, or touch-up marker
- Clear finish (polyurethane, varnish, or lacquer)
- Painter’s tape
- Small, good-quality brushes
- Gloves and dust mask
Optional but helpful:
- Tack cloth (for dust removal)
- Putty knife
- Mini roller
- Hair dryer (for quick drying)
Before you begin, test all products on a hidden area to check for color match and reaction.
Cleaning And Preparing The Surface
Repair starts with a clean surface. Dirt, grease, and old wax can prevent new finishes from sticking. Many beginners rush this step, but it’s crucial for a lasting repair.
Steps To Clean Properly
- Mix a few drops of mild soap with warm water.
- Wipe the worn spots gently with a soft cloth. Avoid soaking the wood.
- For greasy areas, use a gentle degreaser. Don’t use harsh chemicals.
- Dry the area completely with a clean cloth.
If you skip cleaning, the new paint or finish may peel, bubble, or look uneven.
Light Sanding: The Foundation Of Good Repair
Sanding is key for smooth results. Even if you’re only touching up, light sanding helps the new finish grip and blend.
How To Sand Worn Spots
- Use fine sandpaper (220–320 grit) for most cabinets.
- Sand gently in the direction of the wood grain.
- Focus on the worn area and feather out the edges to avoid a visible patch.
- Remove all dust with a tack cloth or a slightly damp rag.
Do not sand through veneer or laminate. For these, just scuff lightly to help paint or filler stick.
Choosing The Right Repair Method
Not every worn spot needs the same fix. Let’s compare the main methods:
| Method | Best For | Skill Needed | Durability |
|---|---|---|---|
| Touch-Up Marker or Crayon | Small scratches, faded spots | Easy | Low |
| Stain/Paint Touch-Up | Medium spots, color loss | Medium | Medium |
| Wood Filler & Refinish | Deep gouges, missing finish | Advanced | High |
| Complete Refinishing | Large, multiple worn areas | High | Very High |
For most home repairs, spot touch-ups or stain repairs are enough. Only refinish fully if the damage is everywhere.
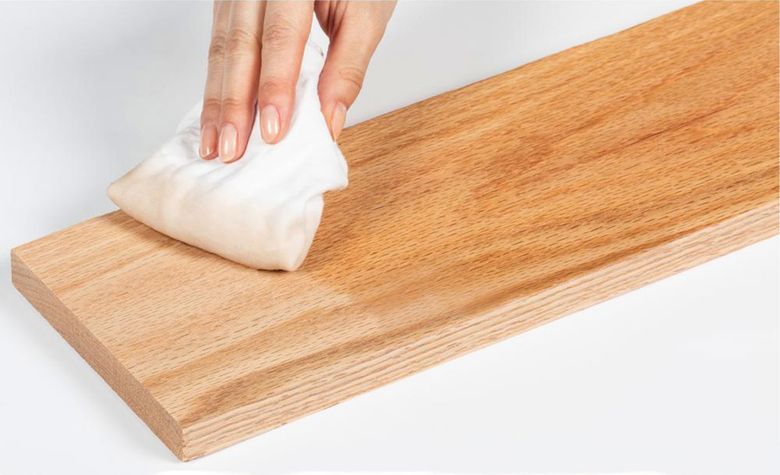
Credit: www.seattletimes.com
Repairing Small Worn Spots
Tiny scratches or faded spots are common near handles and drawer pulls. These can often be fixed in minutes.
Using Touch-up Markers Or Crayons
Touch-up markers are made for small areas. They come in many wood shades. Here’s how to use them:
- Pick the color that matches your cabinet.
- Test on a hidden spot.
- Draw over the worn area, staying inside the line.
- Wipe off any extra with a clean cloth.
- Let it dry and, if needed, repeat for deeper color.
Crayons or wax sticks work the same way. Rub them into the scratch, then buff gently with a soft cloth.
Non-obvious tip: After using a touch-up marker, apply a thin coat of clear finish with a fine brush to seal the spot. This protects the repair and makes it last longer.
Repairing Medium Worn Spots
Medium-size worn spots may show light wood or faded paint. These need a bit more work, but are still very doable.
Staining Or Painting The Area
- Lightly sand the spot and feather the edges.
- Clean off all dust.
- Use a small brush to apply matching stain (for wood) or paint (for painted cabinets).
- Let the first coat dry fully. Apply more coats if needed for a good match.
- Once the color is right, finish with a clear coat for protection.
Pro tip: Try blending the color outwards from the center of the spot. This avoids a sharp “patch” look.
If the area is still rough after painting, sand very lightly and add one more clear coat.
Repairing Deep Worn Spots Or Gouges
If you can feel the damage with your finger, or if the wood is exposed, you’ll need to fill and refinish.
Filling And Refinishing
- Clean and sand the damaged spot.
- Use a wood filler that matches your cabinet color. Press it into the gouge with a putty knife.
- Let it dry completely (follow package instructions).
- Sand the area smooth and level with the surrounding wood.
- Wipe off all dust.
- Stain or paint the spot to match, using thin layers.
- Finish with a protective clear coat.
Advanced insight: For a truly invisible repair, try mixing two filler colors to get a perfect match. Some brands let you stain over the filler, but always test first.
Fixing Worn Spots On Laminate Cabinets
Laminate can’t be sanded deeply, but you can still make worn spots look better.
Steps For Laminate Repair
- Clean the area well.
- Use a laminate repair paste or a color-matched putty for small chips.
- For larger areas, use a bonding primer, then touch up with matching paint.
- Seal with a clear, water-based polycrylic for durability.
Beginner mistake: Skipping the primer on laminate usually leads to peeling paint. Always use a primer made for slick surfaces.

Credit: www.youtube.com
Repairing Painted Kitchen Cabinets
Painted cabinets show wear quickly, especially around edges and handles. Here’s how to touch them up:
- Clean and sand the spot gently.
- Use a small artist’s brush to apply matching paint. Feather out the edges.
- Let it dry, then add a second coat if needed.
- Protect with a clear, non-yellowing sealer.
Pro tip: Save leftover paint when you first paint your cabinets. This makes color matching much easier for touch-ups.
Blending And Finishing For A Professional Look
The secret to a good repair is making it blend with the rest of the cabinet. Even small color differences can stand out.
Tips For Perfect Blending
- Apply stain or paint in thin layers.
- Work from the center of the spot outward.
- Use a soft, dry brush to blend the edges while the finish is still wet.
- If using a clear coat, extend slightly past the repair area for a natural transition.
Non-obvious insight: Lightly buff the repaired spot with a brown paper bag or very fine steel wool once fully dry. This can help blend the sheen and make the spot less noticeable.
Applying Protective Coatings
A clear topcoat is essential for lasting repairs. It seals the spot and prevents future damage.
Choosing The Right Topcoat
- Polyurethane: Very durable, comes in gloss, semi-gloss, and satin.
- Lacquer: Dries quickly, gives a hard finish, but smells strong.
- Polycrylic: Water-based, won’t yellow over time, good for light colors.
Apply with a high-quality brush or mini roller. Let each coat dry fully before adding another. Two thin coats are better than one thick coat.
Matching Colors: How To Avoid Obvious Patches
Matching stain or paint sounds simple, but it’s tricky. Lighting, wood grain, and even age can change how colors look.
Steps To Find The Right Color
- Take a removable cabinet door to the paint or hardware store for color matching.
- Buy small sample pots to test at home.
- Apply in a hidden spot first.
- Mix two colors if needed to get a perfect match.
Beginner mistake: Rushing color selection. Take your time—an almost-right color can look worse than a faded spot.
Drying And Curing: Don’t Rush This Step
Most repairs fail because the finish wasn’t dry before use. Paints and finishes may feel dry but still be soft inside.
- Allow at least 24 hours for each coat of paint or finish to dry.
- Wait several days before heavy cleaning or putting hardware back on.
- If possible, leave cabinet doors open to speed up drying.
Non-obvious tip: Humid or cold kitchens slow drying. Use a small fan or gentle heat to help the process, but avoid direct heat.
Preventing Future Worn Spots
Fixing worn spots is satisfying, but prevention saves you time and effort.
Simple Ways To Protect Cabinets
- Use gentle cleaners—no harsh chemicals or scrub pads.
- Wipe up spills quickly, especially water and grease.
- Add felt pads behind handles to reduce rubbing.
- Install hardware (knobs, pulls) if your cabinets don’t have them.
- Keep direct sunlight off cabinets—use curtains or blinds.
- Apply a fresh clear coat every 2–3 years in high-use areas.
Practical example: Kitchens with children or pets often get worn spots faster. Regular gentle cleaning and a yearly touch-up kit can keep cabinets looking new.
When To Call A Professional
Not all problems can be solved with a DIY kit. If you see any of these, consider professional help:
- Large areas of missing veneer
- Water-damaged, swollen, or moldy wood
- Serious peeling or bubbling finish
- Historic or high-value cabinets needing perfect restoration
Professionals have tools and materials for complex repairs that save you time and avoid mistakes.
How Much Does It Cost To Fix Worn Spots?
Repair costs vary based on the method and cabinet type. Here’s a simple comparison:
| Repair Type | DIY Cost | Pro Cost |
|---|---|---|
| Touch-up Marker/Crayon | $5–$15 | Rarely hired out |
| Stain/Paint Touch-Up Kit | $15–$40 | $60–$200 |
| Deep Repair (Filler & Refinish) | $25–$70 | $150–$500 |
| Full Cabinet Refinishing | $80–$300 | $1,200–$6,000 |
DIY repairs are much cheaper, but remember to value your time and the risk of mistakes. Sometimes, hiring a pro is worth the investment, especially for large or visible areas.

Credit: www.reddit.com
Common Beginner Mistakes And How To Avoid Them
Learning from others’ mistakes can save you a lot of trouble.
- Skipping cleaning: Dust or grease under paint causes peeling.
- Wrong color: Always test first. Don’t trust the can label alone.
- Too much sanding: Especially on veneer or laminate, this can ruin the surface.
- Thick coats: Thin layers dry faster and look better.
- Not sealing: Unprotected repairs wear out quickly.
- Rushing drying: Give each step enough time.
Real-life Example: Fixing A Worn Kitchen Cabinet Spot
Let’s say you have a cabinet under the sink with a faded, rough patch.
- Clean the spot with mild soap and let it dry.
- Lightly sand with 220-grit sandpaper, feathering the edges.
- Wipe away all dust.
- Apply a matching stain using a small brush, starting in the center and blending outward.
- Let dry, then add another thin layer if needed.
- When the color matches, brush on a thin coat of clear polyurethane.
- Let it dry 24 hours, then gently buff with a brown paper bag for a smooth finish.
This process can make the spot almost invisible. Most people won’t notice the repair, and you’ve saved the cabinet from further damage.
Maintaining Your Cabinets After Repair
A little regular care keeps cabinets looking good:
- Dust weekly with a soft, dry cloth.
- Clean spills right away.
- Avoid hanging wet towels over cabinet doors.
- Reapply a clear finish on high-use spots once a year.
For more kitchen care tips, the Family Handyman has practical advice on cleaning and maintaining wood cabinets.
Frequently Asked Questions
How Do I Match The Stain Or Paint Color For My Cabinet Repair?
Matching color is tricky. Remove a small, hidden piece (like a door or drawer) and bring it to a paint or hardware store for matching. Always test the color on a hidden spot first. Mixing two shades can sometimes help get a perfect match.
Can I Use Regular Wall Paint To Touch Up My Kitchen Cabinets?
It’s best not to. Cabinet paints are more durable and moisture-resistant than wall paints. Wall paint can peel or fade quickly in a kitchen environment. Always use paint made for cabinets or furniture.
How Long Do I Need To Wait Before Using The Cabinet After Repair?
Wait at least 24 hours before light use. For heavy use, cleaning, or putting hardware back, wait 3–7 days so the finish can fully cure. Humid or cold weather may need more time.
What If My Cabinets Are Laminate And Not Wood?
Laminate needs a different approach. Clean well, use a bonding primer, and then apply matching paint or laminate repair paste. Do not sand deeply, as this can damage the surface.
Is It Worth Fixing Worn Spots, Or Should I Just Replace My Cabinets?
Fixing worn spots is much cheaper and often makes cabinets look almost new. Replacement is only necessary if the cabinets are badly damaged, waterlogged, or you want a completely new style.
Bringing your kitchen cabinets back to life doesn’t need to be expensive or stressful. With a little time, the right tools, and these step-by-step tips, you can fix worn spots and enjoy a refreshed kitchen for years to come.