
Many homeowners dream of a kitchen with taller cabinets. Why? Because tall kitchen cabinets make your kitchen look larger, give you more storage space, and even add value to your home. But what if your cabinets stop short, leaving wasted space above? You might think replacing them is the only way. Luckily, there are smart ways to make your kitchen cabinets taller without a full remodel.
Maybe you want your cabinets to touch the ceiling for a clean look. Or you need extra storage for rarely used items. Or, you simply want to refresh your kitchen’s design and improve functionality. This article will show you practical steps, real-life examples, and the best options for every budget.
Whether you want to do it yourself or hire a professional, you’ll find all the information you need to make your cabinets taller—and your kitchen better.
Why Make Kitchen Cabinets Taller?
Taller cabinets do more than just fill empty space. They have real benefits:
- More storage: You can keep seasonal dishes, small appliances, or bulk food items out of sight.
- Modern look: Cabinets that reach the ceiling make your kitchen feel custom and high-end.
- Easier cleaning: No dust or grease collects on top of cabinets, so cleaning is simpler.
- Better resale value: Updated kitchens attract buyers and may increase your home’s value.
But before you begin, it’s important to understand your motivation. Some people want a visual upgrade. Others need practical storage. Some kitchens have awkward soffits or exposed pipes above. Knowing your reasons helps you choose the right method and avoid costly mistakes.
Can All Kitchen Cabinets Be Made Taller?
Not all cabinets can be easily made taller. The best candidates are:
- Sturdy, well-attached cabinets
- Flat-topped cabinets with no crown molding
- Cabinets with enough wall space above
If your cabinets are old, poorly attached, or the ceiling is very uneven, it may be safer (and cheaper) to replace them. Also, if you rent your home, check with your landlord before making major changes.
Common Methods To Make Kitchen Cabinets Taller
Let’s look at the main ways to raise your cabinets or extend their height. Each has pros, cons, and a different cost level.
1. Add Cabinet Risers
Cabinet risers are small boxes or frames placed on top of existing cabinets. You can build them from wood or buy ready-made kits. Risers are then covered with matching doors or panels.
Pros:
- Adds 12–18 inches of height
- Creates seamless look if painted or finished well
- More affordable than full replacement
Cons:
- Needs careful carpentry for a good finish
- May expose ceiling flaws
- May require new crown molding
How to do it: Build a box the same width and depth as the cabinet, attach it securely, and finish with paint, veneer, or doors.
2. Raise The Whole Cabinet Unit
In some kitchens, the cabinets are not fixed to the ceiling. You can remove and reinstall the cabinets higher on the wall.
Pros:
- No new materials needed
- Space below can be used for new drawers, open shelving, or appliances
Cons:
- Leaves a gap below (needs filling)
- May require wall repairs
- Changes the height of the countertop
This works best if you plan to replace your countertops or want a more modern, open look.
3. Install Stacked Upper Cabinets
Stacked cabinets are smaller cabinets installed on top of your current uppers.
Pros:
- Adds lots of storage
- Looks custom and expensive
- Great for high ceilings
Cons:
- More expensive than risers
- May be hard to match old cabinet style
- Needs precise measurements
Stacked cabinets are common in luxury kitchens. You can order stock sizes or have them custom built to fit your space.
4. Add Decorative Trim Or Crown Molding
Sometimes, you don’t need full storage above—just a visual upgrade. Adding tall crown molding or a decorative trim can make cabinets look taller.
Pros:
- Inexpensive
- Fast installation
- Many style options
Cons:
- No extra storage
- Needs skill for mitered corners
- Only works if gap is small (under 12 inches)
Choose a trim style that matches your kitchen. For modern kitchens, use simple, flat trim. For classic kitchens, choose elegant, curved molding.
5. Build Custom Cabinet Extensions
Custom extensions use new wood boxes, doors, and sometimes hardware, built to match your existing cabinets.
Pros:
- Perfect match in style and finish
- Any height possible
- Adds real storage
Cons:
- More expensive
- Needs advanced carpentry or a professional
This is the best option if you want cabinets that look like they were always tall.
6. Use Open Shelving Above Cabinets
If you want an airy feel, you can add open shelves above your cabinets instead of closed boxes.
Pros:
- Cheaper than cabinets
- Easy to install
- Great for decor or plants
Cons:
- Not for heavy items
- Exposes dust
Shelving works well in kitchens with farmhouse or industrial styles.
7. Paint The Space Above The Cabinets
Sometimes, a visual trick is enough. Paint the wall above your cabinets the same color as your cabinets. This makes them look taller and the gap less obvious.
Pros:
- Cheapest option
- Fast and easy
Cons:
- No extra storage
- Only works for small gaps
Factors To Consider Before You Start
Before picking a method, think about these points:
- Ceiling height: How much space is above your cabinets?
- Cabinet strength: Can your cabinets support extra weight?
- Style match: Will the new additions match your kitchen’s style?
- Budget: How much do you want to spend?
- DIY skills: Can you do it yourself, or do you need a pro?
Many homeowners overlook how much ceilings can vary. In older homes, ceilings may slope, and you’ll need to measure carefully. Also, matching paint, veneer, or doors can be tricky if your cabinets are faded or a rare color.
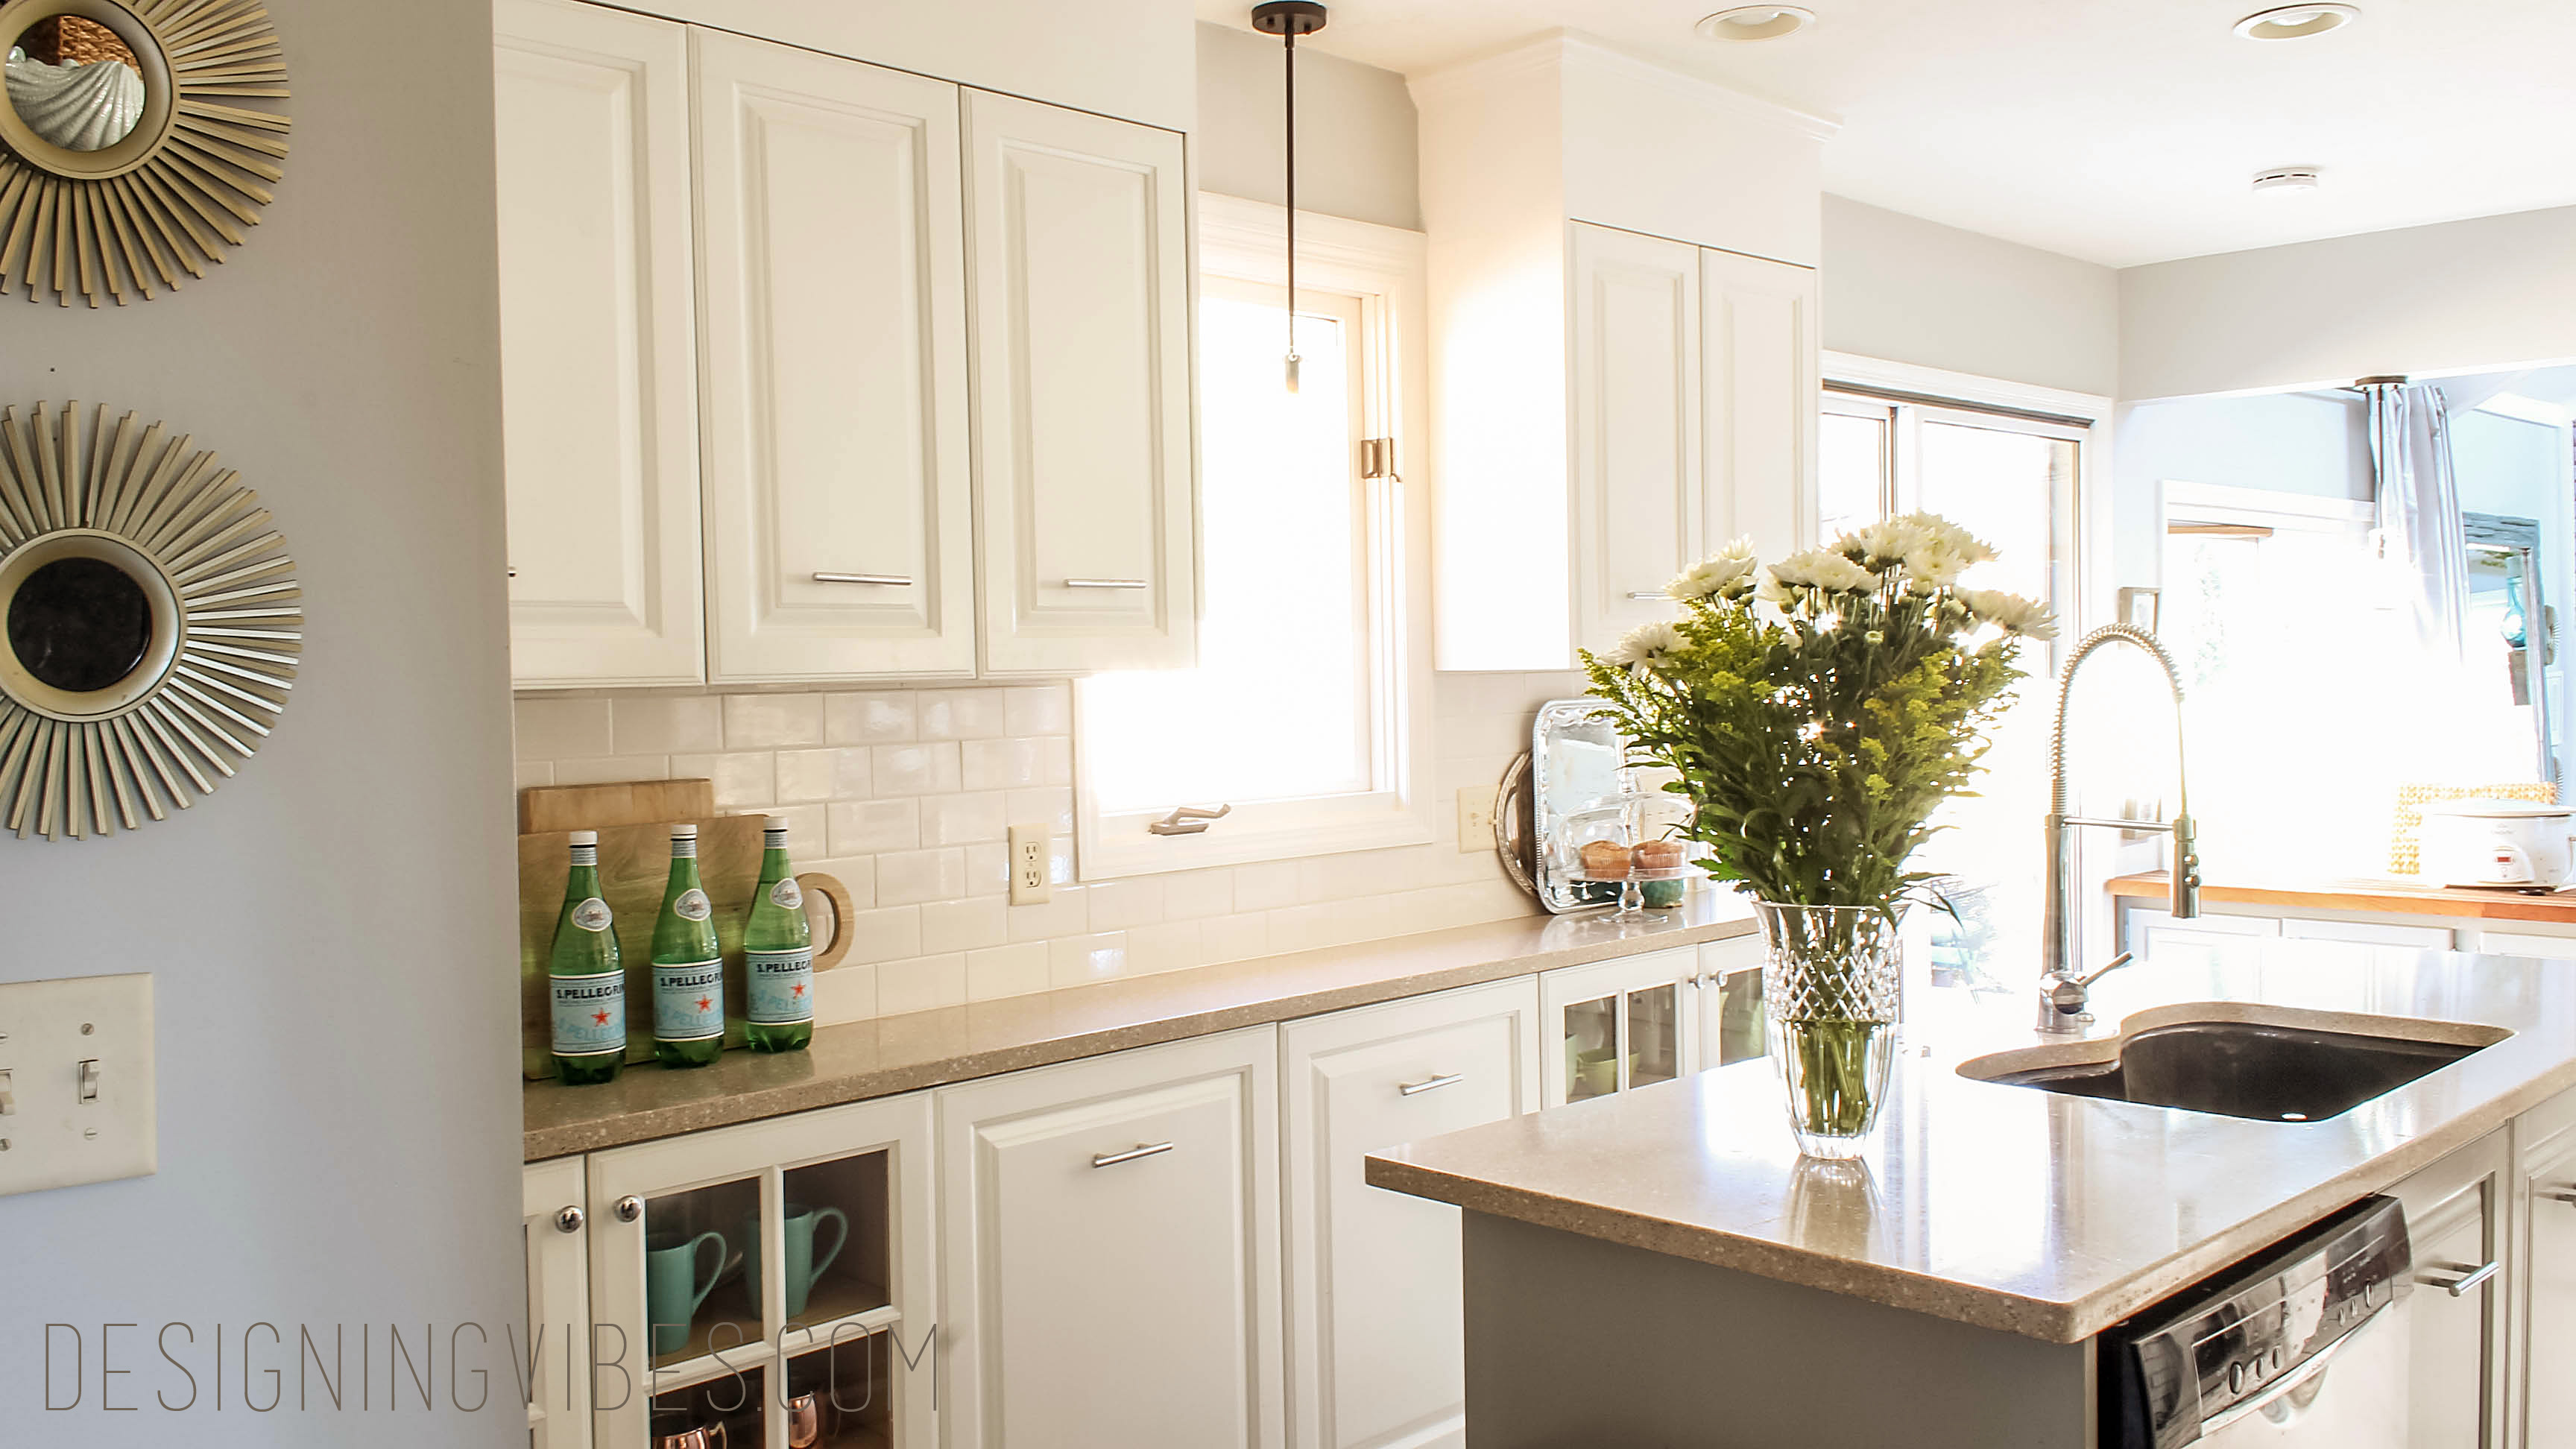
Credit: designingvibes.com
Tools And Materials Needed
Each method uses different tools. Here’s what you might need:
- Measuring tape
- Level
- Drill and screws
- Saw (circular or table saw)
- Wood glue
- Paint or wood finish
- Crown molding or trim
- Cabinet doors (if adding cabinets)
- Stud finder
For custom work, you might also need clamps, a nail gun, and safety gear.
Step-by-step: How To Build And Install Cabinet Risers
Let’s look at the most popular DIY method: adding cabinet risers.
Step 1: Measure The Space
Measure the width, depth, and height above your cabinets. Decide how tall you want the riser box to be. Most people add 12–18 inches, but it depends on your ceiling height.
Step 2: Cut Your Materials
Use plywood or MDF for the box. Cut panels for the front, sides, and top (if needed). The panels should match the depth of your cabinet and the width of each cabinet unit.
Step 3: Assemble The Riser Box
Glue and screw the panels together. Use clamps for tight joints. Make sure the box is square and matches the cabinet’s width.
Step 4: Attach The Riser
Remove any existing crown molding. Place the riser on top of the cabinet and screw it in from inside the cabinet or from above. Make sure it’s level and secure.
Step 5: Finish And Paint
Fill nail holes and seams with wood filler. Sand smooth. Paint or stain to match your cabinets. If using veneer, glue it on before painting.
Step 6: Install New Crown Molding
Add molding or trim at the top for a finished look. Cut corners carefully for a seamless fit.
Practical tip: Always prime your wood before painting. This helps paint stick and gives a smooth finish.
Step-by-step: Raising The Whole Cabinet
If you want to move your cabinets up, follow these steps:
- Empty the cabinets and remove doors for safety.
- Unscrew the cabinets from the wall. Get help—cabinets are heavy.
- Patch and paint the wall as needed.
- Mark the new height on the wall. Use a level for straight lines.
- Reattach cabinets at the higher position, screwing into studs.
- Fill the lower gap with new drawers, shelves, or a panel.
Beginner insight: Check your ceiling for pipes or wires before moving cabinets. Kitchens often have hidden obstacles above cabinets.
Step-by-step: Adding Stacked Cabinets
Stacked cabinets give the most storage and a high-end look.
- Order matching cabinets or have them custom made.
- Remove crown molding from existing cabinets.
- Install the new cabinets on top, screwing into studs or the existing cabinets.
- Add doors and hardware to match below.
- Finish with new molding for a seamless look.
Pro tip: If you can’t find a perfect color match, repaint all your cabinets. This gives a uniform finish and hides old stains.
How Much Does It Cost To Make Cabinets Taller?
Prices vary based on method, materials, and labor. Here is a comparison of typical costs:
| Method | DIY Cost | Professional Cost | Extra Storage | Time Needed |
|---|---|---|---|---|
| Add Risers | $100–$400 | $400–$900 | Yes | 1–2 days |
| Raise Cabinets | $0–$100 | $300–$700 | No | 1–2 days |
| Stacked Cabinets | $400–$1,000 | $1,000–$2,500 | Yes | 2–4 days |
| Crown Molding | $50–$200 | $200–$500 | No | Half day |
| Open Shelves | $50–$250 | $250–$600 | Yes | Half–1 day |
As you can see, adding risers is the most cost-effective way to get more storage and a taller look. Stacked cabinets are the most expensive but give the most value and style.
Mistakes To Avoid When Making Cabinets Taller
Many beginners make the same errors when extending cabinet height. Here’s what to watch for:
- Poor measurements: Always measure twice. Small errors can cause gaps or crooked boxes.
- Weak attachment: Risers or new cabinets must be screwed into studs or the cabinet frame, not just drywall.
- Mismatched finishes: New wood or paint must match existing cabinets. Test colors in advance.
- Overloading new storage: Upper extensions are for light items only. Too much weight can damage the cabinet.
- Ignoring ceiling level: Ceilings are rarely perfectly level. Adjust riser height or trim to cover gaps.
Real-life Examples
Let’s look at two real-world examples to see how homeowners solved their cabinet height problems.
Example 1: Small Kitchen, Big Impact
Maria wanted her cabinets to reach the ceiling in her 1950s home. She built simple plywood risers, painted them the same color as the cabinets, and added new crown molding. The project cost under $300 and took two weekends. Now, her kitchen looks modern, and she stores holiday dishes up high.
Example 2: Custom Stacked Cabinets
The Tran family had a large kitchen with 12-inch gaps above the cabinets. They ordered custom stacked boxes from a local carpenter. The new boxes included glass doors for display. The project cost $2,200 but added style and storage. The cabinets now look like they were always part of the house.
Should You Diy Or Hire A Professional?
This depends on your skills and budget.
- DIY is good if you’re comfortable with power tools, painting, and measuring. You’ll save money but need time and patience.
- Hiring a pro is best for complex projects, custom cabinets, or if you want a flawless finish. Professionals have the right tools and can solve hidden problems.
If you’re unsure, start with a small project like adding trim or painting. If that goes well, move on to risers or shelves.
How To Match New Extensions To Old Cabinets
Matching new materials to old cabinets is often harder than expected. Here’s how to get the best match:
- Take a door to the paint store: They can scan the color and mix a custom paint.
- Order veneer or panels from the cabinet maker: Many brands sell matching materials.
- Sand and repaint all cabinets: This is the only way to guarantee a perfect finish.
- Use glass doors or open shelves: If you can’t match, make the difference look intentional.
Little-known tip: If your cabinets are wood, you can use gel stain to blend new and old pieces. Gel stain sits on top and evens out color differences.
Comparing Tall Cabinets Vs. Standard Cabinets
Is it always better to have tall cabinets? Here’s a quick comparison:
| Feature | Tall Cabinets | Standard Cabinets |
|---|---|---|
| Storage | More (up to ceiling) | Less (gap on top) |
| Cleaning | Easier (no dust on top) | Harder (dust collects) |
| Look | Modern, seamless | Classic, traditional |
| Cost | Higher | Lower |
| Resale Value | Increases value | Less impact |
Insight: Tall cabinets are not always best for very short ceilings or if you want to display decor above cabinets. Choose what fits your kitchen’s size and your style.
Practical Tips For Success
- Plan for power outlets and vents: Don’t block existing electrical or air vents when raising cabinets.
- Label your doors and hardware: If you remove doors, label them so they go back in the right place.
- Use a paint sprayer: For a smooth finish, especially on large surfaces.
- Allow for lighting: If you have under-cabinet lights, you may need to move them.
- Don’t rush: Let paint and glue dry fully before installing.
Many homeowners miss the importance of letting paint cure for several days. Rushing this step can cause fingerprints, dents, or peeling later.
How Long Does The Project Take?
Most methods can be finished over a weekend, but custom work takes longer.
- Cabinet risers: 1–2 days, plus drying time
- Raising cabinets: 1 day with help
- Stacked cabinets: 2–4 days, plus order time
- Trim/molding: 1 day
If you hire a professional, they may finish faster due to experience.
What If You Have A Soffit Above Cabinets?
A soffit is a boxy structure above some cabinets, often hiding pipes or wires. You can:
- Remove the soffit (if empty) and extend cabinets upward
- Build risers around the soffit
- Cover the soffit with matching panels and trim
Always check for pipes or wires before removing a soffit. If unsure, consult an electrician or plumber.
Maintenance And Cleaning
Taller cabinets are easier to clean, but the upper shelves may be hard to reach.
- Use a step stool for top shelves
- Store rarely used items up high
- Clean the top molding every few months
Professional advice: Use soft-close hinges for new doors. This prevents slamming and extends cabinet life.
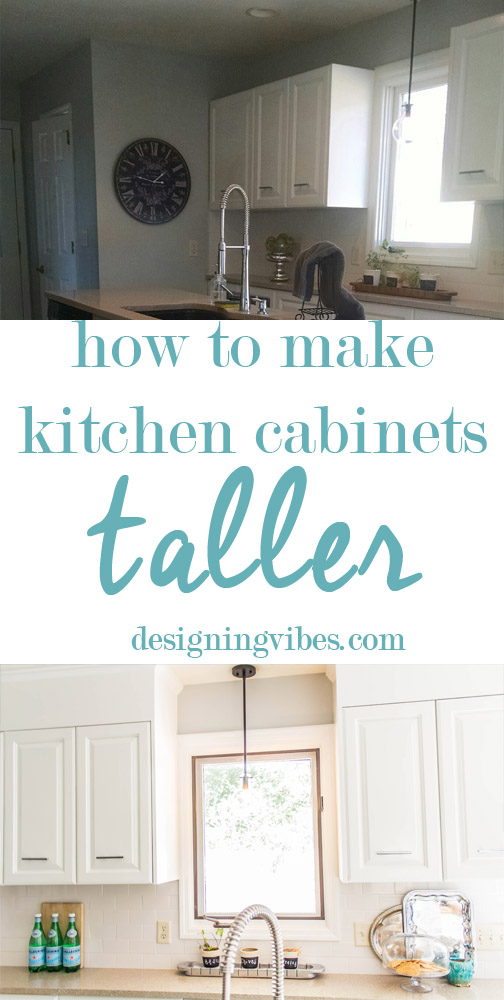
Credit: designingvibes.com
Sustainability: What To Do With Old Materials
If you remove old molding or cabinets, consider recycling or donating them. Many cities have reuse centers for building materials. This is better for the environment and may help others with their own projects.
For more on sustainable home improvement, see the EPA’s guide.
Frequently Asked Questions
Can I Add Height To Cabinets If My Ceiling Is Sloped?
Yes, but you’ll need to custom cut risers or trim to fit the slope. Use a scribe tool to match the ceiling line, and caulk gaps before painting.
Do I Need A Permit To Make Kitchen Cabinets Taller?
Most cities don’t require a permit for cabinet modifications unless you move plumbing or electrical. Always check your local building codes.
What If I Can’t Match The Cabinet Color?
If you can’t find a perfect match, repaint all cabinets or use a contrasting color or glass doors for the new section. Sometimes, a deliberate contrast looks better than a failed match.
How Much Weight Can I Put In The New Upper Section?
Keep heavy items (like big pots) in lower cabinets. Use the new upper section for light items, decor, or seasonal dishes. Most risers and stacked cabinets are not designed for heavy loads.
Is It Cheaper To Replace Cabinets Than To Make Them Taller?
Replacing cabinets is usually more expensive. Making cabinets taller with risers or trim is more cost-effective—unless your cabinets are in poor condition or you want a full kitchen remodel.
Making your kitchen cabinets taller can transform your space, both in style and function. With careful planning and the right method, you can get a custom look without breaking the bank. Whether you build risers, add stacked cabinets, or simply update the trim, your kitchen will feel bigger, cleaner, and more modern.
Take your time, measure carefully, and enjoy your improved kitchen for years to come.
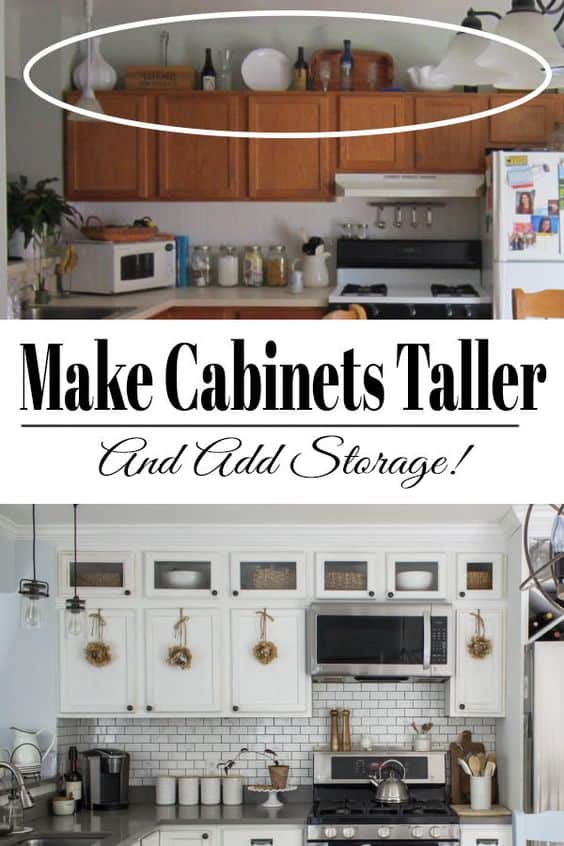
Credit: thehoneycombhome.com