
Organizing your utensil drawer may seem simple, but it can have a huge impact on your kitchen experience. A messy drawer wastes time, frustrates you, and even damages your utensils. But with a thoughtful plan, you can transform your drawer into a neat, efficient space.
This guide will help you understand what really matters, avoid common mistakes, and make your utensil drawer work for you. Whether you cook every day or just want a tidier kitchen, these tips will help you get better results, save time, and enjoy your kitchen more.
Why Organizing Your Utensil Drawer Matters
A cluttered utensil drawer leads to more than just annoyance. When you cannot find the right tool, cooking slows down. You might even buy duplicates because you think something is missing. Studies show that the average person spends up to 55 minutes a day searching for items at home. That adds up to over two weeks a year. In the kitchen, time lost means cold food, overcooked meals, and less enjoyment.
An organized drawer helps you:
- Find utensils quickly
- Protect your tools from scratches and damage
- Make cleaning and meal prep faster
- Spot missing or broken items easily
People often overlook the stress a messy kitchen creates. But a tidy utensil drawer can make you feel more in control and less overwhelmed.
Assessing Your Utensil Needs
Before you start, take a close look at your utensils. Many people keep items they never use, which only adds clutter.
- Empty the Drawer: Take out every utensil. Lay them out on a towel or tray so you can see everything.
- Sort by Type: Put similar items together—spoons, forks, knives, spatulas, tongs, etc. This step shows how many of each item you have.
- Check Condition: Look for broken, stained, or rusty utensils. If it’s damaged or unsafe, it’s time to let go.
- Ask What You Really Use: Be honest. If you haven’t used a cherry pitter or grapefruit spoon in two years, do you really need it in your main drawer?
Non-obvious insight: Many people keep duplicates “just in case.” But in most homes, two of each main utensil (like spatulas or serving spoons) is enough. Extra items can go into a backup box or donation pile.
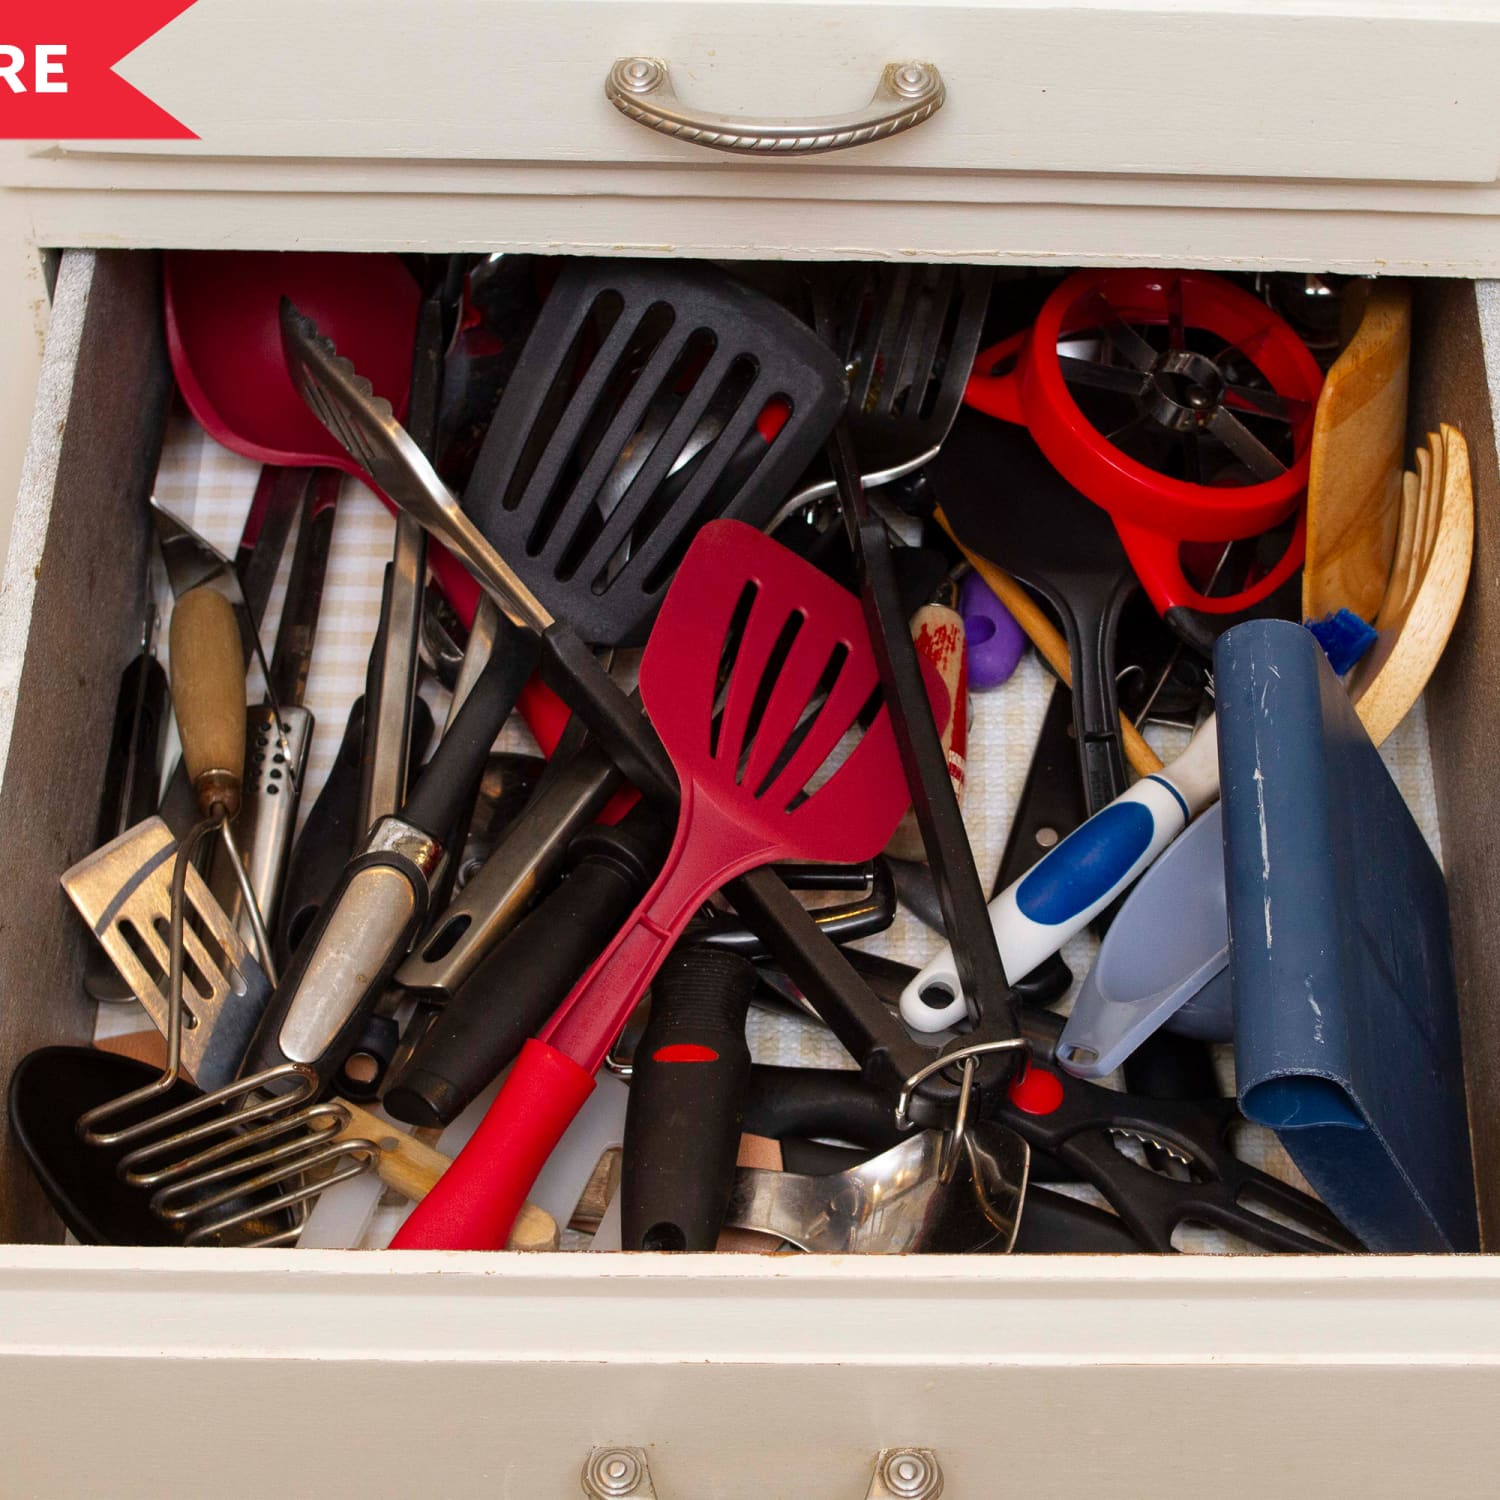
Credit: www.thekitchn.com
Choosing The Right Drawer
Not all drawers are equal. Choose one that is:
- Easy to reach from your main prep area
- Deep enough to hold your most-used utensils
- Away from heat sources (to avoid warping plastic handles)
- Not too wide or too small for your needs
Tip: If you have a very small kitchen, consider using a deep cabinet drawer for utensils and reserving shallow drawers for cutlery.
Sorting And Decluttering: Step-by-step
- Group by Function: Place all similar utensils together. For example, keep all stirring spoons in one pile and all cutting tools in another.
- Decide What Goes in the Main Drawer: Only keep what you use daily or weekly. Rarely used tools can be stored elsewhere.
- Set Aside Seasonal or Specialty Items: Cake servers, corn holders, or holiday cookie cutters don’t need to be in your main drawer year-round.
- Wipe Everything Down: Clean the drawer and each utensil before you put anything back.
Common mistake: People often skip cleaning the drawer itself. Crumbs and dust can scratch utensils or attract pests.
Choosing Drawer Organizers
A drawer organizer is the secret to keeping your system neat. But not all organizers are the same. Here’s what you need to know:
Types Of Drawer Organizers
| Organizer Type | Best For | Pros | Cons |
|---|---|---|---|
| Adjustable Trays | Mixed utensil sizes | Flexible, expandable | Can slide around if not fitted |
| Fixed Compartments | Standard cutlery | Simple, affordable | Less flexible for large utensils |
| Modular Inserts | Custom setups | Customizable, easy to clean | More expensive |
| DIY Dividers | Odd drawer shapes | Fits any size, low cost | Needs assembly |
Non-obvious insight: Many people buy organizers that look good but don’t fit their drawer or utensils. Always measure your drawer’s length, width, and depth before shopping.
Materials Matter
Organizers come in plastic, bamboo, wood, and metal. Plastic is easy to clean but may warp. Bamboo is eco-friendly and looks nice. Metal is durable but can scratch utensils.
Tip: If you have sharp knives, avoid soft plastic or wood. Use a knife block insert or a compartment with a protective base.
Creating Zones Within The Drawer
A well-organized drawer uses zones. This means keeping similar tools together and separating them by how often you use them.
- Daily Use: Place your most-used items (like serving spoons and spatulas) in the front.
- Occasional Use: Put less-used tools (like peelers or tongs) toward the back or side.
- Sharp Items: Keep knives in a separate compartment or use blade guards to prevent accidents.
- Specialty Tools: Store rarely used items in a separate box or a different drawer.
Think about your cooking routine. If you always reach for a whisk when making breakfast, put it near the front.
Arranging Utensils For Maximum Efficiency
Placement is key. Here’s how to set up your drawer for easy access:
- Long utensils (like spatulas or ladles) go in the widest compartment.
- Small tools (like peelers or can openers) fit best in narrow sections.
- Sharp tools (like paring knives or kitchen shears) should be in a safe, separate area.
- Stacking: If your drawer is deep, stack less-used items at the bottom and daily tools on top, but never overfill.
- Vertical vs. Horizontal: In deep drawers, vertical storage (standing up utensils) saves space, but only if the drawer is tall enough.
Practical example: If you make tea every day, put the tea strainer at the front right corner. That way, you grab it without searching.
Labeling And Customizing Your Organizer
Labels are not just for perfectionists. They help everyone in the family put things back in the right spot. Use small stickers or a label maker for each compartment: “spoons,” “tongs,” “openers,” etc.
Customizing: If you have a unique tool (like a garlic press), create a small slot for it. Some organizers have removable dividers, so adjust until everything fits.
Advanced tip: You can use colored liners under the organizer to help utensils stand out, making it even easier to spot what you need.
Storing Oversized Or Awkward Utensils
Not all utensils fit neatly in a standard drawer organizer. Large spatulas, rolling pins, or BBQ tongs might need special solutions.
- Use a deeper drawer for large items, or store them upright in a countertop container.
- Hang them on hooks inside a cabinet door if drawer space is limited.
- Silicone wraps or small bins can keep awkward tools from sliding around.
Common mistake: Forcing large items into a too-small drawer can damage both the utensil and the organizer.
Cleaning And Maintenance
A clean drawer lasts longer and keeps utensils sanitary. Set a schedule to:
- Wipe down the drawer and organizer every two weeks
- Wash liners if you use them
- Check for crumbs or stuck food, especially near the back
If you cook often, you might need to clean more frequently. Always clean before and after big events, like holidays or parties.
Pro tip: Place a thin, non-slip drawer liner under the organizer to catch crumbs and prevent shifting.
Keeping The System Up To Date
Even the best system needs small updates. Review your utensil drawer every 3-6 months:
- Remove items you haven’t used
- Replace broken or worn tools
- Update the organizer if your cooking habits change
Non-obvious insight: Many kitchens become cluttered again because people add new gadgets without removing old ones. Make “one in, one out” your rule: for every new tool, remove something you no longer use.
Organizing For Special Needs And Households
Different households need different setups. Here’s how to adapt:
Families With Children
- Keep sharp items out of reach
- Use brightly colored organizers for easy sorting
- Label sections with pictures if children are young
Shared Living Spaces
- Assign each person a section or use color coding
- Review the drawer together monthly to avoid duplicates
People With Mobility Issues
- Place most-used utensils in the easiest-to-reach spots
- Use soft-grip drawer liners for easier grabbing
Dealing With Small Or Odd-shaped Drawers
Not every kitchen has perfect drawers. Here’s how to manage:
- Use modular organizers that can be cut or adjusted
- Store rarely used utensils elsewhere, like in a jar on the counter
- Choose flat, stackable items to maximize depth
- For tall, narrow drawers, try upright containers inside the drawer
Tip: Foam or bamboo dividers can be cut to fit almost any space.
Smart Storage: What To Keep, What To Move
Not every utensil belongs in your main drawer. Here’s a comparison of what to keep close and what to move elsewhere:
| Keep in Main Drawer | Store Elsewhere |
|---|---|
| Everyday forks, spoons, knives | Holiday cookie cutters |
| Main spatula, ladle, tongs | BBQ tools |
| Can opener, peeler | Large rolling pin |
| Kitchen shears | Specialty slicers |
| Small measuring spoons | Decorating tips |
Rule of thumb: If you use it weekly, keep it close. If not, store it in a less accessible place.
The Role Of Technology In Drawer Organization
Modern kitchens can use technology to stay organized:
- Drawer lighting: Small motion-sensor lights help you see inside, especially in deep or dark drawers.
- Inventory apps: Take a photo of your drawer after organizing. Apps can help you track what you have and what’s missing.
- 3D-printed dividers: If you have a unique drawer size, custom dividers can be printed to fit perfectly.
Example: Some smart homes even use sensors to remind you when utensils are misplaced, though this is rare in most households.
Mistakes To Avoid When Organizing A Utensil Drawer
Even with good intentions, it’s easy to fall into common traps:
- Overfilling the drawer: Too many tools make it hard to find anything.
- Ignoring drawer size: Buying organizers without measuring first leads to wasted money.
- Mixing sharp and delicate tools: Knives can scratch or damage wooden or plastic utensils.
- Not updating the system: As your cooking style changes, your storage needs do too.
- Skipping the cleaning step: A dirty drawer is unhealthy and can make your utensils smell or stick.
Non-obvious insight: Many people don’t realize that heavy utensils at the front can cause drawer slides to wear out faster. Balance the weight for a longer-lasting drawer.
Budgeting For Drawer Organization
You don’t need to spend a lot to get organized. Here’s a quick comparison of cost vs. features for common organizer types:
| Organizer Type | Average Cost (USD) | Durability | Features |
|---|---|---|---|
| Plastic tray | $8-$15 | Moderate | Easy to clean, light |
| Bamboo tray | $15-$30 | High | Eco-friendly, strong |
| Custom modular | $25-$60 | Very high | Custom fit, adjustability |
| DIY dividers | $5-$10 | Variable | Fits any size |
Tip: Start with a basic organizer and upgrade as your needs change. Even a few dollars spent can make a big difference.
Sustainable And Eco-friendly Drawer Solutions
If you want to be more eco-friendly:
- Choose bamboo or recycled organizers
- Donate unwanted utensils instead of throwing them away
- Use washable liners to cut down on waste
Advanced tip: Some brands offer compostable or biodegradable organizers. These can be a good choice if you change your setup often.

Credit: www.lelaburris.com
Making Organization A Family Habit
A tidy drawer stays neat if everyone helps. Teach family members where things go and why it matters. Make it a game for kids or a quick weekend job for adults. The more people involved, the longer your drawer stays organized.
Real-life example: One family color-coded each section and made a rule: “If you use it, you put it back.” After six months, their drawer was still neat and everyone agreed it saved time.
When To Call In The Pros
If you’ve tried everything and your drawer is still a mess, consider a professional organizer. They can:
- Suggest custom solutions for odd-shaped drawers
- Help declutter more than just utensils
- Set up a system you can maintain
For most people, DIY works well, but professionals are a good option for busy families or very small kitchens.
Final Tips For Success
- Always measure before buying organizers
- Clean regularly to prevent buildup
- Update your system as your needs change
- Involve everyone who uses the kitchen
Don’t aim for perfection—aim for a system that works for you and your cooking style. Even small changes can make a big difference.
An organized utensil drawer makes daily life smoother, safer, and more enjoyable. With a little effort, you’ll spend less time searching and more time cooking and eating with family and friends.
For more inspiration and creative ideas, check out this resource from Good Housekeeping.
Frequently Asked Questions
How Often Should I Reorganize My Utensil Drawer?
You should review and reorganize your utensil drawer every 3-6 months. This keeps clutter from building up and helps you spot broken or missing items quickly.
What’s The Best Way To Store Sharp Utensils In A Drawer?
Store sharp utensils, like knives and shears, in a separate compartment or use a knife block insert. Blade guards are also helpful for safety.
Can I Organize A Utensil Drawer Without Buying Anything?
Yes. You can use small boxes, food containers, or even cut cardboard to make DIY dividers. The key is to separate items by type and keep the drawer clean.
What If My Drawer Is Too Small For All My Utensils?
Move rarely used or large utensils to another location, like a countertop container, wall hooks, or a different drawer. Only keep daily-use items in your main drawer.
Are Bamboo Organizers Better Than Plastic Ones?
Bamboo organizers are durable, eco-friendly, and look attractive. Plastic is usually cheaper and easier to clean. The best choice depends on your budget, needs, and style preferences.
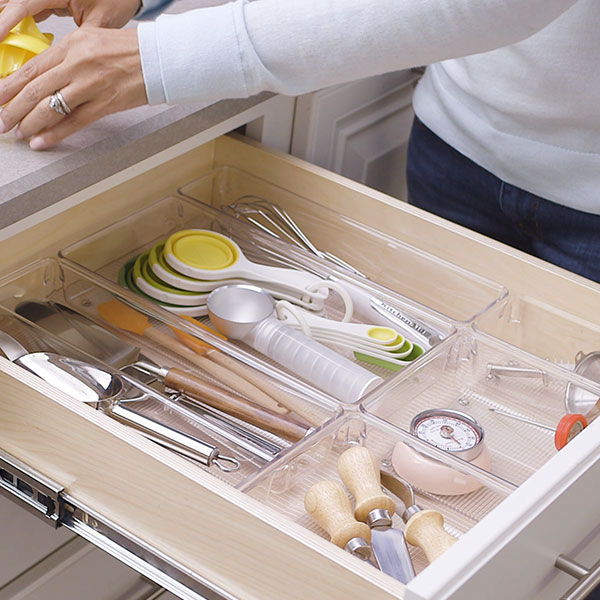
Credit: www.containerstore.com