
Keeping your kitchen cabinets looking beautiful makes your entire kitchen feel fresh and inviting. Over time, grease, dirt, fingerprints, and water marks can make even the best cabinets look dull or worn. Many people believe that polishing cabinets is complicated or that it only matters for expensive wood. In reality, polishing kitchen cabinets is simple, affordable, and makes a huge difference in your home’s appearance. Regular care extends the life of your cabinets, prevents damage, and makes cleaning much easier in the future. This article will walk you through everything you need to know, including what products to use, how often to polish, and how to avoid common mistakes.
Understanding Your Cabinet Material
Before you start polishing, it’s important to know what your cabinets are made of. Different materials need different care. Using the wrong product or method can lead to damage like discoloration, swelling, or peeling.
Wood Cabinets
Most traditional kitchen cabinets use solid wood or wood veneer. Wood is strong and beautiful, but it absorbs moisture and reacts to chemicals. Wood cabinets benefit from gentle cleaners and natural polishes.
Laminate Cabinets
Laminate cabinets have a plastic coating. They are less expensive and resist stains, but they can scratch easily. They should not be polished with wax or oil-based products.
Painted Cabinets
Painted cabinets add color and style but need gentle handling. Strong chemicals can strip paint. Use mild cleaners and avoid abrasive cloths.
Thermofoil Cabinets
Thermofoil is a thin vinyl coating on particle board. It resists stains but is sensitive to heat and strong cleaners.
Metal Cabinets
Less common in homes, metal cabinets (like stainless steel) need polishes designed for metal. General wood polish can leave streaks or cause rust.
| Cabinet Material | Best Polish Type | What to Avoid |
|---|---|---|
| Wood | Natural oils, wax-based polishes | Strong chemicals, water soaking |
| Laminate | Mild all-purpose cleaner | Wax, oil-based polish, abrasives |
| Painted | Mild soap, gentle polish | Ammonia, harsh scrubbing |
| Thermofoil | Gentle multipurpose cleaner | Heat, strong solvents |
| Metal | Metal polish, vinegar-water solution | Chlorine, abrasive pads |
Why Polishing Kitchen Cabinets Matters
Many homeowners clean their cabinets but skip polishing. Polishing does much more than remove fingerprints. It:
- Restores shine and color, making cabinets look new.
- Protects surfaces from water, grease, and stains.
- Prevents drying, cracking, or fading (especially for wood).
- Makes future cleaning easier, as dirt can’t stick as easily.
Neglecting to polish leads to dullness, sticky grime, and sometimes permanent stains. On wood, it can even cause warping or splitting.
Credit: www.cabinetnow.com
Essential Supplies For Polishing Cabinets
Polishing kitchen cabinets does not require expensive tools. Most supplies are affordable and easy to find. Here’s what you need before starting:
- Soft microfiber cloths (at least 2-3)
- Mild cleaning solution (dish soap and water, or gentle cabinet cleaner)
- Polishing product (see cabinet material section)
- Bucket of warm water
- Old toothbrush or small soft-bristle brush (for crevices)
- Dry towel
- Gloves (optional, protects hands from chemicals)
- Step stool (to reach higher cabinets)
- Spray bottle (for applying cleaning solution)
- Cotton swabs (for tight corners)
Some people use homemade polishes (like olive oil and vinegar). These can work for wood, but always test on a hidden area first.
Preparing Cabinets Before Polishing
Polishing works best on clean, dry surfaces. If you polish over dirt or grease, you seal it in, which can cause odors and sticky buildup. Here’s how to prepare:
- Remove all items from cabinets. Take out dishes, food, and liners.
- Wipe off loose dust with a dry microfiber cloth.
- Mix cleaning solution: For most cabinets, use a few drops of dish soap in warm water.
- Wipe down all surfaces: Use a damp (not wet) cloth. Pay attention to handles, corners, and edges.
- Scrub problem spots: For sticky residue or grease, use a bit more soap and a soft brush or toothbrush.
- Dry thoroughly: Cabinets must be completely dry before you polish. Use a towel or let air dry.
- Check for damage: Look for peeling, bubbling, or deep scratches. Repair these areas before polishing.
Non-obvious tip: Don’t forget the cabinet tops. Dust and grease collect there, especially above the stove.
How To Polish Kitchen Cabinets: Step-by-step
Now your cabinets are clean and dry, it’s time to polish. The steps are simple but must be done carefully for the best results.
Step 1: Choose The Right Polish
Select a polish that matches your cabinet material. For wood, use a product with natural oils or beeswax. For laminate, painted, or thermofoil cabinets, use a gentle, non-oily spray polish.
Beginner mistake: Don’t use furniture polish with silicone on laminate or painted cabinets. It can leave streaks or make the surface sticky.
Step 2: Test In A Hidden Spot
Before polishing the entire cabinet, test your product on a small, hidden area (like inside a door). Wait 10 minutes to check for discoloration or residue.
Step 3: Apply Polish To A Cloth
Never pour polish directly onto the cabinet. Instead, apply a small amount to your microfiber cloth. This gives you more control and avoids buildup.
Step 4: Work In Small Sections
Polish one door or drawer at a time. Rub gently in the direction of the wood grain (for wood cabinets) or with light circular motions (for other materials).
Step 5: Buff For Shine
After applying polish, use a clean, dry cloth to buff the surface. This removes extra product and brings out the shine.
Step 6: Polish Handles And Hardware
Wipe handles, knobs, and hinges with the same cloth. If they’re very dirty, use a metal polish or gentle soap first. Dry completely.
Step 7: Reassemble And Enjoy
Once all surfaces are polished and dry, put back your dishes and liners. Step back and admire the refreshed look.
Pro insight: Polishing only the outside is common, but polishing inside the doors (where your hands touch) keeps grime from building up.
How Often Should You Polish Kitchen Cabinets?
The right frequency depends on your kitchen’s use and your cabinet material.
- Wood cabinets: Every 2-3 months, or when they look dull.
- Laminate, painted, thermofoil: Every 3-4 months, or as needed.
- Metal cabinets: Every 2-3 months.
If you cook often or have young children, polish more frequently. In homes with little use, once or twice a year may be enough.
Credit: www.cabinetnow.com
Diy Cabinet Polish Recipes
Some homeowners prefer natural, homemade polishes. These are safe, cheap, and avoid strong smells. Below are easy recipes for each cabinet type.
For Wood Cabinets
Mix 1 part white vinegar with 2 parts olive oil. Add a few drops of lemon juice for scent.
- Shake well in a spray bottle.
- Apply to cloth, not directly to wood.
- Wipe gently, following the grain.
For Laminate Or Painted Cabinets
Mix 1 cup water, 1 tablespoon gentle dish soap, and 1 tablespoon white vinegar.
- Use a damp (not wet) cloth.
- Wipe, then dry with a clean towel.
For Metal Cabinets
Mix 1 part water, 1 part vinegar. For extra shine, buff with a few drops of mineral oil on a cloth.
Important: Always test homemade solutions on a hidden spot first.
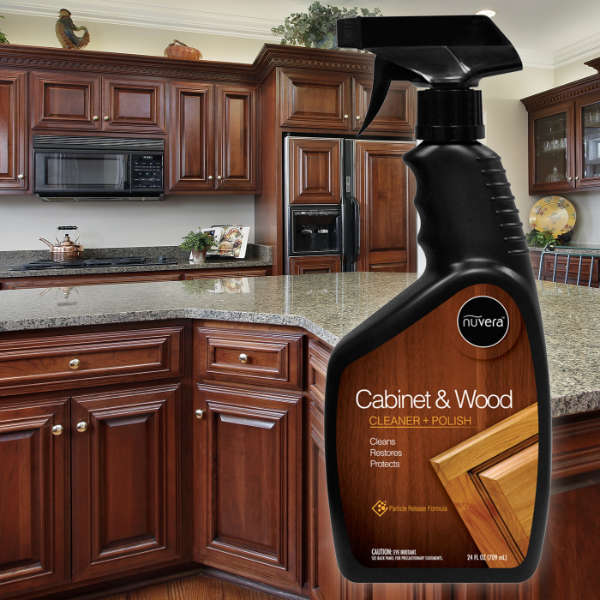
Choosing Commercial Cabinet Polishes
If you prefer ready-made products, look for:
- No harsh chemicals: Avoid ammonia, bleach, or strong solvents.
- Safe for your material: Read labels for wood, laminate, or painted surfaces.
- No oily residue: Some polishes leave a film that attracts dust.
- Trusted brands: Read reviews and check for certifications.
| Product Name | Best For | Main Ingredients | Residue-Free |
|---|---|---|---|
| Howard Feed-N-Wax | Wood | Beeswax, orange oil | Yes |
| Pledge Multi-Surface | Laminate, painted, wood | Water, mild detergents | Yes |
| Weiman Cabinet & Wood Cleaner | Wood, laminate | Plant-based oils, soap | Yes |
| Murphy Oil Soap | Wood | Vegetable oil soap | No (may leave slight oil) |
Non-obvious tip: Avoid “multi-surface” polishes that include wax if you have both wood and laminate cabinets. Wax is good for wood but can make laminate sticky.
Credit: www.nuveraproducts.com
Special Tips For Tricky Cabinet Areas
Some parts of kitchen cabinets get dirtier than others. Polishing these areas needs extra care.
Cabinet Handles And Knobs
Handles are touched many times a day. They collect oils, food, and soap. Remove them if possible to clean and polish every side. If not, use a cotton swab around the edges.
Cabinet Edges And Grooves
Edges and grooves trap crumbs and grease. Use an old toothbrush or a wooden skewer wrapped in cloth to polish these spots. Don’t use sharp metal, which can scratch.
Above The Stove
Cabinets above the stove collect sticky grease from cooking. Clean with a degreaser first, then polish. Repeat more often in this area.
Glass Cabinet Doors
Some cabinets have glass panels. Clean glass with vinegar-water, then polish the wood frame separately. Avoid getting polish on glass, which can leave smears.
Mistakes To Avoid When Polishing Kitchen Cabinets
Even a small mistake can damage your cabinets. Here are common errors and how to avoid them:
- Using too much water: Excess water soaks wood and causes swelling or peeling.
- Skipping cleaning: Polishing over dirt seals in grime.
- Wrong polish for material: Silicone or wax on laminate leads to a sticky finish.
- Polishing too often: Too much polish, especially oil, can dull the surface.
- Strong chemicals: Ammonia, bleach, or oven cleaner can strip color and finish.
- Using abrasive pads: Scratches appear quickly on all cabinet types.
- Ignoring hardware: Dirty handles make cabinets look older, even if surfaces shine.
- Not testing first: Always check new products or DIY recipes on a hidden spot.
- Polishing in direct sunlight: Heat dries polish too fast, leaving streaks.
- Forgetting to buff: Leaving excess polish makes cabinets look greasy, not shiny.
How To Maintain Cabinets After Polishing
Polishing is only part of cabinet care. Keeping them clean between polishing sessions extends their life and keeps them looking great.
- Wipe spills immediately: Water, sauce, or oil left on cabinets can stain or warp the finish.
- Dust weekly: Use a dry microfiber cloth to stop buildup.
- Ventilate while cooking: Steam and grease float up and settle on cabinets.
- Use cabinet liners: Protects inside surfaces from spills and stains.
- Open windows: Reduces humidity, which damages wood and paint.
- Check hardware: Loose handles scratch surfaces—tighten them regularly.
- Keep away from heat: Don’t hang dish towels or potholders on cabinet doors near the stove.
Pro tip: Place a reminder in your calendar to polish cabinets every few months. Regular care is easier than deep cleaning after years of neglect.
When To Call A Professional
Most homeowners can polish their cabinets with simple tools and a little time. But sometimes, professional help is needed:
- Deep scratches or gouges: These need sanding and refinishing.
- Water damage: Swollen or warped wood requires repair.
- Paint peeling: Professionals can strip and repaint for a new look.
- Heavy buildup: If years of grease or wax won’t come off, experts have special cleaners.
- Historic cabinets: Valuable or antique wood should be handled by a pro.
Professional cabinet refinishers can restore even badly damaged cabinets, but this is more expensive than regular polishing. For most people, simple polishing is enough to keep cabinets looking beautiful for many years.
Eco-friendly And Allergy-safe Polishing
Many commercial polishes contain chemicals that can trigger allergies or harm the environment. If you have sensitive skin, allergies, or small children, consider these options:
- Fragrance-free products: Reduces risk of irritation.
- Plant-based or “green” cleaners: Less toxic for people and pets.
- Essential oils: Add scent naturally. Lemon, orange, or lavender are popular.
- Microfiber cloths: Clean well with just water, needing less polish.
Look for eco-friendly certifications or make your own polish from vinegar and oil. Always store products safely, away from children and pets.
Real-world Example: Polishing Kitchen Cabinets In A Busy Home
Let’s see how the process works in a real kitchen. Maria, a mother of three, has oak wood cabinets and cooks daily. Her cabinets get greasy quickly, especially near the stove.
She cleans her cabinets every week with a damp cloth. Every three months, she polishes using a beeswax-based product. She uses a microfiber cloth and works in small sections, following the grain. For sticky spots, she uses a toothbrush with a little soap before polishing.
Maria polishes her handles and hardware, not just the wood. She keeps a step stool nearby to reach the tops of her cabinets, which collect dust and grease. By following these steps, her cabinets still look almost new after seven years.
Insight: Polishing is not just about appearance. Maria finds her cabinets are easier to clean and don’t absorb cooking smells as much.
Cost Of Polishing Kitchen Cabinets
Polishing your kitchen cabinets is affordable. Here’s an estimate for a medium-sized kitchen (10-15 cabinets):
- Microfiber cloths: $5–$10 for a set of 3
- Cleaning solution: $3–$7 for a bottle, or pennies if homemade
- Polish: $8–$15 for a bottle (lasts several sessions)
- Brushes/toothbrush: $1–$3
- Total cost per session: $12–$30
Hiring a professional for deep cleaning and polishing can cost $100–$300 or more, depending on kitchen size and condition. Doing it yourself saves money and gives you control over the products used.
Comparing Polishing Methods
Here is a simple comparison between homemade and commercial polishes for kitchen cabinets.
| Method | Pros | Cons | Best For |
|---|---|---|---|
| Homemade polish | Cheap, chemical-free, customizable scent | Shorter shelf life, may need frequent application | Wood, sensitive users |
| Commercial polish | Long-lasting, easy to use, consistent results | Can contain chemicals, more expensive | All materials, busy households |
| Professional service | Deep cleaning, handles damage, saves time | Expensive, needs scheduling | Damaged or historic cabinets |
Frequently Asked Questions
How Do I Remove Sticky Residue Before Polishing My Kitchen Cabinets?
Sticky residue is common, especially near stoves and handles. Mix a few drops of dish soap with warm water. Dip a soft cloth in the solution and wring out well. Rub the area gently, or use a soft toothbrush for grooves.
Dry completely. For tough spots, use a little baking soda on a damp cloth, but test first to avoid scratches.
Is It Safe To Polish Cabinets With Vinegar And Oil?
Yes, vinegar and oil is a popular homemade polish for wood cabinets. Mix 1 part vinegar with 2 parts olive or mineral oil. Test on a hidden area first. Do not use on laminate, painted, or thermofoil cabinets, as oil can leave marks or weaken adhesive.
How Can I Prevent Streaks After Polishing?
Streaks usually come from using too much polish or not buffing enough. Apply a small amount of polish to a microfiber cloth, not directly to the cabinet. Work in small sections and always buff with a clean, dry cloth. Avoid polishing in direct sunlight, which dries polish too quickly and causes streaks.
Can I Use The Same Polish For Both Wood And Laminate Cabinets?
No, you should not use the same polish for both. Wood polishes often contain oils or wax that can make laminate sticky or dull. Choose a multi-surface cleaner safe for both, or use different products as recommended for each material.
How Do I Know If My Cabinets Need Professional Help?
Call a professional if your cabinets have deep scratches, peeling finish, water damage, or years of built-up grease that won’t come off. Also, if you have valuable antique cabinets, it’s safer to let experts handle polishing and restoration.
Maintaining kitchen cabinets by polishing is an easy and rewarding task. With the right products and techniques, your cabinets will stay beautiful and durable for years. If you need more information on cabinet care, check reliable resources like This Old House. Start today, and enjoy a kitchen that always looks its best!