
Refacing laminate cabinets is a smart way to give your kitchen or bathroom a fresh look without the high cost of a full remodel. Many homeowners believe laminate cabinets can only be replaced, but this isn’t true. With the right steps, you can change their appearance, add new hardware, and even improve durability.
If you want to modernize your space, boost your home’s value, or just enjoy a cleaner look, refacing is a practical and budget-friendly option.
This guide will walk you through the complete process of how to reface laminate cabinets. You’ll learn the pros and cons, how to choose the right materials, the tools you need, and step-by-step instructions. We’ll cover common mistakes, practical tips, and answer the most frequent questions.
Whether you’re a DIY beginner or have some experience, you’ll find everything you need to make your project a success.
Why Reface Laminate Cabinets?
Many people choose to repaint or replace cabinets, but refacing offers unique benefits. Refacing means you keep the cabinet boxes but change the doors, drawer fronts, and sometimes the surface finish. Here’s why it’s worth considering:
- Cost savings: Refacing is usually 30–50% cheaper than replacing cabinets.
- Less mess: There’s no need to tear out existing cabinets, so your kitchen remains usable.
- Faster project: Most refacing jobs take 2–5 days, while replacements can take weeks.
- Eco-friendly: You reduce waste by keeping your cabinet structure.
- Custom look: You can choose modern, classic, or any style you want.
However, refacing is not right for every cabinet. If your cabinet boxes are damaged, warped, or moldy, replacement might be better. Always check the structure before starting.
Understanding Laminate Cabinets
Before you start, it’s important to know what laminate cabinets are. Laminate is a synthetic material, usually made by pressing layers of resin and paper onto particle board or MDF (medium-density fiberboard). It’s popular because it’s affordable, easy to clean, and comes in many colors and patterns.
But laminate can chip, peel, or fade over time. The surface is non-porous, which means paint and adhesives don’t stick easily. That’s why proper prep is critical for a long-lasting refacing job.
Planning Your Cabinet Refacing Project
A successful refacing project starts with careful planning. Here are the key steps:
1. Assess Your Cabinets
- Check for water damage, swelling, or loose boards.
- Make sure the cabinet boxes are sturdy and flat.
- If there’s serious damage, repair or replace before refacing.
2. Decide On Refacing Materials
You have several options when it comes to refacing laminate cabinets:
- Laminate sheets: These are thin, flexible sheets that match or contrast with your current cabinets.
- Wood veneer: Real wood slices glued to the cabinet surface, giving a natural look.
- Thermofoil: Vinyl film fused to MDF, durable and smooth.
- Paint: Special paints for laminate can be used for a new color.
Each material has pros and cons. Here’s a quick comparison:
| Material | Appearance | Durability | Cost | Maintenance |
|---|---|---|---|---|
| Laminate Sheet | Modern/Varied | High | $$ | Easy |
| Wood Veneer | Natural/Warm | Medium | $$$ | Regular |
| Thermofoil | Sleek/Smooth | Very High | $$ | Very Easy |
| Paint | Custom | Medium | $ | Easy |
3. Measure Everything
- Measure each cabinet door and drawer front.
- Measure the face frames (edges around the doors).
- Order about 10% extra material to cover mistakes or future repairs.
4. Choose New Hardware
Refacing is a great time to update handles, knobs, and hinges. Modern hardware can make old cabinets look brand new. Check that new hardware matches the screw holes or be ready to drill new ones.
5. Set Your Budget
Include all materials, tools, and a 10–15% buffer for unexpected costs. On average, DIY refacing costs $800–$2,500 for a medium kitchen, compared to $5,000–$15,000 for new cabinets.
Tools And Supplies You Need
Having the right tools makes the process easier and gives better results. Here’s a list:
- Screwdriver (manual or electric)
- Pry bar (for removing old doors)
- Utility knife
- Measuring tape
- Level
- Pencil
- Sandpaper (medium and fine grit)
- Degreaser or mild cleaner
- Wood glue or strong adhesive
- J-roller (for pressing laminate)
- Paintbrush and foam roller (if painting)
- Clamps (optional, but helpful)
- Safety gear: Gloves, mask, goggles
For materials, you’ll need:
- Chosen laminate, veneer, or paint
- Replacement doors and drawer fronts (if not reusing)
- New or existing hardware
- Matching edge banding (for laminate or veneer)
- Filler putty (for holes or cracks)
- Primer (if painting)

Credit: pelicancr.com
Step-by-step: How To Reface Laminate Cabinets
Now, let’s break down the process into clear steps you can follow. Whether you use laminate sheets, veneer, or paint, the order is similar, but some steps are unique to each method.
Step 1: Prepare The Area
Start by removing everything from your cabinets. Cover your countertops and floor with drop cloths or old sheets. Good lighting helps you spot flaws and work safely.
Step 2: Remove Doors, Drawers, And Hardware
Use your screwdriver to take off all cabinet doors, drawer fronts, and hardware. Keep screws and hinges in labeled bags, especially if you plan to reuse them. Take a photo of the layout for easy reassembly.
Step 3: Clean All Surfaces
Laminate surfaces collect grease and dirt, especially in the kitchen. Use a degreaser or a mix of warm water and mild dish soap. Dry with a lint-free cloth. Don’t skip this step—adhesive and paint won’t stick to dirty surfaces.
Step 4: Repair And Sand
Check for chips, cracks, or loose laminate. Use wood filler or putty for repairs. If the laminate is peeling, glue it down with wood glue and clamp until dry.
Sand all surfaces lightly with medium-grit sandpaper (120–150 grit) to remove gloss. This helps new laminate, veneer, or paint stick better. Wipe away dust with a damp cloth.
Step 5: Apply New Surface
For Laminate Or Wood Veneer:
- Cut sheets to size using a utility knife and straight edge. Leave a slight overhang.
- Apply adhesive to the cabinet surface or back of the sheet (follow manufacturer instructions).
- Place the sheet on the cabinet, starting from one edge. Use a J-roller to press out air bubbles and ensure a tight bond.
- Trim excess with a sharp knife.
- For edges, use edge banding tape. Heat with an iron (if heat-activated) and press firmly.
- Repeat for all cabinet boxes, doors, and drawer fronts.
For Painting:
- After sanding, apply a bonding primer made for laminate. Let it dry fully.
- Apply paint with a foam roller for smooth results. Use thin, even coats.
- Let each coat dry before applying the next. Two to three coats usually give full coverage.
- For extra durability, finish with a clear topcoat (polyurethane or acrylic).
Step 6: Install New Doors, Drawer Fronts, And Hardware
If you ordered new doors or drawer fronts, attach them to the cabinet boxes. Use a level to ensure they hang straight. Install new or reused hardware, making sure screws are tight.
Step 7: Final Touches
Check all surfaces for missed spots, air bubbles, or loose edges. Touch up as needed. Clean all new surfaces gently before loading the cabinets.
Tips For A Professional Finish
Some small details can make a big difference in the end result:
- Work slowly: Rushing leads to mistakes, especially when cutting laminate or veneer.
- Use painter’s tape: Mask off areas you don’t want to cover or paint.
- Match the grain: For wood veneer, align the grain direction across doors and frames.
- Drill pilot holes: When installing new hardware, pilot holes prevent splitting.
- Double-check alignment: Crooked doors or handles can ruin the look.
Common Mistakes To Avoid
Even careful DIYers can make errors. Here are some to watch for:
- Skipping cleaning or sanding: This is the #1 cause of peeling or bubbling later.
- Using the wrong adhesive: Not all glues work on laminate. Check compatibility.
- Not allowing enough drying time: Rushing between steps weakens the bond.
- Measuring only once: Always measure twice, cut once—especially with expensive materials.
- Ignoring cabinet box condition: If the box is weak, refacing won’t last.
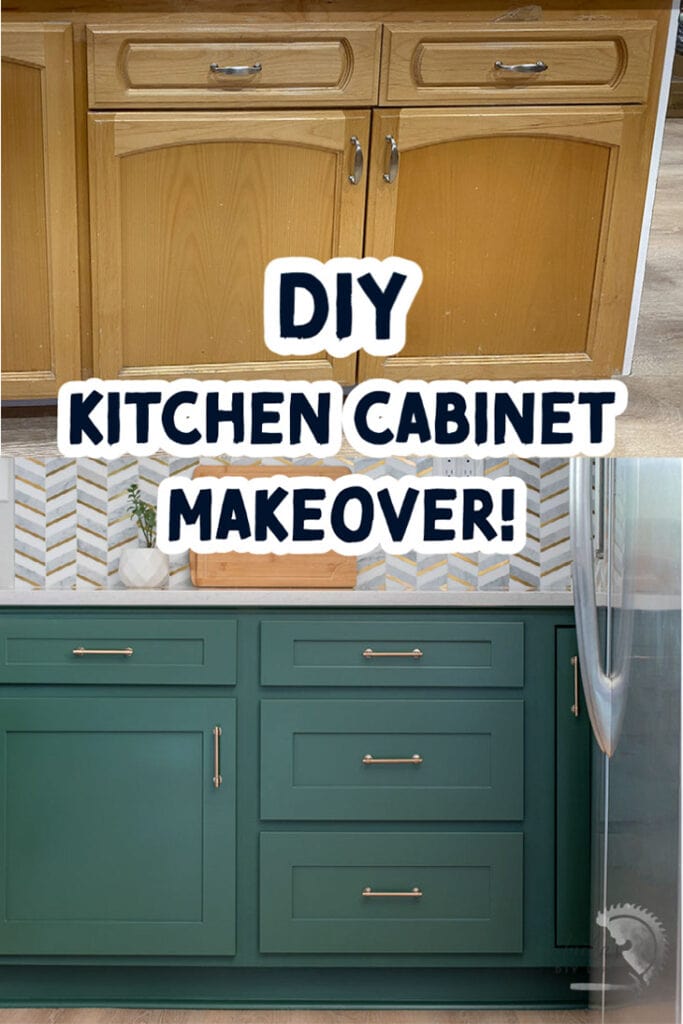
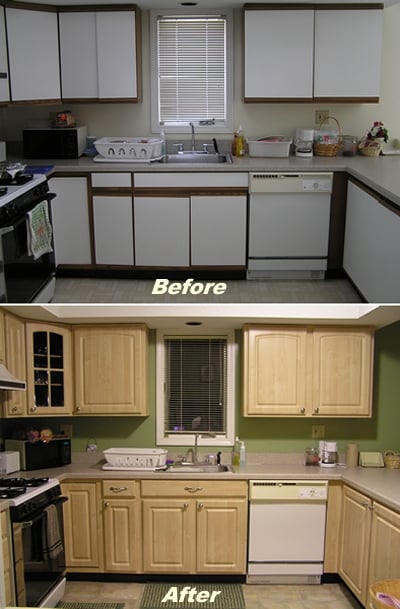
Real-world Example: Kitchen Cabinet Makeover
Consider a medium-sized kitchen (20 cabinet doors, 6 drawers). The homeowner chose white thermofoil doors and brushed nickel handles. The total cost was $1,800 (materials and tools), and the job took four days.
Before refacing, the cabinets were cleaned and lightly sanded. Old doors were removed, and the cabinet frames were covered with matching white laminate. New doors and drawer fronts were attached, and modern hardware installed.
The result: The kitchen looked brand new, and the homeowner saved about $6,000 compared to full cabinet replacement. Friends and family couldn’t tell the cabinets weren’t new—proof that a careful refacing job can match professional work.
Should You Hire A Pro Or Diy?
Refacing laminate cabinets can be a DIY job, but it requires patience and attention to detail. If you have basic tools and can follow instructions, you can save thousands.
However, consider hiring a pro if:
- Your cabinets have complicated shapes or lots of details
- You want a flawless, factory finish
- You have no time for a multi-day project
Professionals use special equipment for cutting and gluing, and some offer warranties. Typical pro refacing costs range from $4,000–$9,000 for a standard kitchen, but results can last 10–20 years.
How Cabinet Refacing Compares To Other Updates
If you’re unsure whether to reface, repaint, or replace, this overview can help:
| Option | Cost (avg.) | Time | Durability | Disruption |
|---|---|---|---|---|
| Refacing | $800–$2,500 (DIY) | 2–5 days | 10–20 years | Low |
| Painting | $200–$800 | 2–4 days | 5–10 years | Low |
| Replacement | $5,000–$15,000 | 1–3 weeks | 20+ years | High |
Ways To Personalize Your Refaced Cabinets
Refacing isn’t just about covering old surfaces. You can add features that make your cabinets more functional or stylish:
- Glass doors: Replace some solid doors with glass panels for a modern look.
- Soft-close hinges: Upgrade to hinges that prevent slamming.
- Pull-out trays: Add sliding shelves inside for easy access.
- Under-cabinet lighting: Install LED strips for better workspace lighting.
- Open shelving: Remove a few doors for open shelves and display space.
These upgrades can be done during the refacing process for less effort and cost.
Maintenance And Care After Refacing
To keep your refaced cabinets looking new:
- Clean with a soft, damp cloth and mild soap. Avoid harsh chemicals.
- Wipe spills quickly to prevent staining.
- Use gentle motion when opening and closing doors.
- Check hinges and handles for looseness every 6–12 months.
- Avoid hanging heavy items on doors.
Most refacing materials resist moisture and stains, but sharp objects can still scratch the surface. Small touch-ups are possible with matching paint or repair kits.
Environmental Benefits Of Refacing
One insight many homeowners miss: refacing is much more eco-friendly than replacing. By keeping the cabinet boxes, you reduce landfill waste and avoid the carbon cost of manufacturing and transporting new cabinets. Many refacing materials are now made with recycled content or low-VOC adhesives, making your project even greener.
According to the Environmental Protection Agency, kitchen remodels generate over 600,000 tons of cabinet waste each year in the U.S. Refacing helps lower this number and supports sustainable renovation.
When Refacing May Not Work
Not every cabinet is a good candidate for refacing. You should consider replacement if:
- The cabinet box is warped or sagging.
- There is mold, water damage, or severe swelling.
- The layout doesn’t fit your needs (for example, you need more storage or a different configuration).
- The cost of repairs plus refacing is close to replacement.
In these cases, a full remodel may be a better investment.
Credit: www.anikasdiylife.com
Where To Buy Refacing Materials
You can find refacing supplies at most home improvement stores (like Home Depot or Lowe’s), specialty cabinet shops, or online. Some companies offer custom-cut doors, drawer fronts, and pre-glued laminate sheets for DIYers.
If you want to learn more about product options and installation advice, the This Old House website has many detailed guides.
Frequently Asked Questions
What Is The Difference Between Refacing And Resurfacing Cabinets?
Refacing means replacing the doors, drawer fronts, and covering the cabinet face frames with new material. Resurfacing often means just adding a new surface (like paint or laminate) to existing doors and frames. Refacing usually gives a more dramatic and durable result.
Can I Reface Cabinets Myself, Or Do I Need A Professional?
Most people can DIY a refacing project with patience and careful measurement. However, if your cabinets have tricky shapes or you want a flawless finish, hiring a pro may be better.
How Long Does Refacing Laminate Cabinets Last?
With proper materials and installation, refaced cabinets can last 10–20 years. Durability depends on traffic, cleaning habits, and the quality of the refacing materials.
Will Refacing Increase My Home’s Value?
Yes. Kitchen upgrades like cabinet refacing are among the top remodeling projects for return on investment. Buyers appreciate a modern kitchen, and refacing is a cost-effective way to achieve it.
Is Refacing Cheaper Than Painting Cabinets?
Refacing is usually more expensive than painting but gives a more complete transformation. Painting is cheaper but may not last as long or hide deep flaws. Refacing is a good middle ground between painting and full replacement.
Refacing laminate cabinets is a practical way to refresh your kitchen or bathroom with less hassle, cost, and waste. With the right tools, materials, and careful work, you can get results that look and feel brand new. Whether you do it yourself or hire a pro, refacing is a smart investment in your home’s beauty and value.
Credit: www.kitchencabinetdepot.com