
Giving your kitchen a fresh look doesn’t always mean a full remodel. Sometimes, simply refinishing your cabinets can transform the whole space. If you have dove gray kitchen cabinets that look worn, faded, or simply outdated, refinishing them is a smart way to bring them back to life. Dove gray is a popular color because it feels both modern and timeless. It matches well with many styles, from classic to contemporary. But getting a smooth, professional finish at home can be tricky if you don’t plan each step carefully.
Many homeowners jump into painting or refinishing without understanding what’s involved. They may skip important steps, like surface prep, or choose the wrong tools and materials. The result? Paint that chips, peels, or looks uneven. With the right approach, though, you can refinish your dove gray cabinets so they look stunning and last for years.
This guide will show you exactly how to do it, even if you’re new to DIY projects. You’ll learn how to prepare, paint, and protect your cabinets, and discover tips that most beginners miss. By the end, you’ll feel confident to start—and avoid the common mistakes that can ruin your hard work.
Understanding Dove Gray Cabinets
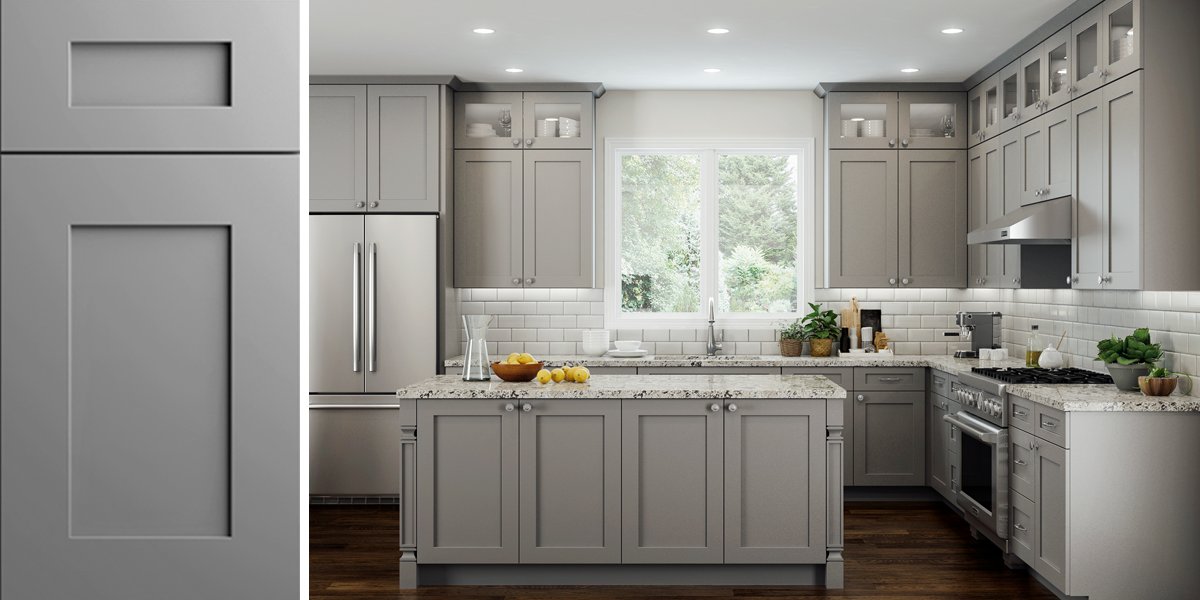
Dove gray is a soft, neutral shade that sits between light gray and off-white. It’s less stark than pure white but brighter than charcoal or slate. This makes dove gray cabinets a favorite for homeowners who want a calm, inviting kitchen. The color reflects light well, which helps small kitchens feel bigger. It’s also versatile: dove gray pairs beautifully with stainless steel, brass, black hardware, and almost any countertop or backsplash.
But dove gray also shows dirt, scuffs, and chips more than darker colors. Over time, even the best paint can fade or lose its fresh look. That’s why regular cleaning and proper refinishing are important. Before starting your project, consider if you want to keep the same shade or try a slightly different tone.
Paint stores can mix dove gray in warmer or cooler undertones, depending on the look you want.
Should You Refinish Or Replace?
Replacing cabinets is expensive and time-consuming. Refinishing, on the other hand, is more budget-friendly and much faster. But not every cabinet is a good candidate for refinishing. Here’s how to decide:
| Condition | Refinish? | Replace? |
|---|---|---|
| Solid wood or high-quality MDF | Yes | No |
| Peeling, water-damaged, warped | No | Yes |
| Minor scratches or scuffs | Yes | No |
| Loose or broken doors | Fix first, then refinish | Replace if severe |
| Poor quality laminate | No (painting may not stick well) | Yes |
If your cabinets are solid wood or a good-quality MDF (medium-density fiberboard), refinishing is usually the better choice. If they’re badly damaged or made from very cheap materials, replacing might be smarter. Don’t try to refinish cabinets with bubbling, separating laminate—they won’t hold paint.
Tools And Materials Needed
Gathering the right tools and materials before you start makes the whole process smoother. Here’s what you’ll need for a typical dove gray cabinet refinishing project:
- Screwdriver (for removing doors and hardware)
- Drop cloths or plastic sheeting
- Painter’s tape
- Degreaser or TSP (trisodium phosphate) for cleaning
- Sandpaper (120, 180, and 220 grit)
- Sanding block or orbital sander (for large surfaces)
- Tack cloth or microfiber cloth
- High-quality primer (stain-blocking, water-based or oil-based)
- Dove gray paint (cabinet-grade, semi-gloss or satin)
- Paintbrushes (angled, 2” or 2.5”)
- Small foam rollers
- Paint tray
- New hardware (optional: Handles, knobs, hinges)
- Wood filler (for dents or holes)
- Putty knife
- Vacuum (for dust clean-up)
- Mask (if sanding or spraying paint)
- Topcoat (clear polyurethane or polycrylic for extra protection)
Don’t skip on quality. Cheap brushes or paint can leave streaks or peel quickly. Cabinet-specific paints are more durable and easy to clean.
Planning And Preparation
A professional-looking result starts long before you open a paint can. Here’s how to get your cabinets ready for refinishing:
1. Remove Cabinet Doors And Hardware
Take off all cabinet doors, drawers, and hardware. Label each door and hinge with tape so you remember where it belongs. This step makes painting easier and avoids drips or missed spots. Don’t try to paint cabinets while they’re still hanging—you’ll regret it.
2. Clean Everything Thoroughly
Grease, dust, and food splatters stop paint from sticking. Use a degreaser or TSP solution to scrub every surface. Rinse with clean water and let everything dry. If you skip this, you’ll see bubbles or peeling later.
3. Repair And Fill Imperfections
Inspect all surfaces for dents, scratches, or holes. Use wood filler and a putty knife to repair these spots. Let the filler dry, then sand smooth. This is one of the most overlooked steps, but it makes a big difference in the final finish.
4. Sand All Surfaces
Sanding is critical for both old and new cabinets. It gives the primer and paint something to grip. Start with 120-grit sandpaper to remove shine or rough spots, then move to 180-grit for a smoother finish. For the final pass, use 220-grit. Always sand with the wood grain, not against it. Wipe away dust with a tack cloth or vacuum.
5. Mask And Protect Surrounding Areas
Use painter’s tape to protect walls, floors, and countertops. Lay down drop cloths to catch drips. Take your time—tape saves hours of clean-up later.
Credit: rtawoodcabinets.com
Priming: The Foundation For A Lasting Finish
Even the best paint won’t stick to bare wood or old finishes without primer. This step is essential, especially with dove gray, which can show stains or wood bleed-through.
Choosing The Right Primer
Cabinet paint jobs need a stain-blocking primer. Water-based primers are less smelly and easier to clean, but oil-based primers block stains better. If your cabinets have tannin-rich wood (like oak), use oil-based primer or a shellac-based product.
Applying Primer
Stir the primer well before using. Use a good brush for corners and details, and a small foam roller for flat surfaces. Apply a thin, even coat—don’t overload the brush. Watch for drips along edges. Let the primer dry completely (check the can for drying times).
Sand lightly with 220-grit paper between coats for smoothness.
Some cabinets need two coats of primer, especially if you’re covering a dark or stained surface. Don’t rush. A well-primed surface means your paint will look better and last longer.
Painting: Bringing Dove Gray Back To Life
This is the most exciting part, but also where many DIYers make mistakes. Here’s how to get a flawless finish on dove gray cabinets:
Choosing Paint
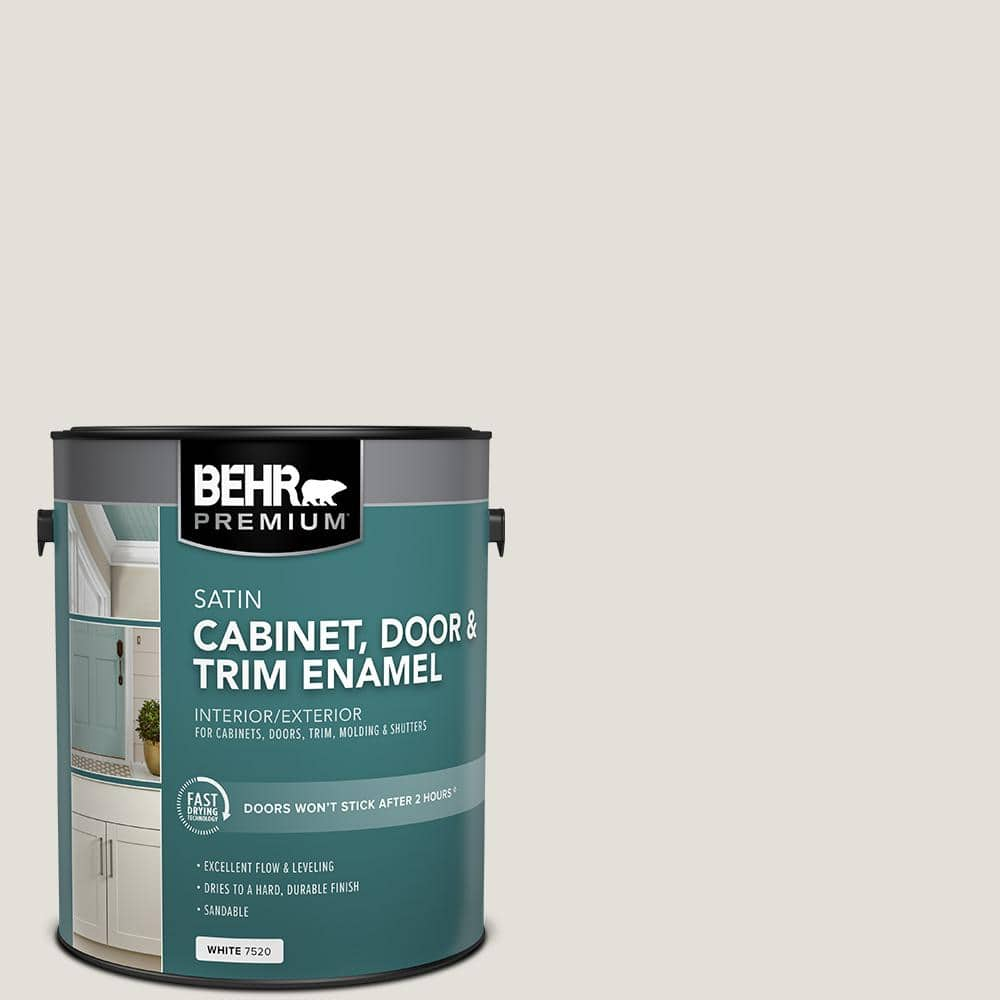
Look for cabinet-grade paint in semi-gloss or satin. These finishes resist stains and are easy to wipe clean. Avoid flat paint—it shows marks and isn’t durable. Many brands have paints made specifically for cabinets. These self-level, so brush marks fade as the paint dries.
Painting Technique
- Start with the backs: Paint the back side of each door first. Let it dry, then flip and paint the front. This avoids fingerprints on the visible side.
- Brush for corners, roll for flats: Use a brush for edges, corners, and details. Use a small foam roller for large, flat areas.
- Thin, even coats: Two or three thin coats are better than one thick coat. Thick paint drips and takes forever to dry.
- Sand lightly between coats: After each coat dries, sand with 220-grit for a super-smooth finish. Wipe away dust before the next coat.
- Paint frames last: Paint cabinet frames only after all doors and drawers are done.
Let each coat dry fully before adding another. Rushing leads to sticky, uneven paint.
Paint Drying And Curing Time
Cabinet paint dries to the touch in a few hours, but full curing takes days or even weeks. Avoid heavy cleaning or slamming doors for at least a week. The paint hardens over time, becoming tougher and more scratch-resistant.
Credit: www.homedepot.com
Protecting Your Finish: Topcoats And Sealers
Some cabinet paints are tough enough without a topcoat, but for maximum durability, especially in busy kitchens, add a clear sealer. Polyurethane (oil-based) or polycrylic (water-based) are good choices. Polycrylic is less likely to yellow over time, which is important with dove gray.
Apply the topcoat with a clean brush or roller. Use two thin coats, sanding lightly between them. Let the final coat cure for several days before regular use.
Reinstalling Doors And Hardware
Once everything is dry and cured, it’s time to put your kitchen back together.
- Double-check dryness: Make sure all pieces are fully dry.
- Reattach hardware: Clean or replace handles, knobs, and hinges. Now is a great time to update old hardware for a new look.
- Hang doors and drawers: Use your labels to put each door and drawer back in its original spot. Adjust hinges if needed for a perfect fit.
Wipe everything down with a soft cloth to remove fingerprints or dust.
Troubleshooting Common Issues
Even with careful prep, problems can happen. Here’s how to handle the most common ones:
Paint Drips Or Runs
Wait until the paint is dry, then sand the drip flat and repaint the spot. To prevent drips, don’t overload your brush or roller.
Streaks Or Brush Marks
Most streaks come from cheap brushes or painting too quickly. Use high-quality tools and don’t rush. If marks appear, sand gently and add another thin coat.
Peeling Or Bubbling Paint
This usually means poor prep—grease, dust, or moisture under the paint. Scrape off the loose paint, clean, sand, and repaint the area.
Uneven Color
If some areas look lighter or darker, you may have missed a spot or didn’t mix your paint well. Stir paint often, and always work in good light. Apply another coat if needed.
Advanced Tips For A Professional Finish
Want your dove gray cabinets to look like they came from a designer showroom? These advanced tips can help:
- Spray painting: If you have space and a paint sprayer, spraying gives a flawless, glass-smooth finish. Always mask thoroughly and practice on scrap wood first.
- Add slow-dry additive: Some pros add a paint conditioner (like Floetrol) to extend drying time, helping brush marks disappear.
- Upgrade your hardware: New handles or pulls can make cabinets look brand new, even with the same color.
- Two-tone look: Pair dove gray upper cabinets with darker gray or navy lowers for a modern style.
- Install soft-close hinges: These add a touch of luxury and protect your fresh paint from slamming doors.
- Lighting matters: Under-cabinet lights highlight the color and make your kitchen look warmer and more inviting.
- Take your time: The biggest secret is patience. Rushing leads to mistakes.
Cost And Time Comparison: Refinish Vs. Replace
Wondering how much time and money you’ll save by refinishing instead of replacing? Here’s a quick comparison:
| Option | Average Cost (10×10 kitchen) | Time Required | Durability |
|---|---|---|---|
| Refinish | $200–$600 (DIY), $1,200–$3,000 (pro) | 4–7 days | 5–10 years (with care) |
| Replace | $4,000–$12,000+ | 1–3 weeks | 20+ years |
| Refacing (new doors/veneers) | $3,000–$7,000 | 3–5 days | 10–20 years |
Refinishing saves thousands and gives great results if your cabinets are solid. It’s also less disruptive—you don’t lose use of your kitchen for weeks.
How To Keep Dove Gray Cabinets Looking New
After all your hard work, you want your cabinets to stay beautiful. Here’s how to keep them looking their best:
- Wipe up spills quickly: Especially tomato sauce, oil, or coffee, which can stain light colors.
- Use gentle cleaners: Avoid harsh chemicals. A soft cloth and mild soap are enough for most messes.
- Don’t hang wet towels: Moisture can damage paint over time.
- Touch up chips right away: Keep a small jar of your paint for easy fixes.
- Check hardware: Tighten handles or hinges if they loosen.
If you clean gently and avoid hard scrubbing, a good cabinet paint job can last many years.

Credit: www.homedepot.com
Real-life Example: A Small Kitchen Makeover
Let’s look at how one homeowner refinished their dove gray cabinets and what they learned.
Sarah’s Story: Sarah had a small, dark kitchen with old oak cabinets. She wanted a modern look but didn’t want to spend thousands on new cabinets. She decided to refinish them in dove gray. She took all the doors off, cleaned them with TSP, and sanded them by hand. She used a water-based primer and a high-quality cabinet paint. The project took her a full week, working a few hours each evening and most of the weekend.
Sarah’s biggest mistake was skipping the tack cloth after sanding her first door—dust made the paint look gritty. She had to sand and repaint that door. After that, she wiped every surface carefully before painting. She also upgraded her hardware to brushed nickel pulls.
Result: Her kitchen looked brighter, bigger, and much more modern. Friends thought she had new cabinets. The total cost was under $400, including new hardware and paint.
Sarah’s advice: “Don’t rush. Prep is everything. I almost skipped cleaning, but I’m glad I didn’t. The doors feel smooth, and the color is perfect.”
The Most Overlooked Steps
Many guides skip over these, but they matter for a pro result:
- Label everything: It’s easy to mix up doors and drawers. Use painter’s tape and a marker.
- Clean between every stage: Dust and grease hide everywhere.
- Check for drips or missed spots after each coat, especially on door edges.
Should You Hire A Pro Or Diy?
Refinishing cabinets is a project most homeowners can handle if they’re patient. If you want a perfect, factory-like finish and don’t have time or tools, hiring a pro might be worth it. Pros use spray equipment and can finish a kitchen in a few days.
But the cost is much higher.
If you’re comfortable with basic tools and want to save money, DIY is a great choice. Just be honest about your skill level and the time you can commit.
When To Refinish (best Season)
Spring and fall are the best times. Extreme heat or humidity can make paint dry too fast or too slow. Paint in a well-ventilated room, and avoid painting on very humid or rainy days.
Eco-friendly Refinishing Tips
If you want to reduce your project’s environmental impact:
- Choose low-VOC (volatile organic compound) paints and primers.
- Recycle old hardware or donate it to building reuse centers.
- Use reusable drop cloths instead of plastic.
- Clean brushes with water (if using water-based products) instead of solvents.
For more on choosing green products, visit the EPA Safer Choice page.
Frequently Asked Questions
How Long Does Cabinet Refinishing Really Last?
A properly refinished cabinet finish can last 5 to 10 years with regular care. The key is using high-quality materials and preparing the surfaces well. Kitchens with heavy use or lots of moisture may need touch-ups sooner.
Can I Paint Over Cabinets Without Sanding?
It’s possible but not recommended. Sanding creates a rough surface that helps primer and paint stick. Skipping sanding often leads to peeling or chipping later. Some “no-sand” products exist, but they don’t work as well on greasy or glossy cabinets.
What’s The Best Paint Finish For Dove Gray Cabinets?
Semi-gloss and satin are the best choices. They’re easy to clean, resist stains, and reflect light well. Flat paints look nice but show dirt and are hard to wipe clean.
How Do I Fix Chips Or Scratches In My Painted Cabinets?
Clean the area, sand lightly, and touch up with leftover paint using a small brush. For deeper chips, fill with wood filler, sand smooth, then repaint and seal.
Is It Cheaper To Refinish Or Replace Kitchen Cabinets?
Refinishing is almost always much cheaper. Most homeowners spend $200–$600 on materials for a medium kitchen, while new cabinets often cost $4,000 or more. If your cabinet boxes are solid, refinishing gives the best value.
Refinishing dove gray kitchen cabinets is a project that takes time and effort, but the results are worth it. With careful preparation and the right materials, you can give your kitchen a fresh, modern look without breaking the bank. Start with small steps, be patient, and enjoy your updated space for years to come.