
If you own a swimming pool with a vinyl liner, you know how important it is to keep your pool looking clean and inviting. But over time, you may notice white, chalky stains forming on the walls or floor. These are usually calcium deposits, and they can be stubborn to remove. Left unchecked, calcium buildup not only makes your pool look unattractive but can also damage the vinyl liner, leading to expensive repairs.
Many pool owners struggle with this problem. It’s easy to think regular cleaning is enough, but calcium is persistent. If you want to keep your vinyl pool liner in top shape, you need a smart strategy for dealing with these deposits.
In this guide, you’ll learn what causes calcium buildup, how to remove it, and most importantly, how to stop it from coming back. Whether you’re a new pool owner or have years of experience, you’ll find practical solutions and expert tips you might not have considered before.
Understanding Calcium Buildup In Vinyl Pool Liners
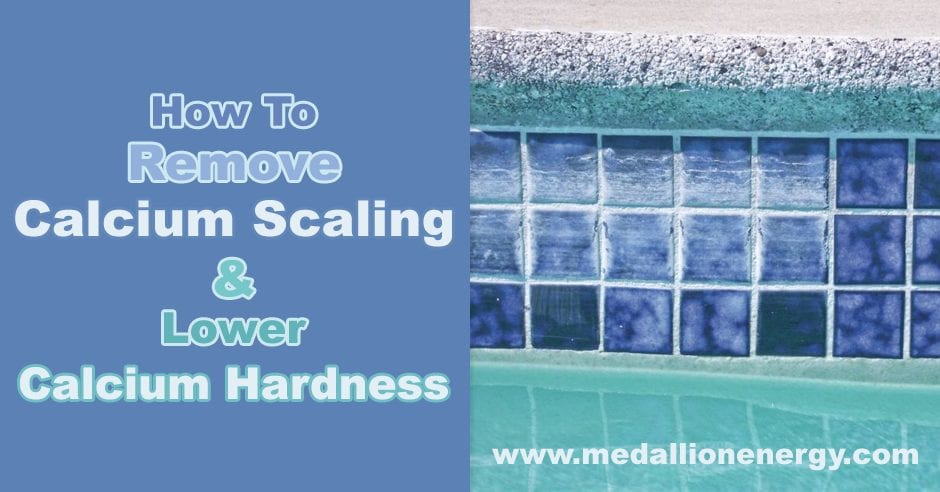
Calcium buildup happens when hard water—water with a high mineral content—comes into contact with your pool liner. As water evaporates, minerals like calcium carbonate and calcium silicate are left behind. Over time, these minerals create visible white or grayish stains.
There are two main types of calcium deposits:
- Calcium carbonate: This is the most common form. It looks like white, flaky powder and is relatively easier to remove.
- Calcium silicate: This is much harder, forms grayish-white spots, and takes longer to develop. It’s more difficult to clean and often requires specialized treatment.
Most vinyl pool owners deal with calcium carbonate, but it’s important to identify the type of deposit before choosing a removal method.
Why Calcium Buildup Happens
Several factors increase the risk of calcium buildup:
- High calcium hardness in your pool water
- Alkaline water (high pH)
- Warm temperatures and rapid evaporation
- Poor water circulation
- Adding hard tap water to the pool
If you live in an area with hard tap water, your pool is at higher risk. Testing your water regularly is the first step to controlling calcium levels.
Signs Of Calcium Deposits On Vinyl Liners
It’s not always obvious when calcium is starting to build up. Early signs can include:
- Faint white streaks along the waterline
- Rough or gritty texture on the liner when you run your hand over it
- Cloudy water that doesn’t clear after filtration
- Greyish patches that don’t fade with brushing
Over time, these stains can become thick, crusty, and very difficult to remove. If you catch them early, cleaning is much easier and less risky for your liner.
Credit: www.medallionenergy.com
Tools And Supplies Needed
Before you start, gather the right tools and chemicals. Removing calcium from a vinyl liner requires gentle products—harsh chemicals can damage the liner and shorten its life.
You’ll need:
- Soft pool brush (nylon bristles, not metal)
- Pool vacuum
- Non-abrasive cleaning pad or sponge
- Vinyl-safe calcium remover (check label for compatibility)
- White vinegar or muriatic acid (for heavy buildup, use with caution)
- Rubber gloves and safety goggles
- Bucket for mixing solutions
- Test kit (for pH, alkalinity, and calcium hardness)
- Clean towels
Tip: Never use pumice stones or abrasive pads on vinyl liners. They can scratch or tear the surface.
Step-by-step: How To Remove Calcium From A Vinyl Pool Liner
1. Test And Balance Your Pool Water
Before you touch the stains, check your pool water’s chemistry. Imbalanced water can make calcium buildup worse or return quickly after cleaning.
- Test pH: Ideal range is 7.2–7.6. High pH increases calcium deposits.
- Test alkalinity: Target 80–120 ppm (parts per million).
- Test calcium hardness: Aim for 200–400 ppm.
If levels are too high, lower them before you start cleaning. Add pH decreaser or use a water softener product as needed.
2. Lower The Water Level
For best results, drain the pool water just below the affected area. This gives you direct access to the stains without dilution from pool water.
- Use your pool’s pump or a submersible pump.
- Work in small sections if deposits are widespread.
3. Brush The Liner Gently
Use a soft nylon brush or a non-abrasive cleaning pad. Brush the stained area gently to remove loose debris and surface buildup. Don’t scrub aggressively—vinyl is easy to tear.
4. Apply A Calcium Remover
Choose a vinyl-safe commercial calcium remover. Apply according to the manufacturer’s directions:
- Wet the area with clean water first.
- Use a sponge or soft pad to apply the remover directly to the stain.
- Let it sit for the recommended time (usually 5–10 minutes).
- Gently scrub in a circular motion.
- Rinse with clean water.
Non-obvious insight: Many beginners use too much pressure when scrubbing. This can cause micro-tears in the liner, leading to leaks. Always keep your movements gentle.
5. Try Natural Solutions For Light Stains
For mild calcium deposits, white vinegar is effective and safe:
- Mix equal parts vinegar and warm water in a bucket.
- Soak a sponge in the solution.
- Press the sponge against the stain and hold for a few minutes.
- Wipe away the residue and rinse.
This method is safer for your liner and the environment.
6. Tackle Heavy Buildup With Caution
For tough calcium silicate stains, you can use diluted muriatic acid, but only as a last resort:
- Wear gloves and goggles.
- Mix one part muriatic acid with ten parts water in a bucket (always add acid to water, never the other way).
- Apply the solution with a sponge, avoiding spills.
- Let it sit for 1–2 minutes, then scrub gently and rinse thoroughly.
Never let acid sit too long or touch large areas at once. Test a small spot first.
7. Vacuum And Clean The Pool
Once deposits are removed, use a pool vacuum to clean any residue that fell into the water. Wipe the liner with a clean towel to remove any leftover cleaner.
8. Refill And Rebalance Water
Refill your pool to the proper level. Re-test and adjust pH, alkalinity, and calcium hardness. This helps prevent new buildup.
Expert tip: After cleaning, add a sequestering agent to your pool. This chemical binds minerals and keeps them from settling as deposits on your liner.

Credit: www.amazon.com
Preventing Future Calcium Buildup
Removing calcium is only half the job. Keeping it away is much easier than deep cleaning every few months.
1. Regular Water Testing
Test your pool water at least once a week during swim season. Watch for:
- PH above 7.6
- Calcium hardness above 400 ppm
- High alkalinity
Keeping levels in check prevents most calcium problems.
2. Control Water Source
If your tap water is hard (high mineral content), consider using a pre-filter when adding water to your pool. Some pool owners install a softener for their fill line.
3. Use A Sequestering Agent
Add a pool sequestering agent after each refill or chemical shock. This product binds calcium and keeps it dissolved, so it can’t form deposits.
4. Keep The Liner Clean
Brush the liner every week using a soft brush. Focus on the waterline and corners, where deposits usually start.
5. Control Evaporation
Warmer water evaporates faster, leaving more minerals behind. Cover your pool when not in use to slow evaporation, especially during hot weather.
6. Maintain Good Circulation
Run your pool pump at least 8 hours per day during swim season. Poor circulation allows minerals to settle and stick.
7. Monitor For Early Signs
Look for white lines or rough patches and act quickly. Small stains are much easier to remove than thick, old deposits.
Comparing Calcium Removal Methods
Not all cleaning methods are equal. Here’s how some common options compare for vinyl pool liners:
| Method | Effectiveness | Safety for Vinyl | Ease of Use | Cost |
|---|---|---|---|---|
| Commercial Calcium Remover | High | Safe if vinyl-compatible | Easy | Moderate |
| White Vinegar Solution | Moderate | Very safe | Very easy | Low |
| Muriatic Acid (Diluted) | Very high | Risky | Difficult | Low |
| Abrasive Pads/Pumice Stone | High | Unsafe | Moderate | Low |
Takeaway: Choose a method that’s proven safe for vinyl. Acid works, but it’s risky. Vinegar and commercial removers are safer and effective for most cases.
How Water Chemistry Affects Calcium Buildup
Understanding your pool’s chemistry is key to long-term prevention. Here’s how the main factors interact:
| Chemical | Ideal Range | Effect on Calcium |
|---|---|---|
| pH | 7.2–7.6 | High pH increases deposits |
| Alkalinity | 80–120 ppm | High levels make scaling more likely |
| Calcium Hardness | 200–400 ppm | High hardness = more buildup |
Insight: Many new pool owners focus only on chlorine and ignore hardness or alkalinity. But all these factors work together—keeping them balanced is your best defense.
Common Mistakes To Avoid
Even experienced pool owners make errors that lead to more calcium buildup or damage the liner.
- Using harsh scrubbers: Never use metal brushes, pumice stones, or abrasive pads on vinyl. They can scratch, tear, or weaken the liner.
- Ignoring water chemistry: Cleaning without adjusting pH and hardness means the problem will come back quickly.
- Overusing acid: Muriatic acid is powerful but can burn the liner or cause fading if used incorrectly.
- Letting stains sit too long: The older the deposit, the harder it is to remove. Early action saves time and money.
- Not rinsing after cleaning: Always rinse away any cleaning product. Leftover chemicals can damage the vinyl or affect water chemistry.
- Skipping regular maintenance: Prevention is always easier than repair. Brush and test often.
How To Identify Stubborn Calcium Vs. Other Stains
Sometimes, white stains on a vinyl liner are not calcium. Here’s how to tell:
- Calcium deposits: Chalky, powdery, or hard and crusty. Usually form at the waterline.
- Algae: Green or brown, may feel slimy.
- Organic stains: Tan, brown, or black, often from leaves or dirt.
- Metal stains: Blue, green, or rusty color. Caused by iron, copper, or manganese.
If you’re not sure, apply a few drops of vinegar to the stain. If it fizzes, it’s calcium carbonate.
Professional Help: When To Call An Expert
In some cases, DIY cleaning isn’t enough. If you have thick, widespread deposits or suspect liner damage, it’s safer to call a pool professional. They have stronger products, special tools, and know how to handle stubborn stains without harming your liner.
A professional can also check for:
- Liner tears or leaks hidden under calcium
- Underlying water chemistry problems
- Long-term solutions for recurring calcium
This can save you money and prevent bigger problems down the line.
Real-world Example: Tackling Calcium In A Family Pool
Consider a family in Arizona, where the water is very hard. They noticed a white, rough line around their vinyl pool liner. At first, they tried scrubbing with a kitchen sponge, but the stains came back quickly.
After testing their water, they found pH at 8. 0 and calcium hardness at 450 ppm—both too high. They used a vinyl-safe calcium remover, added a sequestering agent, and adjusted their pH and hardness down to normal levels. Now, they brush the liner weekly and test the water every Sunday.
The stains haven’t returned, and the pool looks great.
Key lesson: Cleaning works best when combined with proper water chemistry and regular maintenance.
Comparing Diy Vs. Professional Calcium Removal
If you’re deciding whether to clean the pool yourself or hire a pro, compare these factors:
| Factor | DIY | Professional Service |
|---|---|---|
| Cost | Low to moderate | High |
| Risk to Liner | Moderate (if not careful) | Low |
| Time Required | Several hours | Usually 1–2 hours |
| Effectiveness | Good for mild/moderate stains | Excellent for severe stains |
| Long-term Prevention | Owner must maintain | Often includes follow-up advice |
For most homeowners, DIY is enough for small deposits. For heavy buildup or if you’re unsure, consider professional help.
Essential Maintenance Tips For Vinyl Pool Liners
Protecting your liner from calcium (and other problems) is about more than just cleaning. Follow these tips:
- Inspect the liner every month for tears, bubbles, or discoloration.
- Clean the waterline weekly with a soft brush.
- Keep debris out of the pool—leaves and dirt can cause staining.
- Shock the pool as needed, but never over-chlorinate (can fade the liner).
- Check for leaks if you see water loss or bubbles under the liner.
- Store chemicals safely and never mix different products.
When To Replace A Vinyl Pool Liner
Even with the best care, vinyl liners don’t last forever. Signs you may need a new liner:
- Multiple leaks or tears that can’t be patched
- Severe fading or brittle texture
- Liner pulling away from the walls or floor
- Stains that won’t clean even after professional treatment
Most liners last 7–15 years with good care. If yours is older and calcium keeps returning, replacement may be the best option.

Credit: www.amazon.com
Where To Find More Help
If you need more details, check the official Pool & Hot Tub Alliance website for science-backed pool care advice: Pool & Hot Tub Alliance.
Frequently Asked Questions
What Causes Calcium Buildup On Vinyl Pool Liners?
Calcium buildup happens when your pool water has high mineral content, especially calcium hardness and high pH. Warm temperatures and evaporation leave minerals behind, which form white or grayish stains on the liner.
Is It Safe To Use Muriatic Acid On A Vinyl Liner?
Muriatic acid can remove tough calcium stains, but it’s risky for vinyl. Always dilute it and test a small area first. Never let acid sit too long, and rinse thoroughly. For most cases, use a vinyl-safe cleaner or vinegar instead.
How Often Should I Clean Calcium Deposits From My Liner?
Clean as soon as you see white streaks or rough patches. For most pools, a thorough check and cleaning every 1–2 months during the swim season is enough, combined with weekly brushing.
Can I Prevent Calcium Buildup Completely?
You can greatly reduce it by keeping water chemistry balanced, especially pH and hardness. Use a sequestering agent, brush often, and control your water source. Complete prevention is hard in areas with very hard water, but regular maintenance keeps it under control.
What If The Stains Don’t Come Off After Cleaning?
If stains remain after gentle cleaning and balancing your water, they may be old or very thick deposits. Try a professional-grade remover or consult a pool expert. Sometimes, the liner may need replacement if deposits are severe.
If you stay proactive and use the right methods, your vinyl pool liner can stay smooth, clean, and beautiful for many years. Regular care and smart prevention are your best tools against stubborn calcium buildup.