
Refinishing your kitchen cabinets can give your kitchen a whole new look without the expense of a full renovation. One of the most important steps in this process is sanding kitchen cabinets. Sanding ensures that new paint or stain will stick well, look smooth, and last a long time. Many homeowners hesitate to start, worrying it’s difficult or time-consuming, but with the right approach, anyone can achieve professional-looking results.
This article is your complete guide to sanding kitchen cabinets. Whether you’re updating old oak doors, modernizing maple cabinets, or just refreshing the finish, you’ll learn everything you need. You’ll find step-by-step instructions, tips for choosing the right tools, advice on common mistakes, and answers to questions beginners often have.
By the end, you’ll know how to sand kitchen cabinets with confidence, avoid problems, and get the best results possible.
Why Sanding Kitchen Cabinets Matters
Before picking up any tools, it’s good to understand why sanding is so important. Old cabinet surfaces often have layers of grease, scratches, and finish. If you paint or stain without sanding, the new finish may peel, bubble, or show flaws.
Sanding removes the shiny layer (the old finish), smooths out scratches, and creates a surface that paint or stain can grip. This not only improves the look but also helps your cabinets last longer. Even if cabinets seem smooth, skipping sanding is a mistake that can lead to disappointment.
Safety First: Preparation And Precautions
Working with sanders and old finishes creates dust and sometimes fumes. It’s important to take safety seriously, especially if your cabinets are old (before 1978, they may have lead paint). Here’s how to stay safe:
- Ventilate the Area: Open windows, use fans, and keep air moving.
- Wear Protection: Use a dust mask or respirator, safety glasses, and gloves.
- Check for Lead: If your home is old, consider a lead paint test kit from a hardware store. If lead is present, use special precautions or hire a pro.
- Keep Area Clean: Place drop cloths to collect dust and protect floors.
Taking a few minutes to set up safely can prevent health problems and make cleanup easier.

Credit: www.brushhouseofnorthjersey.com
Tools And Materials: What You Need
Having the right tools makes sanding easier and gives better results. Here’s what you’ll need:
- Screwdriver: For removing doors and hardware
- Sandpaper: Various grits (explained below)
- Sanding block or sponge: For hand sanding
- Orbital sander: Speeds up flat surfaces
- Shop vacuum: For dust control
- Tack cloth: Removes fine dust
- Masking tape and plastic sheets: Protects areas you’re not sanding
Choosing Sandpaper Grit
Sandpaper comes in different grits, which measure how rough it is. Lower numbers are rougher; higher numbers are smoother. For kitchen cabinets, you’ll need:
- 80-100 grit: For removing old finish or heavy sanding
- 120-150 grit: For smoothing after heavy sanding
- 180-220 grit: For final smoothing before painting or staining
Switching grits in steps gives you a smooth, even surface.
Power Sanders Vs. Hand Sanding
- Orbital sanders are great for flat panels and large areas. They save time but can be too rough if not used carefully.
- Hand sanding works better for corners, details, and edges. Sanding blocks or foam sanding pads fit into grooves and give you more control.
Pro tip: Some beginners use only one grit or tool. For best results, combine both methods and several grits.
Step 1: Remove Cabinet Doors, Drawers, And Hardware
Sanding cabinets in place is possible, but removing doors, drawers, and hardware gives a much better result. Here’s why:
- You can reach all surfaces, including edges and corners.
- It’s easier to sand flat, avoiding drips or uneven spots.
- There’s less risk of damaging walls, floors, or hardware.
How to do it:
- Use a screwdriver to take off the doors and drawer fronts.
- Remove all handles, knobs, and hinges.
- Label each piece with masking tape so you know where it belongs.
- Set up a workspace with good ventilation and a stable surface.
Non-obvious insight: Some people forget to label pieces, which leads to confusion and misaligned doors later. Take 10 minutes to label everything, and you’ll save hours at the end.
Step 2: Clean Surfaces Thoroughly
Paint or stain won’t stick to greasy, dirty cabinets, no matter how much you sand. Start by cleaning:
- Mix warm water with a degreaser or mild dish soap.
- Scrub all surfaces with a sponge or cloth.
- Pay extra attention to corners, handles, and under lips.
- Rinse with clean water and let dry completely.
If you skip cleaning, sandpaper will clog quickly, and the finish can fail. For heavy grease, use a product like TSP (trisodium phosphate), but wear gloves and rinse well.
Step 3: Repair Any Damage
Now is the time to fix scratches, holes, or cracks. Sanding will not hide deep flaws; it can even make them more visible. Here’s what to do:
- Fill dents, scratches, or holes with wood filler.
- Let the filler dry as recommended (usually 15-60 minutes).
- Sand the filled spots with 120-150 grit sandpaper until smooth and level.
Check for loose veneer or splinters. Glue and clamp if needed, then sand gently.
Pro tip: Many beginners sand before repairing, which can make repairs harder. Always repair first, then sand.

Credit: www.youtube.com
Step 4: Sand The Cabinet Frames, Doors, And Drawers
Now you’re ready for the main step: sanding. Break it into manageable tasks.
Sanding The Frames
Start with the cabinet boxes attached to your walls (the frames):
- Use 100-120 grit sandpaper on flat areas with an orbital sander.
- Sand with the grain (direction of the wood lines), not against it.
- Corners and grooves: Switch to a sanding sponge or folded sandpaper.
- After first pass, switch to 150-180 grit for a smooth finish.
Non-obvious insight: Pressing too hard can create dips or uneven spots. Let the sandpaper do the work—gentle, even pressure is best.
Sanding Doors And Drawer Fronts
Lay doors and drawer fronts flat on your work surface.
- Start with 100-120 grit for heavy finish, or 150 grit for light sanding.
- Sand all flat areas first, then edges and corners.
- For detailed profiles, use a sponge or special sanding pad.
- Move to 180-220 grit for the final pass.
Edge tips: Edges often need less pressure and finer sandpaper, as they can round off quickly. Don’t over-sand corners or they will lose shape.
Sanding Between Grooves And Details
Many cabinets have raised panels or decorative grooves. These areas are tricky but important.
- Use a flexible sanding sponge or wrap sandpaper around a dowel.
- Sand gently to keep shapes sharp.
- For very detailed work, try a small brush with sandpaper or a detail sander.
Common mistake: Skipping grooves leads to peeling or rough finish later. Take your time on these details.
Step 5: Remove All Dust
Even the best sanding job can look bad if dust remains. Dust interferes with paint and stain, leaving bumps or rough spots.
- Use a shop vacuum with a brush attachment to remove loose dust.
- Wipe all surfaces with a tack cloth (sticky cheesecloth) to catch fine dust.
- Repeat vacuuming and wiping until no dust is left.
Extra tip: Wait 15 minutes after wiping—sometimes dust settles again. Wipe once more before painting or staining.
Step 6: Optional—wet The Wood For A Super Smooth Finish
For a very smooth finish, some experts recommend a “water pop. ” Lightly dampen a clean cloth and wipe all sanded surfaces. This raises the wood grain slightly. When dry, sand again lightly with 220 grit. This step is optional but makes the final finish feel extra smooth.
Step 7: Final Inspection And Prep For Paint Or Stain
Before moving on, check everything:
- Are all surfaces smooth to the touch?
- Is the old finish completely removed or at least dulled?
- Are there any rough spots, scratches, or dings left?
If you find flaws, do a quick spot sanding and dust removal. Mask off any areas you don’t want to paint or stain (walls, glass, etc. ).
Final prep: Place doors and drawers on risers (blocks) so you can paint or stain edges without sticking to the surface.
How Long Does Sanding Kitchen Cabinets Take?
Timing depends on cabinet size, detail level, and your tools:
- Small kitchen (10-15 doors/drawers): 6-8 hours
- Medium kitchen (20-25 pieces): 8-12 hours
- Large kitchen (30+ pieces): 12-18 hours
If it’s your first time, allow extra time for setup, learning, and breaks.
Data insight: Power sanders speed up the job by about 30-40% compared to hand sanding alone.
Comparing Sanding Methods
Here’s a look at how different sanding methods compare for kitchen cabinets:
| Method | Speed | Best For | Drawbacks |
|---|---|---|---|
| Orbital Sander | Fast | Flat panels, large areas | Not for details, risk of gouges |
| Sanding Block | Medium | Edges, gentle curves | Slower on large surfaces |
| Sanding Sponge | Slow | Grooves, profiles, corners | Time-consuming for big jobs |
| Detail Sander | Medium | Tight corners, small details | Hard to use on large areas |
Non-obvious insight: Combining methods gives the best results. Power tools for main surfaces, hand tools for edges and details.
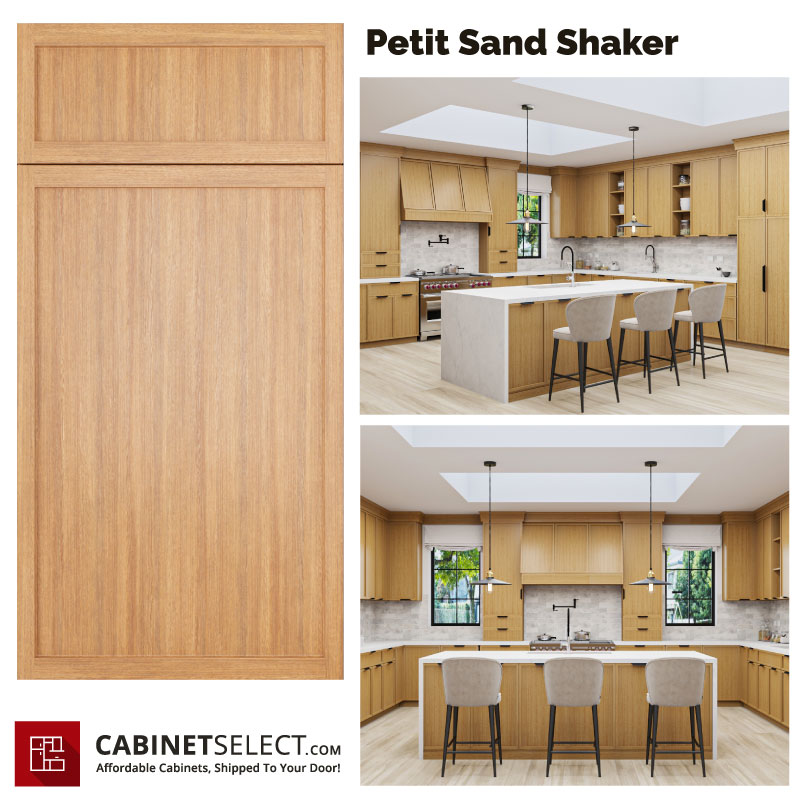
Credit: cabinetselect.com
Common Mistakes And How To Avoid Them
Even careful DIYers make mistakes. Here are pitfalls to watch for:
- Skipping grits: Moving from rough to fine sandpaper in steps is important. Skipping leaves scratches.
- Sanding against the grain: This creates scratches that show under paint or stain.
- Not cleaning enough: Dust ruins smooth finishes.
- Over-sanding edges: This rounds off sharp profiles and changes the look.
- Missing inside corners: Leaves old finish that can peel later.
- Using worn-out sandpaper: Dull paper polishes instead of sanding. Change often.
- Rushing the process: Haste leads to uneven, patchy results.
Pro tip: Take photos as you go—before and after. This helps track progress and spot missed areas.
When To Strip Vs. When To Sand
Sometimes, cabinets have very thick paint or tough finishes that make sanding alone very hard. In these cases, consider stripping first.
| Situation | Best Approach |
|---|---|
| Thin finish or bare wood | Sanding only |
| Multiple thick paint layers | Chemical stripper, then sanding |
| Heavy varnish or shellac | Stripping, then sanding |
| Lead-based paint | Professional removal needed |
Stripping removes most of the finish, making sanding easier and faster. Always follow safety guidelines with chemicals.
Sanding For Different Cabinet Types
Not all cabinets are the same. The material affects how you sand:
Solid Wood
- Can handle more sanding.
- Shows the grain under stain.
- Watch for soft spots or knots.
Veneer
- Thin layer of wood over plywood.
- Sand lightly—too much removes the veneer.
- Always use fine grits (150-220) and gentle pressure.
Mdf (medium-density Fiberboard)
- Very smooth, no grain.
- Sands easily but can gouge or fuzz.
- Use fine grits and avoid water.
Pro tip: Test in a hidden spot to see how the material reacts before doing the full surface.
Preparing For Paint Vs. Stain
Your final finish affects sanding steps:
- Painting: Remove shine and smooth the surface. Minor scratches will be hidden.
- Staining: Surface must be extra smooth; flaws will show. Sand in finer steps (180, then 220 grit).
Some primers say “no sanding needed,” but for best results, always sand at least lightly.
What To Do After Sanding
With sanding complete, you’re ready for finishing:
- Prime (for paint): Use a high-quality primer suited for cabinets.
- Stain (for wood look): Apply evenly with a brush or cloth, following wood grain.
- Paint: Use cabinet-grade paint for durability.
- Seal: Apply clear sealer or topcoat for extra protection.
Follow drying times and sand lightly between coats if recommended.
Tools And Materials Cost Comparison
Here’s a quick look at average costs for sanding supplies:
| Item | Low Cost | High Cost |
|---|---|---|
| Sandpaper (pack) | $5 | $15 |
| Orbital Sander | $35 | $80 |
| Sanding Sponge/Block | $2 | $10 |
| Tack Cloth | $2 | $5 |
| Shop Vacuum (optional) | $50 | $150 |
| Masking Tape/Drop Cloths | $10 | $25 |
Tip: Many hardware stores rent sanders if you don’t want to buy one.
Practical Tips For A Professional Finish
- Work in good light—missed spots are easier to see.
- Sand in small sections to avoid fatigue and mistakes.
- Replace sandpaper often for best results.
- Don’t skip dust removal—even tiny dust can ruin the finish.
- Test your finish on a scrap or hidden area first.
Non-obvious tip: If you plan to paint, tint your primer to match your paint color. This gives better coverage.
How To Handle Curved Or Detailed Cabinets
Many older cabinets have curved edges, raised panels, or carved details. These need special care:
- Use a flexible sanding sponge or small foam block.
- For carved areas, wrap sandpaper around a pencil or dowel.
- Avoid power sanders—hand work gives more control.
Slow, gentle sanding keeps details sharp and prevents damage.
Dealing With Laminate Cabinets
Laminate is a thin plastic layer. You can sand lightly to dull the surface, but don’t try to remove it.
- Use 220 grit sandpaper, very light pressure.
- Focus on cleaning more than sanding.
- Use a bonding primer before painting.
Don’t sand through the laminate—this creates rough spots that paint won’t cover.
Fixing Mistakes After Sanding
If you find a scratch, dent, or rough spot after priming or painting:
- Let paint dry completely.
- Lightly sand the area with fine grit (220).
- Wipe clean, then apply touch-up paint or stain.
A little extra care at this stage gives a perfect final look.
Environmental Tips And Dust Management
Sanding creates a lot of wood dust. Here’s how to keep it under control:
- Use a vacuum sander attachment if possible.
- Seal off doorways with plastic sheets.
- Clean up after each work session.
- Dispose of dust safely—don’t wash down the drain.
For more tips on safe wood refinishing, check resources like the EPA Renovation, Repair and Painting Program.
Frequently Asked Questions
How Do I Know When I’ve Sanded Enough?
You’ve sanded enough when the surface feels smooth, the old finish is dull or mostly gone, and there are no shiny spots. Run your hand over the wood—if you feel bumps or roughness, sand more. Don’t over-sand, especially on veneer.
Can I Sand Cabinets Without Removing The Doors?
It’s possible, but not recommended. Leaving doors on makes it harder to sand edges and corners and increases mess. If you must, tape off hinges and hardware and use extra care.
What’s The Best Sandpaper Grit For Kitchen Cabinets?
Start with 100-120 grit to remove old finish, then move to 150-180 grit for smoothing, and finish with 220 grit before painting or staining. Always sand with the wood grain.
Is Sanding Necessary If I’m Using A “no-sand” Primer?
Light sanding is still recommended. “No-sand” primers help with adhesion, but dulling the old finish gives the best results. Skipping sanding can lead to peeling or chipping paint.
How Do I Deal With Cabinets That Have Lead Paint?
If your cabinets are from before 1978, test for lead paint. Don’t sand lead paint—it’s dangerous. Hire a certified professional for safe removal. For more, see the EPA’s lead safety rules.
Sanding kitchen cabinets might seem like a big task, but with the right steps, tools, and patience, anyone can get a beautiful, lasting result. Start with safety and preparation, use the correct sanding method for your cabinet type, and don’t rush.
Each step—from cleaning and repairing to sanding and dust removal—matters for the final look and durability. The time you invest in careful sanding pays off every time you walk into your refreshed kitchen. With these detailed tips and insights, you’re ready to tackle your cabinets and transform your space with confidence.