
Sealing your kitchen cabinets is one of the smartest ways to protect them from moisture, stains, and everyday wear. Many people spend good money on beautiful cabinets, but forget that their finish is what keeps them looking new. Over time, grease, water, and even just regular cleaning can break down the cabinet surface, leading to dullness, swelling, or even mold.
Whether your cabinets are new and unprotected, or you want to refresh an older finish, learning how to seal kitchen cabinets can save you money and hassle in the long run.
This guide will walk you through everything you need to know—what sealing is, how to choose the right products, step-by-step instructions, and the simple mistakes that often ruin results. Even if you’re new to DIY, you’ll find clear advice and practical tips to make the job easier and more effective.
Let’s give your kitchen cabinets the protection and shine they deserve.
Why Seal Kitchen Cabinets?
Kitchen cabinets face more challenges than almost any other furniture in your home. Daily exposure to steam, water, oils, and cleaning products can quickly damage unprotected wood or laminate.
Sealing creates a protective barrier that locks out moisture, prevents stains, and makes cleaning much easier. For wood cabinets, a good sealer also enhances the wood’s natural beauty, giving it a richer look.
If you skip sealing, you’ll likely see these problems:
- Water stains and swelling near the sink or dishwasher
- Grease build-up that’s hard to clean
- Fading or dullness from UV and chemicals
- Cracks and chips in the finish
- Mold or mildew in damp spots
Sealing isn’t just about looks—it extends the life of your cabinets and keeps your kitchen healthier.
Understanding Cabinet Materials
Not all cabinets are the same. The material affects what kind of sealer you need and how you apply it. Here’s a quick look at the most common types.
| Cabinet Material | Common Issues | Best Sealing Approach |
|---|---|---|
| Solid Wood | Absorbs moisture, stains easily, can warp | Penetrating or surface sealers |
| Veneer (wood over plywood/MDF) | Edges peel, surface dulls, water damage | Gentle surface sealers, avoid sanding through |
| Laminate | Surface scratches, peels, stains can set in seams | Special laminate sealers or polycrylic |
| Painted Cabinets | Chipping, staining, fading | Clear topcoat, usually water-based |
Non-obvious insight: Even factory-finished cabinets can benefit from resealing. Over time, the original topcoat wears down, especially near handles and sinks.
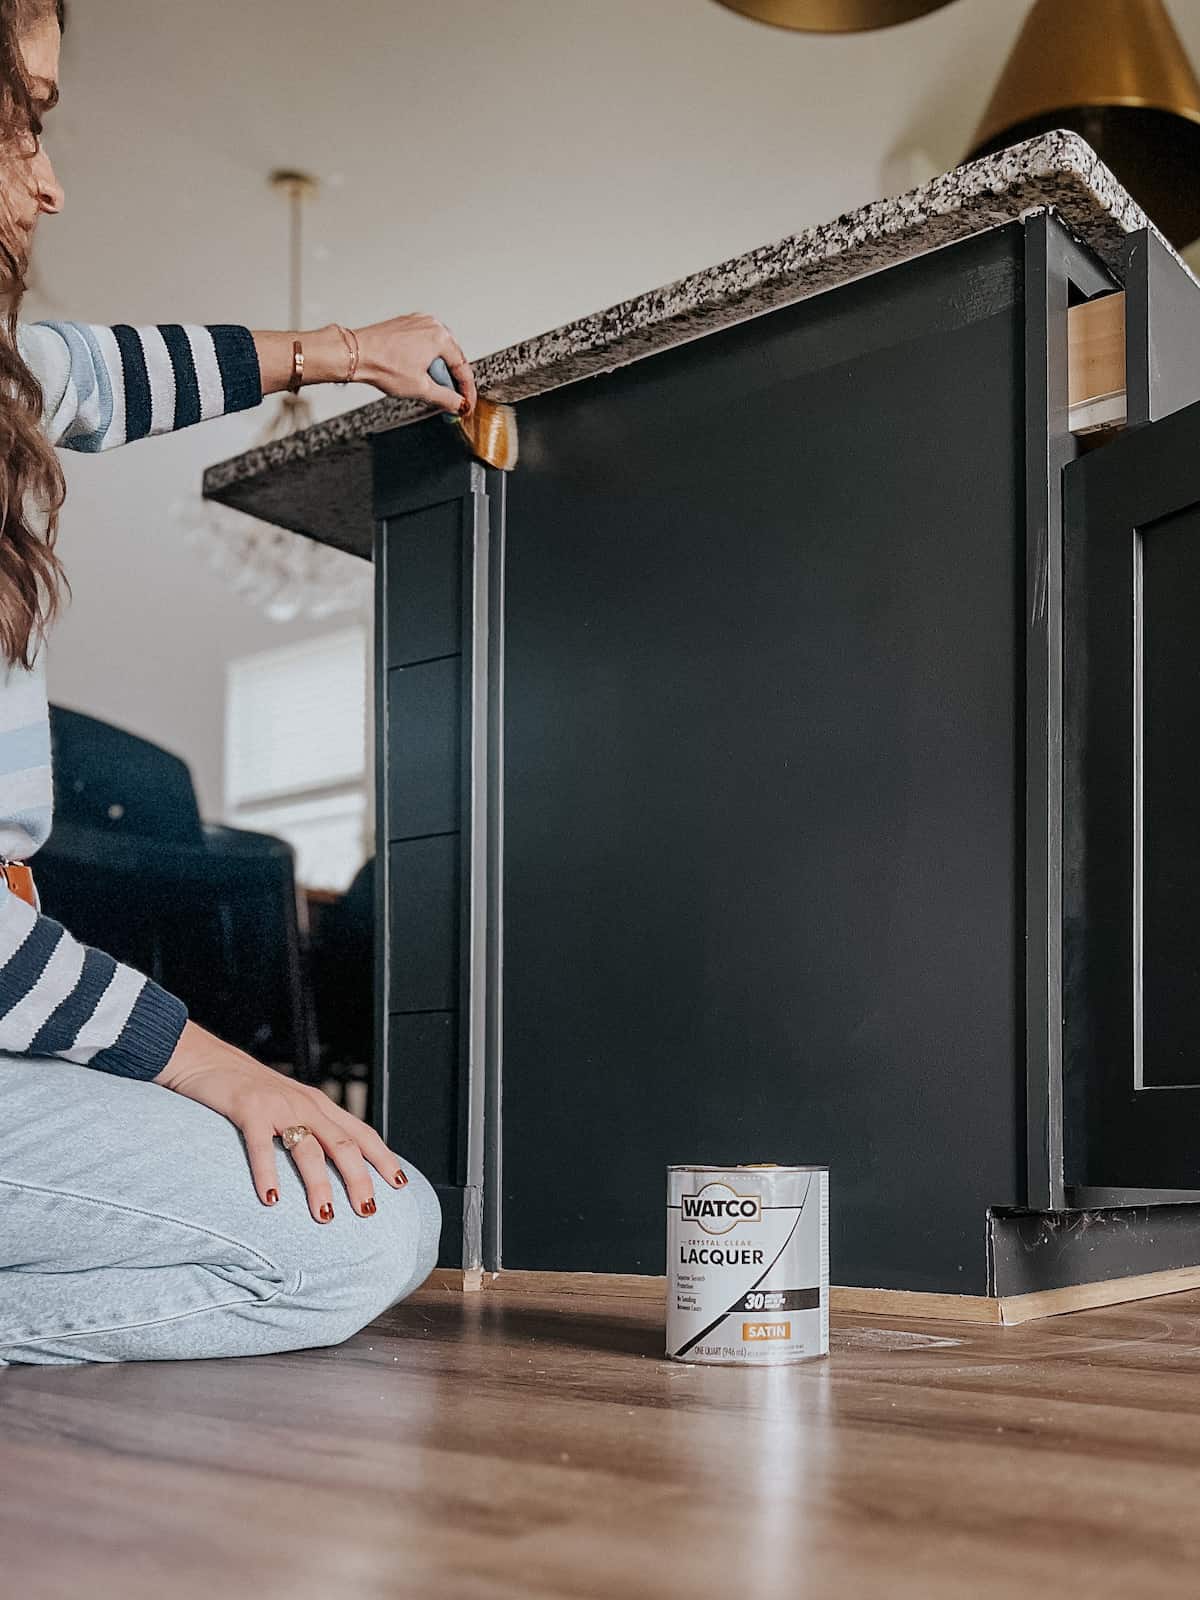
Credit: www.loveandrenovations.com
Types Of Sealers For Kitchen Cabinets
Choosing the right sealer is key. Each type has pros and cons. Here are the main options you’ll find:
1. Polyurethane
Very durable, comes in water-based or oil-based formulas. Water-based is low odor, fast-drying, and won’t yellow. Oil-based gives a deeper look but takes longer to cure and can darken wood.
2. Polycrylic
Similar to polyurethane but water-based and less likely to yellow. Good for light woods and painted cabinets.
3. Varnish
Traditional choice, very tough, but can be hard to apply smoothly. Often used for high-end wood cabinets.
4. Shellac
Natural product, gives a warm finish. Not as moisture-resistant as polyurethane but easy to repair.
5. Wax
Soft, subtle protection. Good for a rustic look but needs frequent reapplication and isn’t very water-resistant.
6. Lacquer
Very hard, glossy finish. Usually sprayed on in factories, tricky for DIY at home due to fumes.
Non-obvious insight: Water-based sealers are often recommended for kitchens because they resist yellowing and clean up with soap and water.
| Sealer Type | Best For | Drawbacks |
|---|---|---|
| Polyurethane (oil-based) | High-traffic, dark wood | Yellows, slow cure, odor |
| Polycrylic | Light wood, painted cabinets | Less tough than oil-based |
| Wax | Rustic or antique cabinets | Needs frequent re-coat |
| Shellac | Quick touch-ups, easy repairs | Less water resistant |
Tools And Materials You’ll Need
Before you start, gather everything you need. Having the right tools makes sealing much easier and gives better results.
- Protective gloves and a mask (especially for oil-based products)
- Screwdriver (for removing cabinet doors and hardware)
- Drop cloths or old sheets to protect floors and counters
- Sandpaper (usually 220 grit)
- Tack cloth or microfiber cloth (for dust removal)
- Paintbrushes (high-quality synthetic for water-based, natural bristle for oil-based)
- Small foam rollers (optional, for smooth finishes)
- Sealer of your choice (read the label to be sure it’s for cabinets)
- Mild soap and water (for cleaning)
- Painter’s tape (to protect walls and hinges)
- Stir sticks (never shake sealers)
- Clean containers (for pouring or mixing sealer)
Buying the wrong brush is a common beginner mistake. For water-based sealers, use synthetic bristle brushes. Natural bristle brushes can absorb water and leave streaks.
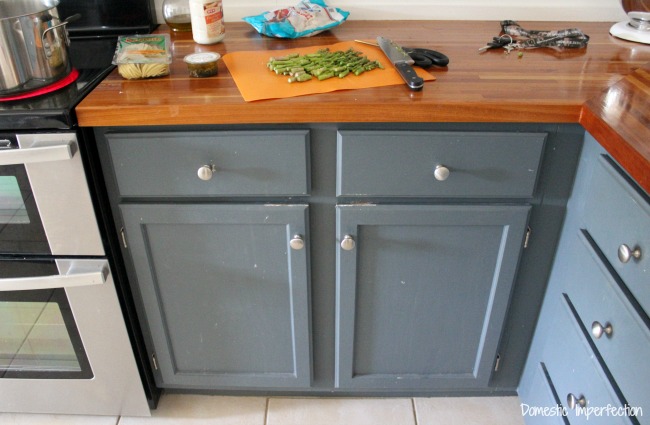
Credit: wildfireinteriors.com
Preparing Cabinets For Sealing
Preparation is where most DIYers go wrong. Rushing this step leads to rough, uneven finishes and poor protection. Spend extra time here and you’ll see much better results.
1. Remove Doors And Hardware
Unscrew cabinet doors, drawers, and all handles or knobs. This prevents drips on hinges and lets you seal every surface.
Tip: Label each door and hardware set with masking tape so you can put them back in the right place.
2. Clean Thoroughly
Kitchen cabinets collect grease, dust, and food particles. If you seal over dirt, it will show forever.
- Mix a few drops of mild dish soap with warm water.
- Wipe down all surfaces with a damp sponge.
- For heavy grease, use a degreaser (test on a hidden spot first).
- Rinse with clean water and let dry completely.
Never use ammonia-based cleaners right before sealing—they can interfere with adhesion.
3. Light Sanding
Sanding gives the sealer something to grip. It also smooths out minor dings.
- Use 220-grit sandpaper.
- Sand in the direction of the wood grain.
- Wipe away all dust with a tack cloth.
If your cabinets are painted or have a glossy finish, you must sand enough to dull the surface so the new sealer sticks.
4. Protect Surrounding Areas
Tape off walls, countertops, and floors with painter’s tape and drop cloths. It’s easier than cleaning up drips later.
How To Seal Kitchen Cabinets: Step-by-step
Now that your cabinets are prepped, it’s time to apply the sealer. The process is similar for most products, but always read the label for special instructions.
Step 1: Stir, Don’t Shake
Open your sealer and stir gently with a clean stick. Shaking introduces bubbles that can ruin the finish.
Step 2: Apply The First Coat
- Dip the brush about one-third into the sealer. Don’t overload.
- Start at the center of the panel and brush outwards, following the wood grain.
- For large flat areas, use a foam roller for a smoother finish.
- Cover all exposed edges and corners.
- Apply a thin, even coat. Thick layers dry slowly and can drip.
Pro tip: Work in small sections. Don’t try to coat a whole door or cabinet at once.
Step 3: Let It Dry
Check the label for drying times. Water-based sealers usually dry in 2-4 hours; oil-based may take 8-24 hours.
- Avoid touching the surface until fully dry.
- Good airflow helps, but avoid direct fans or heat.
Step 4: Lightly Sand Between Coats
After the first coat is dry, lightly sand with 320-grit sandpaper. This removes tiny bumps and helps the next layer stick.
- Wipe away all dust with a tack cloth.
- Never skip this step—dust or roughness multiplies with each layer.
Step 5: Apply Additional Coats
Most cabinets need 2-3 coats for full protection. Repeat the process: brush/roll, dry, sand, clean, and recoat.
- For high-traffic areas like under the sink, add a third coat.
- On painted cabinets, 2 coats are usually enough.
Step 6: Final Cure
Don’t reinstall doors or hardware until the last coat is completely dry. Some sealers need up to 7 days to reach full hardness—check the product instructions.
Mistake to avoid: Using the cabinets too soon can leave fingerprints or dents in the soft finish.
Special Considerations For Different Cabinet Types
Wood Cabinets
Solid wood or veneer cabinets look best with a clear sealer that highlights the grain. Polyurethane (especially water-based) is the top choice. For very old or valuable wood, shellac is gentle and easy to repair if scratched.
Painted Cabinets
Use a water-based polycrylic or polyurethane. Oil-based products can yellow over time and ruin the paint color.
Laminate Cabinets
Laminate isn’t porous like wood, so it needs a sealer designed to bond to glossy surfaces. Lightly sand first and use a bonding primer if the label recommends it. Polycrylic works better than wax for laminate.
Refacing Projects
If you’ve just refaced your cabinets (new doors, new veneer), wait until all glue is fully cured before sealing. Otherwise, fumes can get trapped and cause bubbling.
Common Sealing Mistakes And How To Avoid Them
1. Skipping Cleaning
Even a little grease or dust can cause sealer to peel or look uneven.
2. Not Sanding Enough
Glossy or dirty surfaces prevent proper adhesion. Always sand lightly.
3. Applying Thick Coats
Thick layers dry unevenly and can create drips or bubbles.
4. Using The Wrong Brush
The wrong brush leaves streaks or loose bristles in the finish.
5. Ignoring The Weather
High humidity slows drying and can cause a cloudy finish. Work in a dry, well-ventilated space.
6. Forgetting Edges And Undersides
Moisture often enters from the bottom or sides. Seal every exposed surface.
7. Not Allowing Enough Curing Time
Even if it feels dry, the finish may still be soft inside. Wait for full cure before heavy use.
How Long Does It Take To Seal Kitchen Cabinets?
The time needed depends on cabinet size, sealer type, and how many coats you apply. Here’s a typical timeline:
- Preparation (cleaning, sanding, taping): 2-3 hours for a standard kitchen
- First coat: 1-2 hours
- Dry time: 2-24 hours (water-based dries faster)
- Second/third coats (including drying/sanding): 2-4 hours each
- Final cure: 24 hours to 7 days, depending on product
For most kitchens, expect to spend one weekend on the full process, with cabinets ready for light use after 24-48 hours.
Maintenance After Sealing
A good sealer lasts several years, but care helps it last longer.
- Wipe up spills quickly, especially near sinks and stoves.
- Clean with mild soap and water, not harsh chemicals.
- Use soft cloths, not abrasive pads.
- Check for dull spots or damage once a year. Touch up as needed.
Re-sealing every 3-5 years keeps cabinets looking their best.
Example: Many commercial kitchens re-seal their cabinets annually because of heavy use, but for home kitchens, every few years is usually enough.
When To Call A Professional
DIY sealing is safe for most people, but consider hiring a pro if:
- Your cabinets are antique or very valuable.
- The current finish is peeling or flaking (may need stripping).
- You want a sprayed-on lacquer finish.
- You’re sensitive to fumes or chemicals.
Professionals have tools and experience to handle tricky jobs and can guarantee a flawless look. The cost is higher but may be worth it for high-end kitchens.
Environmental And Health Considerations
Many modern sealers are low-VOC (volatile organic compounds), meaning they produce fewer harmful fumes. Always check the label. Water-based products are the safest for indoor use. Open windows and use fans to ventilate while sealing.
Dispose of leftover sealer and rags according to local rules—oil-based products can be flammable.
For more on VOCs and health, see the EPA’s guide to VOCs.

Credit: diy.stackexchange.com
Comparing Kitchen Cabinet Sealing Products
Here’s a quick look at some popular sealing products and their features.
| Product | Type | Dry Time | Finish Options | VOC Level |
|---|---|---|---|---|
| Minwax Polycrylic | Water-based polycrylic | 2 hours | Satin, Semi-gloss, Gloss | Low |
| General Finishes High Performance | Water-based polyurethane | 2-4 hours | Flat, Satin, Semi-gloss, Gloss | Low |
| Varathane Classic Polyurethane | Oil-based polyurethane | 8 hours | Satin, Semi-gloss, Gloss | Medium |
| Briwax | Wax | 30 mins | Soft sheen | Low |
Tip: Always buy enough sealer to cover two full coats. One quart usually covers 125–150 square feet per coat.
Real-world Example: Sealing A Busy Family Kitchen
Let’s look at a practical example. The Rodriguez family has oak cabinets in a busy kitchen. After 10 years, the finish was dull and sticky, especially near the sink and stove.
They chose a water-based polyurethane for durability and easy cleaning. The project took a weekend:
- Day 1: Removed doors and hardware, cleaned and sanded, applied the first coat.
- Day 2: Sanded lightly, applied two more coats, let dry overnight.
After a week, the cabinets looked brighter, resisted stains better, and were easier to wipe down. The family now plans to re-seal every few years for long-lasting beauty.
Non-obvious insight: Even if you don’t redo your kitchen, sealing cabinets is one of the best ways to refresh its look and feel.
Frequently Asked Questions
How Often Should I Reseal Kitchen Cabinets?
Most cabinets need resealing every 3-5 years. If your kitchen is very busy, or you notice water soaking in or dull spots, reseal sooner. Older, high-traffic, or unprotected wood may need attention more often.
Can I Seal Cabinets Without Sanding?
You should always lightly sand before sealing. This removes grease and gives the new layer something to grip. Skipping this step can lead to peeling or uneven finishes.
What’s The Best Sealer For Painted Cabinets?
A water-based polycrylic is usually best for painted cabinets. It won’t yellow the color and dries quickly. Avoid oil-based products—they can darken or change the paint over time.
Is Sealing Safe For My Health?
Modern sealers, especially water-based, are much safer than old products. Still, always work in a well-ventilated area and wear gloves. Avoid oil-based sealers if you have breathing problems.
Can I Use Kitchen Cabinets Right After Sealing?
No, you need to wait for the final cure. This is usually 24-48 hours for light use, and up to 7 days for full hardness. Using cabinets too soon can leave marks or cause damage.
Sealing your kitchen cabinets is a practical way to protect your investment and keep your kitchen looking its best. With careful prep, the right products, and a little patience, you can get professional results and enjoy beautiful, low-maintenance cabinets for years to come.