
Setting the right temperature on your KitchenAid oven is more than just turning a dial or pressing a button. It’s the difference between a perfect batch of cookies and a tray of burnt surprises. For many home cooks, understanding every detail of this process can seem confusing—especially with so many types of KitchenAid ovens and features.
But once you learn the basics and a few expert tips, you’ll cook with confidence and get the results you want every time.
If you’ve ever wondered why your food sometimes turns out undercooked or why the oven seems to take longer than expected, you’re not alone. Many people, even experienced cooks, miss important steps when setting their oven temperature. This guide will walk you through the whole process, from learning your oven’s controls to advanced temperature settings, troubleshooting, and maintenance.
Whether you’re a beginner or just want to get better results, this article will help you master your KitchenAid oven.
Understanding Kitchenaid Oven Types And Controls
KitchenAid offers several types of ovens, each with different controls and features. Knowing which type you have is the first step to setting the temperature correctly.
Main Types Of Kitchenaid Ovens
- Freestanding Electric Ovens: These are common in many homes. They usually have a control panel with physical knobs or buttons.
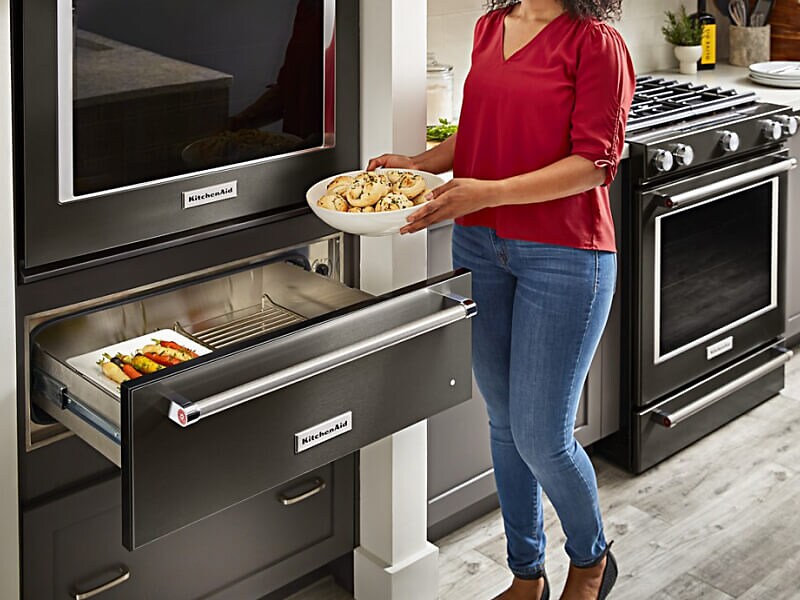
- Wall Ovens: Built into your kitchen cabinets, wall ovens often have digital displays and touch controls.
- Double Ovens: These allow you to cook at two different temperatures at the same time, perfect for big families or holiday meals.
- Convection Ovens: These use a fan to move hot air, cooking food more evenly and often faster. You’ll see a “Convection” setting on the control panel.
- Smart Ovens: Some models connect to Wi-Fi and can be controlled with an app.
Basic Control Panel Features
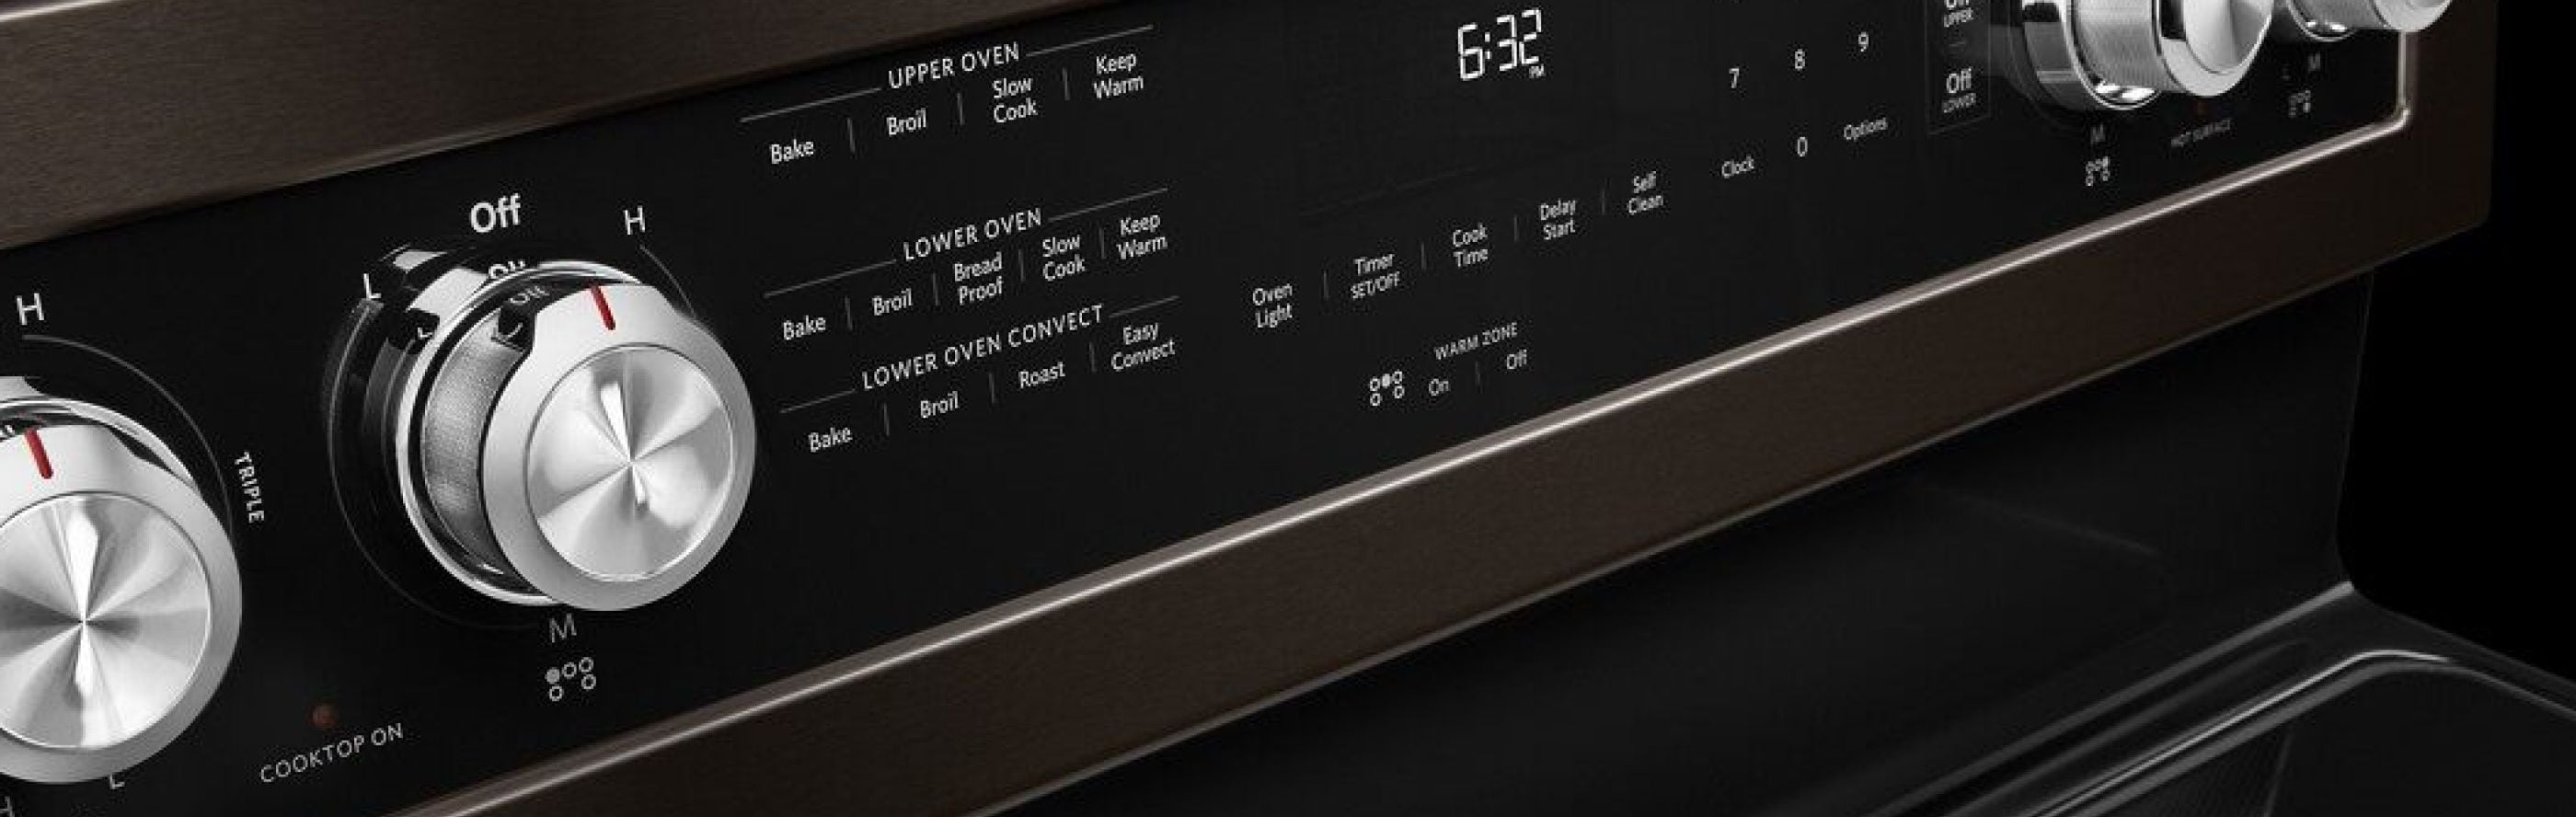
- Temperature dial or buttons: Used to set the desired temperature.
- Bake, Broil, Convection, and other modes: Choose the cooking method.
- Start/Stop button: Begins or ends the preheating or cooking process.
- Timer: Allows you to set cooking time.
- Oven display: Shows current temperature, time, and selected settings.
Why Oven Types Matter
Each type has unique steps for setting the temperature. For example, a smart oven might let you set the temperature from your phone, while a freestanding oven requires turning a physical knob. Always check your user manual for model-specific instructions.
Step-by-step Guide: Setting The Temperature On A Kitchenaid Oven
Setting the temperature on your KitchenAid oven is simple once you know the sequence. Here is a practical step-by-step guide.
1. Power On And Prepare
Before you start, make sure the oven is plugged in and the control panel is working. Remove any items from inside the oven.
2. Select Your Cooking Mode
- For most recipes, use the Bake mode.
- If you want a crispier finish or faster cooking, choose Convection Bake.
- For browning or melting, use the Broil setting.
On models with a mode button, press it until the desired mode lights up or appears on the display.
3. Set The Temperature
- If your oven has a dial, turn it to the desired temperature (for example, 350°F or 180°C).
- For ovens with digital controls, press the “Bake” button, then use the up/down arrows or number pad to select the temperature.
- On touchscreen ovens, simply tap the temperature on the display.
Always check if your recipe calls for Fahrenheit or Celsius. Most KitchenAid ovens default to Fahrenheit, but you can change this in the settings.
4. Start Preheating
- Press the Start button, if required. Some ovens begin preheating automatically after you set the temperature.
- The oven will display “Preheating” or a heating icon.
- Wait for the oven to beep or show a message that it has reached the target temperature. This usually takes 10-15 minutes.
Non-obvious insight: Many people start cooking before the oven is fully preheated, which can lead to uneven results. Always wait for the signal.
5. Place Food In The Oven
Once preheated, carefully place your food inside using oven mitts. Close the door gently to avoid losing heat.
6. Monitor Cooking
Keep an eye on the oven display and use the timer if needed. For best results, avoid opening the door too often.
7. Adjust Temperature Mid-cooking (if Needed)
Some recipes require you to change the temperature during cooking. On digital models, press the temperature buttons and enter the new value. On manual ovens, turn the dial.
8. Turn Off When Finished
When your food is done, press the “Off” or “Cancel” button. For dial controls, return the temperature knob to “Off. ”
Special Features And Advanced Temperature Settings
KitchenAid ovens offer extra features that help you cook more precisely. Learning these will give you better control and results.
Convection Cooking
Convection ovens use a fan to circulate air, cooking food evenly. You can set the temperature as usual, but many recipes suggest lowering the temperature by 25°F (about 15°C) when using convection.
Example: If a recipe says to bake at 400°F, set your convection oven to 375°F.
Rapid Preheat
Some KitchenAid models have a Rapid Preheat feature, which heats the oven faster. To use this, press the “Rapid Preheat” button (if available), then set your temperature as normal.
Tip: Only use Rapid Preheat for single-rack cooking. For multiple racks, the oven may not heat evenly.
Delay Start
This feature lets you set the oven to start at a later time. Ideal for busy schedules, but be careful with perishable foods that shouldn’t sit at room temperature.
Temperature Conversion (celsius To Fahrenheit)
You can switch the temperature scale on most digital KitchenAid ovens:
- Press and hold the “Bake” and “Broil” buttons together for a few seconds.
- The display will show “F” or “C.”
- Use the arrow buttons to select.
- Press “Start” to confirm.
Proofing And Keep Warm
- Proofing: Some models have a low-temperature setting for proofing bread dough.
- Keep Warm: Maintains cooked food at a safe serving temperature (usually around 170°F/77°C).
Common Mistakes When Setting Kitchenaid Oven Temperature
Even experienced cooks can make small errors that affect results. Avoid these common mistakes for better baking and roasting.
- Not Preheating Fully: Placing food in before the oven is hot leads to uneven cooking.
- Wrong Temperature Units: Accidentally using Celsius instead of Fahrenheit (or vice versa) can ruin a dish.
- Overcrowding the Oven: Too many pans block air flow, making the temperature uneven.
- Opening the Door Too Often: Each time you open the oven, heat escapes, and the temperature drops.
- Skipping Calibration: If your oven’s temperature is inaccurate, food won’t cook as expected.
- Ignoring Altitude and Humidity: High altitude or very humid kitchens may need slight temperature changes.
Non-obvious insight: Sometimes, oven thermometers are off by 10–25 degrees. Consider using an external oven thermometer to verify accuracy, especially when baking sensitive recipes.
How To Calibrate Your Kitchenaid Oven Temperature
If you notice food is always underdone or overdone, your oven might need calibration. Calibration means adjusting the oven’s internal settings so that the displayed temperature matches the actual temperature.
Why Calibration Matters
Factory calibration is usually close, but over years of use, ovens can drift. Even a 15°F difference can change how your cakes or roasts turn out.
How To Check If Calibration Is Needed
- Place an oven-safe thermometer in the center of the oven.
- Set the oven to 350°F (or 180°C).
- After the oven signals it’s preheated, wait another 10 minutes.
- Check the thermometer. If it’s more than 10°F (6°C) off, calibration is a good idea.
Calibrating A Kitchenaid Oven
Most digital KitchenAid ovens allow you to adjust the temperature offset:
- Press and hold the “Bake” button for several seconds until the display changes.
- Use the arrows to adjust the temperature up or down (in 5°F increments).
- Press “Start” to save.
For models with manual dials, consult your user manual—some require a professional adjustment.
Practical tip: Write down how much you adjusted so you can reset later if needed.
Comparing Kitchenaid Oven Temperature Features
Here’s a side-by-side look at common KitchenAid oven features to help you understand what affects temperature setting and cooking results.
| Feature | Manual Oven | Digital Oven | Smart Oven |
|---|---|---|---|
| Temperature Setting | Knob/dial | Buttons or touchscreen | App or voice control |
| Preheat Signal | Indicator light | Beeper/display | App notification |
| Calibration | Manual (complex) | Easy, via menu | Automatic updates |
| Special Modes | Basic (bake, broil) | Convection, proof, keep warm | Remote start, custom recipes |
Insight: Smart ovens are convenient but always keep a physical backup method in mind in case the app isn’t available.
Using The Timer And Delayed Start Functions
KitchenAid ovens provide timer and delayed start features that can make meal prep easier and safer.
Using The Timer
- Press the “Timer” button.
- Enter the desired time using the keypad or arrow buttons.
- The oven will beep when the time is up, but will not turn off the oven unless the “Cook Time” or “Auto Off” feature is used.
Delayed Start
- Set your cooking mode and temperature.
- Press “Delay Start” and enter the desired start time.
- The oven will automatically begin preheating at the scheduled time.
Warning: Never use delayed start for foods that spoil quickly, like meat, eggs, or dairy.
Temperature Settings For Common Recipes
Here’s a quick guide to the most common temperature settings for home cooking in your KitchenAid oven.
| Food Type | Suggested Temperature | Cooking Mode |
|---|---|---|
| Cookies | 350°F (180°C) | Bake |
| Bread | 375°F (190°C) | Bake/Proof |
| Pizza | 425°F (218°C) | Bake or Convection |
| Roast Chicken | 400°F (204°C) | Convection Roast |
| Casserole | 350°F (180°C) | Bake |
| Vegetables | 425°F (218°C) | Convection Bake |
| Steak (Broil) | 500°F (260°C) | Broil |
These temperatures are a starting point. Always check your recipe for specific instructions.
Credit: www.kitchenaid.com
Cleaning And Maintenance For Accurate Temperature
A clean oven not only cooks better but also keeps the temperature consistent. Grease, crumbs, and burnt food can cause hot spots and uneven cooking.
How To Clean Your Kitchenaid Oven
- Wait until the oven is cool before cleaning.
- Remove racks and soak in warm, soapy water.
- Wipe the interior with a damp cloth and mild cleaner. Avoid harsh chemicals.
- For self-cleaning models, use the self-cleaning cycle as directed in your manual.
- Clean the oven door and control panel with a soft, damp cloth.
Tip: Don’t forget to check the oven seal (gasket). A damaged seal lets heat escape, making the temperature unstable.
Maintenance Schedule
- Monthly: Wipe spills as they happen.
- Every 3 months: Deep clean the oven and check seals.
- Yearly: Inspect for signs of wear, especially on older models.
Non-obvious insight: Even new ovens can have shipping dust or residue—always do a quick clean before the first use.
Troubleshooting Temperature Problems
If your KitchenAid oven isn’t reaching or holding the correct temperature, here’s how to troubleshoot.
Oven Doesn’t Heat Up
- Check that the oven is plugged in and the breaker is on.
- Make sure the door is closed fully.
- Test other functions (like the light) to confirm power.
Oven Heats Too Much Or Not Enough
- Check calibration as described earlier.
- Use an oven thermometer to confirm the real temperature.
- Check the oven seal for damage.
Uneven Cooking
- Rotate pans halfway through cooking.
- Avoid overcrowding the oven.
- Clean the fan (for convection ovens) regularly.
Error Codes On Display
- Refer to your user manual for code meanings.
- Most errors can be cleared by turning the oven off and on again.
- If the problem continues, contact KitchenAid support.
Practical tip: Keep your user manual in a safe place, or download it from the KitchenAid website for your model.
Using Accessories And Thermometers For Better Results
Adding a few simple tools can help you get the most from your KitchenAid oven.
Oven Thermometer
A separate oven thermometer gives you an accurate reading of the real temperature inside. Place it in the center of the oven, away from walls.
Baking Stone Or Steel
These help stabilize the temperature and create a crispy bottom for bread and pizza.
Air Fry Racks
Some newer KitchenAid ovens include air fry racks. Always follow the manual to set the correct temperature and avoid burning food.
Temperature Probes
Some high-end models have a built-in temperature probe. Insert it into meat or casseroles, and the oven will beep when the food reaches the perfect temperature.
Kitchenaid Oven Temperature And Energy Use
Cooking at the right temperature is not only about good food—it also affects your energy bill.
- Preheating uses the most energy. Only preheat when necessary.
- Cooking at a lower temperature for longer can sometimes use less energy.
- Keeping the door closed saves heat and reduces energy waste.
Interesting fact: According to the U.S. Department of Energy, using a convection setting can reduce cooking time and temperature, saving up to 20% more energy compared to regular baking.
For more energy-saving oven tips, visit the U.S. Department of Energy.

Credit: manuals.plus
Comparing Kitchenaid Oven Models For Temperature Control
If you’re considering a new oven or just want to know how your model stacks up, here’s a quick comparison of popular KitchenAid oven series.
| Model Series | Control Type | Convection | Smart Features | Temperature Range |
|---|---|---|---|---|
| KSGG700ESS (Freestanding) | Digital | Yes | No | 170–550°F (77–288°C) |
| KOCE500ESS (Wall Oven) | Touchscreen | Yes | No | 170–550°F (77–288°C) |
| KODE500ESS (Double Wall) | Digital | Yes | No | 170–550°F (77–288°C) |
| KOST100ESS (Smart Wall Oven) | Touchscreen/App | Yes | Yes | 170–550°F (77–288°C) |
All models support basic and advanced temperature settings, but smart models offer remote control and recipe integration for added convenience.
Frequently Asked Questions
How Do I Change My Kitchenaid Oven From Fahrenheit To Celsius?
Most digital KitchenAid ovens let you switch between Fahrenheit and Celsius. Press and hold the “Bake” and “Broil” buttons together for several seconds, then use the arrows to select “C” for Celsius. Press “Start” to confirm.
Why Does My Oven Beep Before It’s Fully Heated?
Some KitchenAid ovens beep when they reach the set temperature, but the walls and racks may not be fully heated yet. For best results, wait 5–10 minutes after the beep before placing your food inside.
Can I Set Different Temperatures For The Upper And Lower Ovens In A Double Oven?
Yes, double ovens allow you to set different temperatures for each oven. Select the upper or lower oven on the control panel, then set the desired temperature for each one.
What Should I Do If My Oven Temperature Seems Inaccurate?
First, check with an oven thermometer. If the temperature is off by more than 10°F (6°C), calibrate your oven using the settings menu. If problems continue, call KitchenAid customer support.
Is It Safe To Use Aluminum Foil In My Kitchenaid Oven?
You can use aluminum foil, but avoid covering oven vents or the bottom surface, as this can block airflow and change the temperature. Always follow the guidelines in your user manual.
Getting the temperature right on your KitchenAid oven isn’t just about following recipes—it’s about understanding your specific model and using its features to your advantage. With these steps, tips, and troubleshooting advice, you’ll cook with more confidence and enjoy consistently delicious results.
Credit: www.kitchenaid.com