
Many people think dehydrators are the only way to dry food at home. But if you own an oven, you already have a tool that can do the job well. Drying fruits, vegetables, herbs, and even meats in your oven is not hard.
With a few tips, you can enjoy homemade dried snacks, save money, and control what goes into your food. Whether you want crunchy apple chips, chewy beef jerky, or dried tomatoes for your next recipe, learning to use your oven as a dehydrator opens up many possibilities.
Some believe that only special equipment gives good results, but that’s not true. Most home ovens can work as dehydrators with a little preparation. This article will show you how to use your oven for drying food, explain the science behind it, share step-by-step instructions, and answer common questions.
By the end, you’ll be ready to start dehydrating at home, even if you’ve never tried it before.
Why Dehydrate Food?
Dehydrating is an age-old method to preserve food. By removing water, you make food last longer. There are several benefits:
- Longer shelf life: Dried foods stay fresh for months or even years.
- Concentrated flavor: The taste often becomes sweeter or stronger.
- Less storage space: Dried food is lighter and smaller.
- Healthy snacks: You can make snacks without extra sugar or preservatives.
- Save money: Drying at home is often cheaper than buying pre-packaged dried foods.
Dehydration is not just for experts. With an oven, you can start easily and safely.
How Does Dehydration Work?
To dehydrate means to remove most of the water from food. Bacteria and mold need moisture to grow. When food is dried, it’s harder for them to survive, so the food lasts longer.
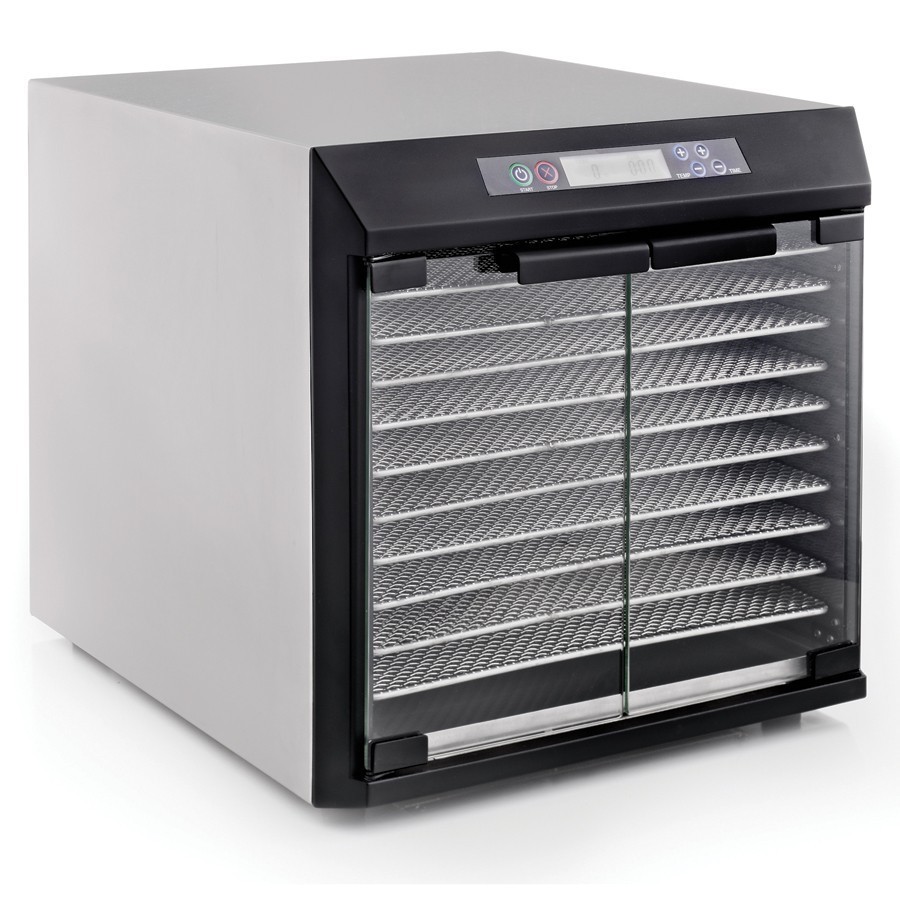
A dehydrator uses low heat and a fan to circulate air. Ovens work in a similar way. The key is to use low temperature and let air move, so moisture escapes. Most ovens do not have a “dehydrate” setting, but you can still control the temperature and airflow.
Credit: www.therawchef.com
Is Oven Dehydration As Good As A Dehydrator?
Many people wonder if the results from an oven are as good as those from a dehydrator. The answer is: it depends on your oven and what you are drying.
Here’s a simple comparison:
| Feature | Oven | Dehydrator |
|---|---|---|
| Temperature Control | Often less precise | Very precise |
| Air Circulation | Not always even | Designed for airflow |
| Batch Size | Usually larger | Smaller, more trays |
| Energy Use | Higher | Lower |
| Availability | Almost every kitchen | Must be purchased |
Ovens are less specialized but very flexible. For beginners or those who don’t want to buy new gadgets, ovens are a great starting point.
What Foods Can You Dehydrate In An Oven?
Ovens can dry a wide range of foods. Here are some popular choices:
- Fruits (apples, bananas, mangoes, strawberries, pears, pineapples)
- Vegetables (tomatoes, peppers, carrots, zucchini, green beans, kale)
- Herbs (basil, parsley, thyme, oregano, mint)
- Meats (for jerky, but with extra care)
- Nuts and seeds (for crisping, not full dehydration)
- Mushrooms
Some foods dry better than others. Soft fruits and herbs are easiest for beginners. Meats require more care to avoid food safety risks.
What You Need To Dehydrate Food In An Oven
You don’t need much to get started:
- Oven: Any standard oven, gas or electric
- Baking sheets: For holding the food
- Cooling racks or oven-safe racks: To let air circulate under the food
- Parchment paper or silicone mats: To prevent sticking
- Sharp knife or mandoline: For even slicing
- Tongs or spatula: For flipping food if needed
- Storage containers: Airtight jars or bags for keeping dried food
If your oven has a convection setting (fan), use it. It helps dry more evenly.
Step-by-step: How To Use Your Oven As A Dehydrator
Drying food in your oven is simple, but you need to pay attention to details. Follow these steps for the best results.
1. Choose And Prepare Your Food
Start with fresh, ripe produce or lean meat. Wash fruits and vegetables well. Remove seeds, stems, and any bruised spots. Slice food into thin, even pieces—about 1/8 to 1/4 inch thick is usually best. Thinner slices dry faster and more evenly.
For meat, trim off all fat. Fat does not dry and can spoil. Cut meat into thin strips (about 1/8 to 1/4 inch thick).
2. Pre-treat If Needed
Some foods need pre-treatment to keep their color, taste, or safety.
- Fruits: To stop browning, dip apple or pear slices in a mix of lemon juice and water (1 part juice to 4 parts water) for 2–3 minutes.
- Vegetables: Blanch some vegetables (like carrots or green beans) in boiling water for 2–3 minutes, then cool in ice water. This stops enzymes that can spoil flavor or color.
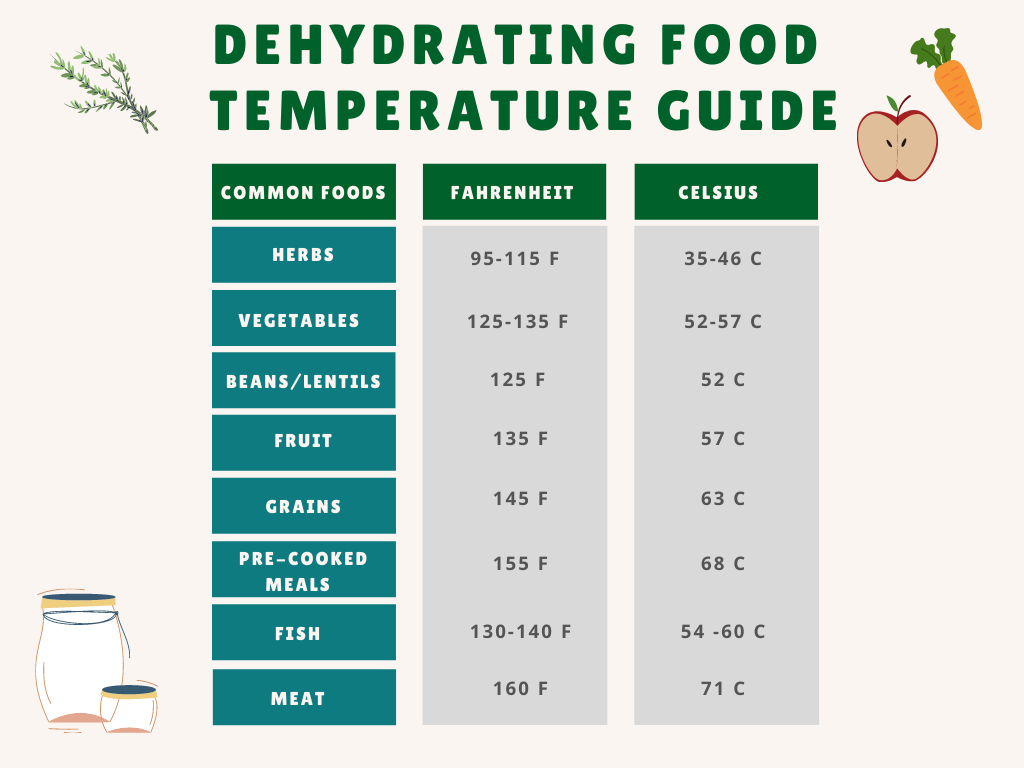
- Meat: For jerky, marinate in salt and spices, and consider pre-cooking to 160°F (71°C) for safety.
3. Arrange Food On Racks
Place slices in a single layer on racks set over baking sheets. Pieces should not touch. This allows air to move all around.
If you don’t have racks, lay slices on parchment-lined baking sheets, but flip them halfway through drying.
4. Set The Oven Temperature
The ideal temperature for drying is 120°F to 170°F (50°C to 75°C). Most ovens start at 170°F. If yours won’t go lower, prop the door open with a wooden spoon or heatproof object. This lets moisture escape and lowers the temperature a bit.
A good tip: Use an oven thermometer to check the real temperature, as many ovens run hotter or cooler than their display.
5. Let Air Circulate
Airflow is vital. If your oven has a fan (convection), turn it on. If not, the propped door trick helps moisture escape.
Never close the door completely; trapped steam will slow drying and can cause spoilage.
6. Start The Dehydration Process
Place trays in the oven. The drying time depends on what you’re drying, slice thickness, and oven accuracy. Here’s a general guide:
- Fruits: 4–8 hours
- Vegetables: 4–8 hours
- Herbs: 1–3 hours
- Meat (jerky): 6–12 hours
Check every hour or two. Rotate trays if your oven has hot spots.
7. Test For Doneness
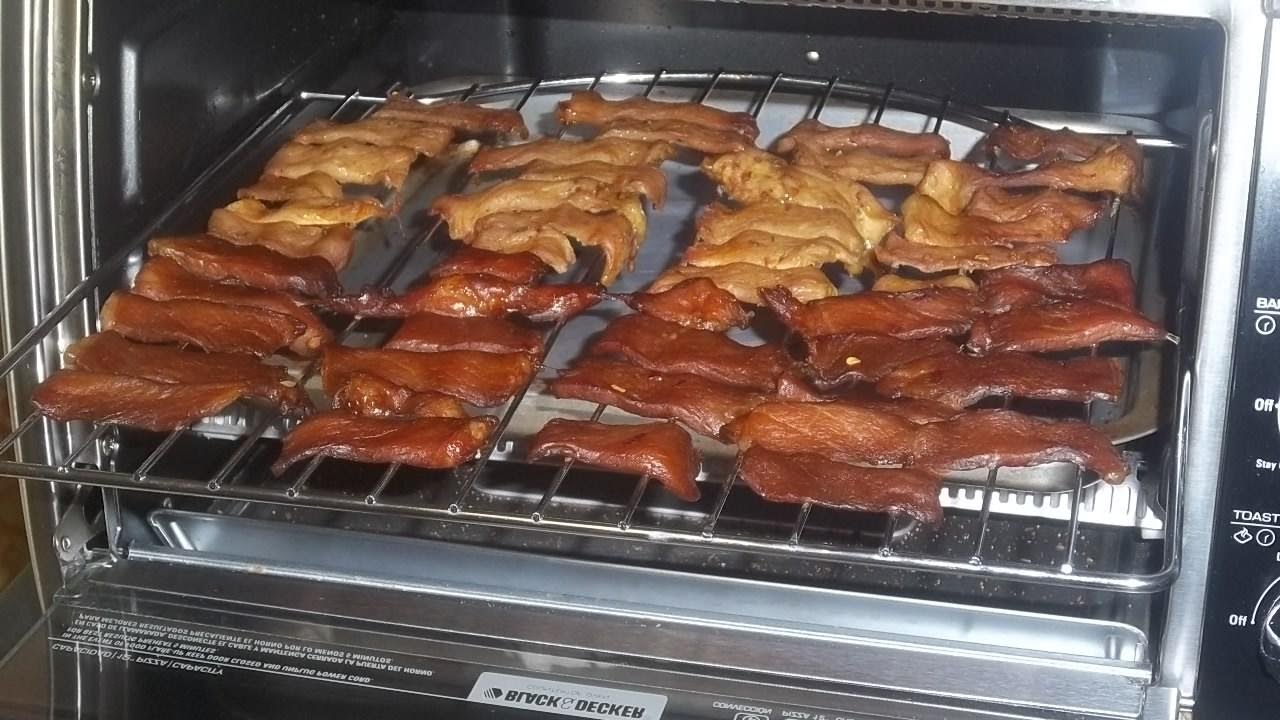
Dried food should be leathery and bend, not snap (except for some crunchy items). Cut a piece in half; no moisture should come out. For jerky, it should be dry but still chewy, not brittle.
8. Cool And Store Properly
Let dried food cool completely before storing. If you put warm food in a jar, it can cause condensation, which leads to mold.
Store in airtight containers in a cool, dark place. Label with the date. Most dried foods last 6–12 months if stored well.
Credit: food-hacks.wonderhowto.com
Detailed Tips For Dehydrating Different Foods
Not all foods behave the same in the oven. Here are some special tips for common foods:
Fruits
- Apples/Pears: Slice thinly; soak in lemon water to prevent browning.
- Bananas: Dip in lemon water to keep color; use silicone mats to prevent sticking.
- Berries: Small berries can be dried whole, but larger ones dry faster if cut in half.
- Mangoes/Pineapples: Remove tough cores; slice evenly.
Fruits are done when they’re still a bit flexible but not sticky. Over-dried fruit becomes hard and less tasty.
Vegetables
- Tomatoes: Cut cherry tomatoes in half, larger types in slices. Remove seeds if you want.
- Carrots/Zucchini: Slice thinly; blanch before drying for brighter color.
- Peppers: Remove seeds; slice into strips.
Vegetables should be crisp or leathery. If they snap easily, they might be too dry.
Herbs
- Basil, mint, oregano, thyme: Remove thick stems, lay leaves flat.
- Parsley, cilantro: Spread in a single layer.
Herbs dry quickly—check often. They’re done when crumbly.
Meat (jerky)
- Beef, turkey, chicken: Use lean cuts only. Marinate for flavor and food safety.
- Slice evenly: Thicker pieces take longer and may not dry safely.
Always heat jerky to 160°F (71°C) before drying, or pre-cook. This reduces risk of bacteria.
Mushrooms
- Clean gently: Use a brush or damp cloth, not water.
- Slice: 1/4 inch thick is good.
Mushrooms are dry when they snap.
Oven Dehydration: Key Mistakes To Avoid
Many beginners make common errors. Here’s how to avoid them:
- Oven too hot: High heat cooks food instead of drying it. Always use the lowest setting, and don’t rush.
- No airflow: Keep the door cracked open. Without airflow, food steams and spoils.
- Uneven slices: Different thicknesses dry at different rates. Use a mandoline for even cuts.
- Crowded trays: Food must not touch. Crowding slows drying and causes uneven results.
- Skipping pre-treatment: For many foods, a quick blanch or lemon dip keeps color and taste.
- Storing food before it’s cool: Warm food in jars causes condensation and mold.
- Not checking for doneness: Always cut and check a few pieces before storing.
A non-obvious insight: For some ovens, placing a small fan near the open door can boost air movement and speed up drying. Also, the oven light can add a bit of gentle heat, which is enough for herbs.
How To Store And Use Home-dried Foods
Proper storage is as important as drying. Here’s how to keep your dried foods fresh:
- Use airtight containers: Glass jars, vacuum-seal bags, or heavy zipper bags work well.
- Keep in a cool, dark place: Light and heat reduce shelf life.
- Check for moisture: If you see condensation, redry the food.
- Label with date: So you know how long it’s been stored.
You can use dried foods in many ways:
- Snacks: Eat dried fruit or jerky as-is.
- Baking: Add dried fruits to muffins, breads, or granola.
- Cooking: Rehydrate vegetables for soups or stews.
- Seasoning: Crumble dried herbs onto dishes.
A clever tip: If you want to test shelf life, keep a small sample in a clear bag on your counter. If it molds or changes color, check your main storage batch.
How Oven-dried Foods Compare To Store-bought
People often wonder if homemade dried foods are as good as store versions. Here’s a side-by-side look:
| Aspect | Oven-Dried (Homemade) | Store-Bought |
|---|---|---|
| Flavor | Often fresher, no additives | Consistent, but may have preservatives |
| Nutrition | No added sugar or salt (unless you add it) | Often contains additives, sugar, or salt |
| Cost | Lower, especially for large batches | Higher per ounce |
| Variety | Dry what you like, any way you want | Limited to what’s sold |
| Effort | More work and time | Ready to eat |
Homemade dried foods give you control over taste and ingredients. You can make unique flavors, such as spicy mango or herbed tomato chips. And you avoid preservatives that often show up in store-bought products.
Energy Use And Cost: Is Oven Dehydrating Worth It?
One concern is energy use. Ovens use more electricity or gas than dehydrators. Here’s what to consider:
- Oven energy use: A standard oven uses about 2,000–5,000 watts per hour. If you dry for 6 hours, that’s 12–30 kWh.
- Dehydrator energy use: Most dehydrators use 300–700 watts per hour.
If you dry large batches, you use the oven more efficiently. But for small amounts, a dehydrator is cheaper to run.
Still, for people who dry food only a few times a year, using the oven saves the cost and storage space of buying a dehydrator.
Troubleshooting: Common Problems And Solutions
Even with good planning, things can go wrong. Here’s how to fix them:
- Food is sticky after drying: It’s not dry enough. Return it to the oven for another hour, check again.
- Food is too hard or brittle: The oven was too hot, or slices were too thin. Next time, lower the heat, or slice thicker.
- Uneven drying: Rotate trays every hour. Slice food more evenly.
- Food has off flavors: Strong-smelling foods (like onions) can flavor other foods. Dry similar foods together, or clean oven well between batches.
- Mold after storage: Food was not fully dry or not cooled before storage. Always test doneness and cool before sealing.
If you want to read more about the science of dehydration, see this Wikipedia page on food dehydrators.
Safety Tips For Oven Dehydration
Food safety is very important, especially for meat and low-acid foods.
- Meat: Always heat to 160°F (71°C) before drying. This kills bacteria. For jerky, some people pre-cook in the oven or microwave before drying.
- Eggplants/potatoes: Some vegetables need blanching to destroy enzymes and bacteria.
- Check your oven: If you have an older oven, test its lowest temperature with a thermometer.
For those with health concerns, always store dried foods in the fridge or freezer if unsure about dryness.
Creative Ideas: Taking Oven Dehydration Further
Once you master the basics, try these fun ideas:
- Fruit leather: Blend fruit with a little honey, spread thin on parchment, and dry until chewy.
- Veggie chips: Try kale, beet, or zucchini chips for a healthy snack.
- DIY soup mix: Dry carrots, onions, celery, and herbs, then mix for instant soup base.
- Herb blends: Make your own Italian seasoning or taco spice by drying and mixing herbs.
A little experimentation helps you find your favorite textures and flavors.
Credit: www.campkitchen.ca
Frequently Asked Questions
How Low Can I Set My Oven For Dehydration?
Most ovens only go down to 170°F (77°C). If your oven does not go lower, keep the door cracked open to let out heat and moisture. Some ovens have a “warm” setting, which can be as low as 140°F (60°C).
Always use an oven thermometer to check.
Is It Safe To Dehydrate Meat In The Oven?
Yes, but you must take care. Start by heating the meat to 160°F (71°C) to kill bacteria. Then, dry at the lowest oven setting with the door cracked open. Store jerky in the fridge if you’re not sure it’s fully dry.
How Do I Know When My Food Is Fully Dried?
Food should be leathery, not sticky or wet. Tear a piece in half—there should be no moisture inside. For herbs, they should crumble. For jerky, it should bend but not snap.
Can I Dehydrate Multiple Foods At Once?
You can, but only if they have similar drying times and flavors. Drying onions and apples together may make your apples taste like onions. It’s best to dry similar foods together.
What If My Oven Doesn’t Have A Convection Fan?
You can still dehydrate. Keep the door cracked open. Rotate trays often. For even better airflow, place a small electric fan near the open oven door (not inside the oven).
Final Thoughts
Drying food in your oven is a simple way to get healthy, tasty snacks and ingredients without special tools. With a little practice, you’ll find which foods and flavors you like best. Remember: slice evenly, use low heat, and let air flow. The process takes time, but the reward is homemade treats you can trust. Start with easy foods like apples or herbs, and soon you’ll be making your own jerky, chips, and dried fruits for less money and more flavor. Oven dehydration is a skill anyone can master—and it’s a great way to make the most of what you have at home.