
If you use a meat slicer at home or in your business, you know how important a sharp blade is. A dull blade can ruin your slices, slow down your work, and even make your slicer dangerous. But sharpening a meat slicer blade is often misunderstood, and many people are unsure how to do it the right way.
This guide will walk you through the full process, explain the key details, and help you keep your slicer working safely and efficiently.
Most slicer blades are made of strong stainless steel or hardened alloys, but even these materials lose their edge over time. You might notice the blade dragging, producing uneven cuts, or even tearing meat instead of slicing cleanly. These are sure signs the blade is dull.
Regular sharpening not only improves slice quality but also extends the life of your slicer and helps prevent accidents. This article will show you exactly how to sharpen your meat slicer blade, step by step, along with safety tips, maintenance advice, and answers to common questions.
Why A Sharp Meat Slicer Blade Matters
A sharp blade is not just about better-looking slices. It’s about safety, efficiency, and food quality.
- Safety: Dull blades force you to use more pressure, increasing the risk of slips and injuries.
- Efficiency: A sharp blade cuts faster, so you can prepare more food in less time.
- Food Quality: Clean cuts prevent shredding or crushing meat, keeping texture and appearance intact.
- Machine Longevity: Less resistance means less strain on the motor and moving parts.
Many users overlook how quickly a blade can dull, especially when slicing tough meats or using the slicer daily. Regular sharpening is crucial for anyone who values their equipment.
How To Tell If Your Meat Slicer Blade Needs Sharpening
You don’t need to guess when it’s time to sharpen. Look for these clear signs:
- Uneven slices: If the thickness is inconsistent, the blade is likely dull.
- Ragged or torn edges: Clean blades cut smoothly; dull ones tear and mash.
- Excess effort: Needing more force means the blade isn’t sharp enough.
- Increased noise or vibration: Dull blades can make the machine work harder, causing extra noise.
- Slower slicing: Prep time increases as the blade gets blunt.
If you notice any of these, it’s time to sharpen your blade.
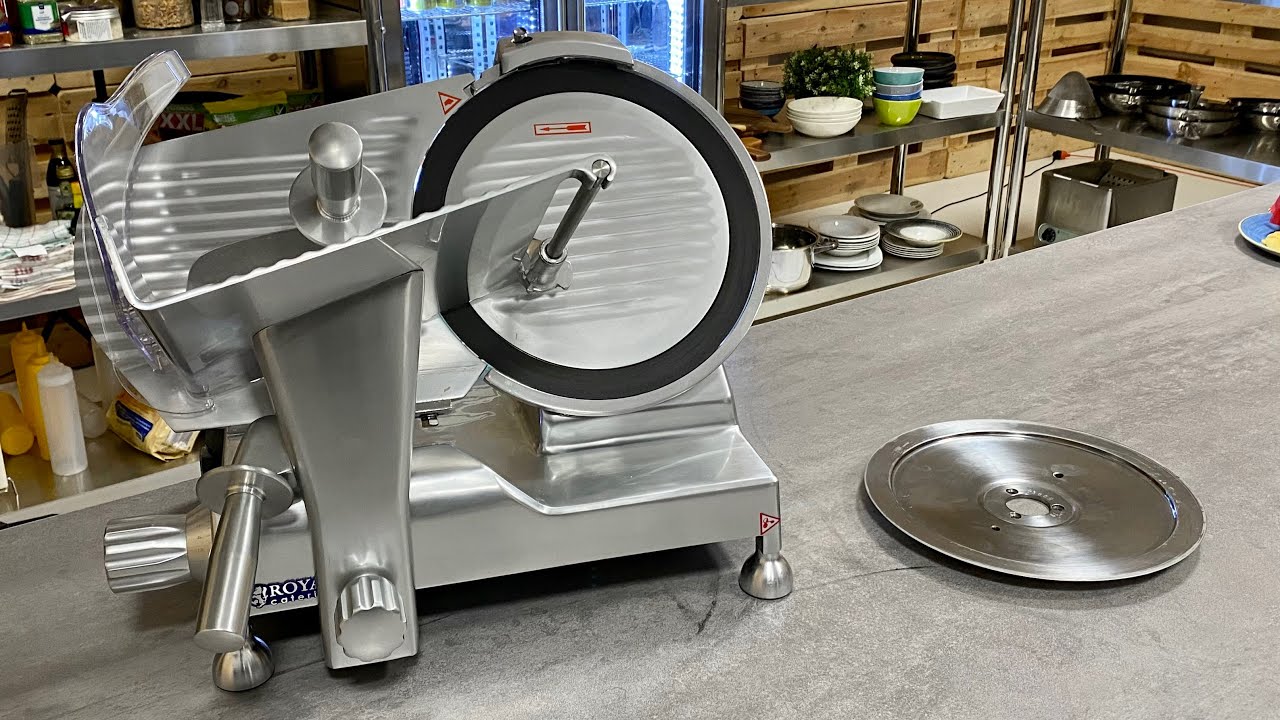
Credit: www.youtube.com
Tools And Materials You’ll Need
Before starting, gather these essential items:
- Meat slicer (unplugged and cool)
- Sharpening stone or built-in sharpener (depending on your slicer model)
- Cleaning cloths or paper towels
- Food-safe lubricant (mineral oil or slicer oil)
- Cut-resistant gloves
- Safety goggles
- Mild detergent or sanitizer for cleaning
- Screwdriver (for blade removal, if needed)
- Owner’s manual (for slicer-specific instructions)
It’s important to use the right sharpening stone or attachment, as some brands require specific tools.
Step-by-step Guide: How To Sharpen A Meat Slicer Blade
Let’s break down the process in detail. The exact method can vary depending on whether your slicer has a built-in sharpener or not.
Step 1: Safety First
- Unplug the slicer before touching the blade.
- Wear cut-resistant gloves and, if possible, safety goggles.
- Make sure the slicer is on a stable, clean surface.
Step 2: Clean The Blade
- Remove all food debris using a damp cloth and mild detergent.
- Dry the blade completely. Moisture can affect sharpening and cause rust.
Step 3: Prepare The Sharpening Tool
If Using A Built-in Sharpener:
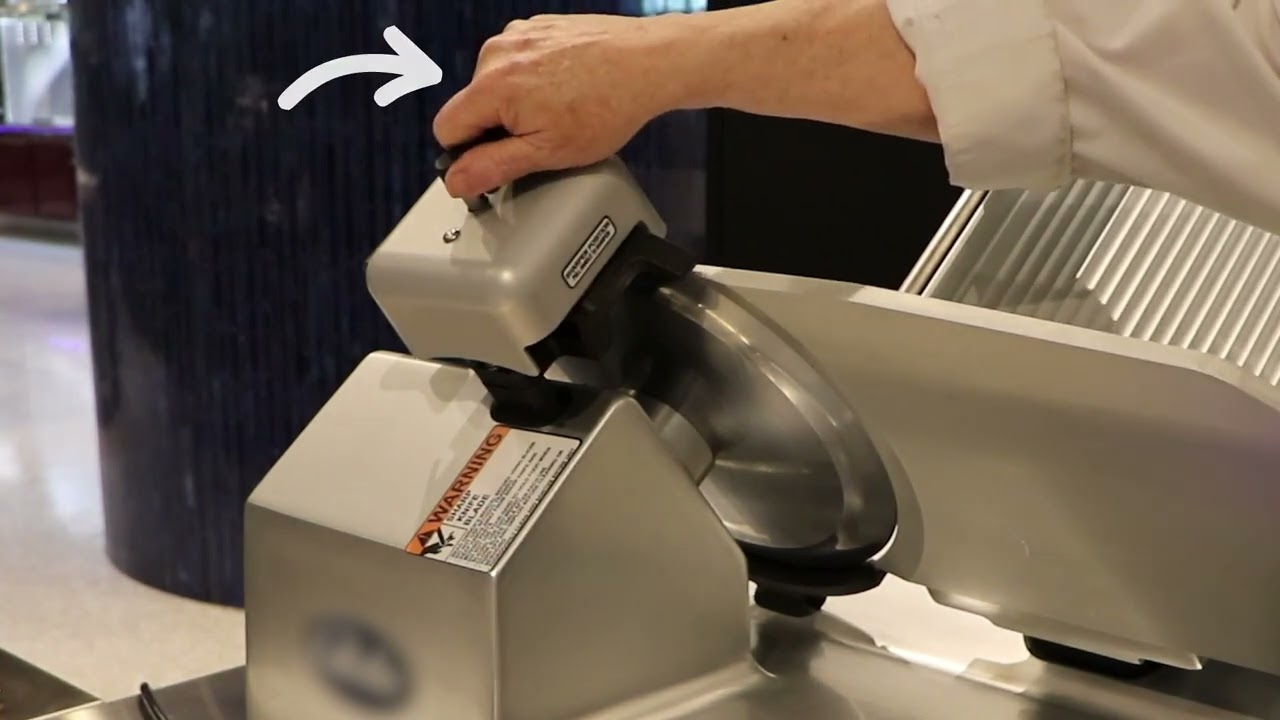
- Most commercial slicers have a built-in sharpener. Check your manual for where it’s located and how to engage it.
If Using A Separate Sharpening Stone:
- Choose a fine-grit sharpening stone (400–800 grit is common for slicer blades).
- Some stones are handheld; others attach to the slicer.
Step 4: Secure The Sharpening Mechanism
Built-in Sharpener:
- Position the sharpening stones against the blade as shown in your manual.
- Usually, there are two stones: One for sharpening, one for honing.
- Lock the sharpener into place.
Handheld Or Detachable Stone:
- If your slicer requires blade removal, carefully unscrew and take out the blade.
- Secure the blade on a stable surface.
- Place the sharpening stone at the correct angle (usually 20–25 degrees for slicer blades).
Step 5: Sharpen The Blade
Using Built-in Sharpener:
- Plug in the slicer (if required by the manufacturer, otherwise sharpen manually).
- Hold the sharpening button or switch for about 30 seconds.
- Release and let the blade cool for a minute.
- Repeat for another 10–20 seconds if the blade is very dull.
Using A Separate Stone:
- Hold the stone at the correct angle.
- Move it smoothly across the edge, following the curve of the blade.
- Repeat on both sides (if double-beveled).
- Continue for 10–15 passes per side.
Step 6: Hone The Blade
Honing polishes the edge for a finer cut and removes burrs.
- If your sharpener has a honing stone, engage it for 5–10 seconds.
- For manual honing, use a fine ceramic rod or honing stone at the same angle.
- Wipe off any metal dust after honing.
Step 7: Clean And Lubricate
- Carefully wipe the blade with a damp cloth to remove any metal filings.
- Dry thoroughly.
- Apply a thin layer of food-safe lubricant to prevent rust and keep the blade moving smoothly.
Step 8: Reassemble And Test
- Put the blade back on the slicer (if removed).
- Reassemble all parts securely.
- Plug in and test the slicer with a small piece of meat.
- Check for smooth, even slices and listen for any unusual sounds.
Comparing Built-in Vs. Separate Sharpeners
Many meat slicers come with a built-in sharpener, but some require a separate stone. Here’s a quick comparison:
| Feature | Built-in Sharpener | Separate Stone |
|---|---|---|
| Ease of Use | Very easy, usually one button | Requires blade removal and manual skill |
| Sharpening Speed | Fast (30–60 seconds) | Slower (5–10 minutes) |
| Consistency | Uniform results | Depends on user skill |
| Cost | Included with slicer | Separate purchase required |
How Often Should You Sharpen A Meat Slicer Blade?
Frequency depends on usage, but here are some general guidelines:
- Home use: Every 2–3 months if used weekly
- Light commercial use: Once a month
- Heavy commercial use: Every 1–2 weeks
If you slice cheese, bread, or frozen meats, the blade dulls faster. Always sharpen as soon as you notice quality dropping, not just on a fixed schedule.
Credit: www.partstown.com
Mistakes To Avoid When Sharpening
Many people make simple mistakes that can damage the blade or make sharpening less effective.
- Skipping cleaning: Dirt and fat on the blade can clog the sharpening stone.
- Sharpening too often: Over-sharpening wears down the blade quickly.
- Using the wrong angle: Too steep or too shallow can ruin the edge.
- Forgetting to hone: Honing is essential for a razor-sharp, smooth edge.
- Not wearing gloves: Even a dull blade can cause serious cuts during sharpening.
- Neglecting lubrication: A dry blade can rust or seize.
- Applying too much pressure: Gentle, steady movements are best.
Deep Cleaning After Sharpening
Every time you sharpen, you should also deep clean your slicer. Metal filings, oil, and food debris can remain on the blade or nearby parts.
- Disassemble the slicer as much as your manual allows.
- Wash all parts with hot water and a mild detergent.
- Rinse and dry completely.
- Sanitizing spray helps if you use your slicer for different foods.
- Lubricate all moving parts after cleaning.
A clean slicer is safer and keeps your food tasting fresh.
Maintenance Tips For A Long-lasting Blade
Proper maintenance extends blade life and keeps your slicer performing at its best.
- Clean after every use. Don’t let meat juices or fat sit on the blade.
- Sharpen only when needed. Use the “paper test” (slice a piece of paper—if it tears, the blade is dull).
- Check blade alignment. A misaligned blade won’t sharpen evenly.
- Store your slicer dry. Moisture is the enemy of sharp edges.
- Replace the blade if it’s chipped, warped, or can’t be sharpened evenly.
How To Sharpen Specialty Slicer Blades
Some slicers have serrated blades or unusual shapes. These need special attention:
- Serrated blades can’t be sharpened with a regular stone. They require a diamond file or professional service.
- Always check the manufacturer’s recommendations for specialty blades.
- Some premium slicers offer replacement blades rather than sharpening.
Signs Your Blade Needs Replacement, Not Sharpening
Sharpening can’t fix every problem. Here’s when to replace your blade:
- Deep chips or nicks: Too much metal is missing.
- Warped or bent blade: Causes uneven cuts and is unsafe.
- Excessive rust: Deep rust weakens the blade.
- Repeated dullness: If sharpening doesn’t restore the edge, the blade is worn out.
For most home users, a blade lasts several years with regular care. In busy restaurants, replacement might be needed every year.
Cost Comparison: Sharpening Vs. Replacing
Is it cheaper to sharpen or replace your blade? Here’s a simple cost breakdown:
| Option | Average Cost | Frequency |
|---|---|---|
| Sharpening (at home) | $0–$20 (stone/kit) | Every 1–3 months |
| Sharpening (professional) | $20–$50 per service | As needed |
| Blade replacement | $50–$150 per blade | Every 1–5 years |
Sharpening at home is the most cost-effective unless your blade is damaged. Commercial kitchens often keep a spare blade for emergencies.
Using A Professional Sharpening Service
If you’re not comfortable sharpening yourself, you can send the blade to a professional. This is common for restaurants and delis. Look for a service that:
- Specializes in food equipment
- Uses commercial-grade machines
- Can handle your specific slicer model
Professional sharpening ensures a perfect edge and can handle specialty blades. However, it costs more and takes extra time.
Practical Safety Tips
Working with sharp blades is always risky. Here are some safety measures:
- Always unplug the slicer before starting.
- Wear both cut-resistant gloves and goggles.
- Never touch the edge directly, even if you think it’s dull.
- Keep children and pets away from the work area.
- Don’t rush—slow and steady prevents accidents.
A little caution goes a long way when handling slicer blades.

Credit: www.youtube.com
Common Questions About Slicer Sharpening
Even experienced users have questions about sharpening. Here are a few less obvious insights:
- How sharp is “sharp enough”? The blade should slice through a tomato or paper without tearing.
- Can I use a kitchen knife sharpener? No, slicer blades need a different angle and technique.
- What if my slicer is vintage? Find a professional who works with older models; don’t risk damaging a rare blade.
Real-world Example: Restaurant Vs. Home Use
Let’s look at how sharpening habits differ.
Home user: Slices meat once a week for sandwiches. Sharpens every three months, uses a built-in sharpener, and replaces the blade every 3–4 years.
Deli owner: Slices meat and cheese all day, every day. Sharpens weekly, uses professional service every few months, and replaces the blade yearly.
Understanding your usage pattern is key to good blade care.
Environmental Impact: Sharpening Vs. Disposing
Sharpening a blade keeps it in use longer and reduces waste. Disposing of a blade adds to landfill, especially since most are not recyclable due to food contamination. By sharpening regularly, you reduce your environmental footprint.
When To Call A Technician
Some problems require a professional:
- The blade won’t turn after sharpening.
- There’s a wobble or vibration you can’t fix.
- The sharpening mechanism is broken or missing parts.
- You’re unsure about any step of the process.
Calling a technician is better than risking injury or damaging your slicer.
How To Store And Protect Your Slicer Blade
After sharpening, proper storage helps maintain the edge:
- Cover the blade with a protective guard.
- Store the slicer in a dry, cool place.
- Keep the blade lightly oiled if you won’t use it for a while.
Never store the slicer while it’s still wet or dirty. Rust can develop quickly.
Innovations In Meat Slicer Blade Design
Modern slicer blades are getting more advanced:
- Non-stick coatings reduce food buildup and make sharpening easier.
- Hardened steel alloys hold an edge longer.
- Quick-release mechanisms make blade removal safer and faster.
When buying a new slicer, look for these features to make sharpening and maintenance easier.
For more detailed information about blade angles and sharpening methods, check resources like Wikipedia: Sharpening.
Frequently Asked Questions
How Do I Know If My Meat Slicer Blade Is Sharp Enough?
Try slicing a tomato or a sheet of paper. If the blade cuts cleanly without crushing or tearing, it’s sharp enough. For best results, check the edges visually for tiny burrs or chips.
Can I Use Any Sharpening Stone For My Meat Slicer Blade?
No. Use a fine-grit sharpening stone designed for food blades, or the stone recommended by your slicer’s manufacturer. Some blades (like serrated ones) need specialized tools.
Is It Safe To Sharpen The Blade While It’s On The Slicer?
Only if your slicer has a built-in sharpener designed for use with the blade attached. Otherwise, always remove the blade and unplug the machine before sharpening.
How Often Should I Clean My Slicer After Sharpening?
Deep clean your slicer every time you sharpen the blade. This removes metal particles and keeps food safe. For daily use, wipe down after each session.
What Should I Do If I Damage The Blade During Sharpening?
Stop immediately. Do not use a damaged blade. Consult your owner’s manual or call a technician to assess whether the blade can be repaired or needs replacement.
Taking care of your meat slicer blade isn’t difficult, but it does require attention to detail and regular maintenance. By sharpening your blade the right way and following these tips, you’ll get better results, work more safely, and keep your slicer running for years to come.