
Giving your cabinets a fresh, modern look is easier than you think. Staining cabinets grey has become a popular choice for homeowners who want a timeless, elegant style. Grey matches many wall colors, adds a cool touch to your kitchen or bathroom, and hides fingerprints better than white.
If you want a simple way to upgrade your space without replacing your cabinets, learning how to stain cabinets grey is a smart project. This guide will walk you through each step, from choosing the right stain to finishing with a durable topcoat.
You’ll also discover insider tips, common mistakes to avoid, and practical advice you won’t find in quick DIY videos. Whether you’re a beginner or have some experience with home improvement, you’ll find everything you need to achieve professional results.
Why Choose Grey Stain For Cabinets?
Grey is more than just a trendy color; it’s a versatile shade that works with classic or modern décor. Unlike paint, staining lets the natural wood grain show through, adding depth and richness to your cabinets. Grey stains come in a range of shades—from light ash to deep charcoal—so you can pick the tone that matches your style.
Grey also has practical benefits. It hides dust and small scratches better than white or very dark colors. It doesn’t make a room look smaller, like black might. And it doesn’t turn yellow over time, unlike some paints and lighter stains.
If you want a lasting finish that’s easy to maintain, grey is a strong choice.
Types Of Grey Stain: What’s Right For Your Cabinets?
Before you start, it’s important to choose the right grey stain for your project. Not all stains are the same, and the final look depends on your cabinet material and the stain type.
| Stain Type | Main Features | Best For |
|---|---|---|
| Oil-Based | Deep color, slow drying, easy to blend | Hardwoods (oak, maple) |
| Water-Based | Quick drying, low odor, easy cleanup | Softwoods (pine, birch), indoor use |
| Gel Stain | Thicker, sits on top, less blotching | Veneer, previously finished cabinets |
| Penetrating Stain | Soaks in, natural look, shows wood grain | Unfinished, open-grain wood |
Oil-based stains give a rich, even finish but take longer to dry and need good ventilation. Water-based stains dry fast and clean up with soap and water. Gel stains are thicker and are great if your cabinets have a veneer or a tricky surface. Penetrating stains work best on bare wood and really highlight the grain.
Pro tip: Always check what your cabinets are made of before picking a stain. Some woods absorb stain unevenly (like pine), so a gel stain or a pre-stain conditioner helps avoid blotchy results.
Tools And Materials You’ll Need
Gathering the right tools before you start will make the project smoother and faster. Here’s a list of what you’ll need:
- Grey wood stain (oil-based, water-based, gel, or penetrating)
- Pre-stain wood conditioner (for softwoods or blotchy woods)
- Screwdriver (for removing cabinet doors and hardware)
- Drop cloths or plastic sheeting
- Sandpaper (120-grit and 220-grit)
- Sanding block or orbital sander
- Tack cloth or microfiber cloth (for dust removal)
- Foam brushes or lint-free rags
- Paintbrush (for corners or details)
- Stir sticks
- Disposable gloves
- Safety mask and goggles
- Painter’s tape
- Degreaser or TSP cleaner
- Bucket and sponge
- Clear protective finish (polyurethane, polycrylic, or lacquer)
- Small containers (for stain or finish)
Having these ready avoids last-minute trips to the store and helps you work without interruptions.
Planning And Prepping: The Foundation For Success
Many first-timers rush into staining without proper prep. This leads to uneven color, rough surfaces, or peeling later. Successful staining is 80% about preparation. Here’s how to set yourself up for the best results.
1. Clear Your Workspace
Empty the cabinets and clear the counters. Move small appliances, food, and anything that might get in the way. Lay down drop cloths to protect your floors.
2. Remove Doors And Hardware
Take off all cabinet doors, drawers, and hardware (handles, knobs, hinges). Label each door and its matching hardware with painter’s tape. This makes reassembly much faster and ensures everything fits back perfectly.
3. Clean All Surfaces
Kitchen and bathroom cabinets collect grease and dirt. Use a degreaser or TSP cleaner to remove all residue. Rinse with clean water and let dry completely. Even a small amount of grease can prevent stain from sticking evenly.
4. Sand Thoroughly
Sanding is critical. Old finish, scratches, and dents must be smoothed out. Start with 120-grit sandpaper for rough surfaces or old varnish. Finish with 220-grit for a smooth base. Sand with the grain to avoid scratches.
Pay extra attention to corners and edges. Use a sanding block for flat areas, and hand-sand details. Vacuum and wipe with a tack cloth to remove all dust. Dust left on the surface can cause bumps under the stain.
5. Tape Off Surrounding Areas
Use painter’s tape to protect walls, floors, and any surfaces you don’t want stained. This saves cleanup time and gives crisp edges.
Testing The Stain: Avoid Surprises
Grey stains look different on each wood type. They can appear blue, green, brown, or even purple if you skip testing. Always test your stain on a hidden area (inside a door or back of a drawer). Apply the stain, let it dry, and check the color in different lights—morning, afternoon, and evening.
Adjust the application time or try a different shade if the color isn’t right.
Insider tip: If your test spot looks too blue, try a second coat or mix a drop of brown stain into the grey. For a warmer grey, a pre-stain conditioner can help.
How To Stain Cabinets Grey: Step-by-step
Here is the full process, broken down into clear, manageable steps. Take your time and don’t rush—each step affects the final look.
1. Apply Pre-stain Conditioner (optional But Recommended)
If your cabinets are made of softwood (like pine) or a wood that stains unevenly, use a pre-stain wood conditioner. This soaks into the wood and helps the stain go on evenly. Apply with a clean brush or rag, following the wood grain. Wait 15–30 minutes before staining.
2. Mix And Stir The Stain
Open the stain can and stir well. Pigments can settle, so mix from the bottom. Stir every 10 minutes as you work to keep the color even.
3. Apply The Grey Stain
Dip a clean rag or foam brush into the stain. Wipe or brush on a thin, even coat, moving with the grain. Work in sections—one door or drawer at a time.
Let the stain sit for 2–5 minutes (check your can’s instructions), then wipe off the excess with a clean rag. The longer it sits, the darker the color. For a light grey, wipe off quickly. For a deeper color, let it absorb a few minutes more.
Avoid puddles or drips. Overlap each section slightly to prevent streaks.
4. Let The Stain Dry
Let each piece dry flat in a dust-free area. Drying times vary:
- Oil-based: 6–12 hours
- Water-based: 2–4 hours
- Gel stain: 6–8 hours
Check that the surface feels dry and not tacky before moving on.
5. Add More Coats For Depth
If you want a richer grey, repeat the staining process after the first coat is dry. Most projects need 1–2 coats. Too many coats can hide the wood grain.
6. Lightly Sand Between Coats
For a silky-smooth finish, lightly sand with 220-grit sandpaper between coats. Wipe away dust with a tack cloth. This step removes tiny bumps and ensures the next layer sticks well.
7. Apply A Protective Topcoat
Stain alone isn’t durable enough for cabinets. After the last coat is fully dry, apply a clear topcoat (polyurethane or polycrylic) with a clean brush or foam applicator. This protects against water, scratches, and kitchen messes.
Apply 2–3 thin coats, letting each dry fully and sanding lightly between coats. Oil-based topcoats add a warm glow, while water-based ones keep the color cooler.
8. Reattach Doors And Hardware
Once everything is dry and cured (usually 24–48 hours after the last topcoat), reinstall doors and hardware. Remove painter’s tape, touch up any missed spots, and enjoy your new cabinets.
Advanced Techniques For Unique Grey Finishes
Grey doesn’t have to be flat or boring. Here are a few ways to customize your cabinets:
Glazing For Depth
After staining, add a glaze (a thin, tinted finish) to accent grooves or create an aged look. Apply glaze over the stain, then wipe away, leaving it in corners and details.
Layering Stains
For a weathered look, layer a light grey stain, let dry, then add a darker grey or brown on top. Wipe off quickly so only a hint of the second color stays.
Distressing
Gently sand corners and edges after staining and before sealing. This gives a worn, farmhouse look.
Non-obvious insight: Don’t use steel wool on oak cabinets—tiny fibers can react with tannins in the wood and turn black under grey stain.
Mistakes To Avoid When Staining Cabinets Grey
Many DIYers run into common problems. Here’s how to avoid them:
- Skipping cleaning: Even small amounts of grease or dust can cause the stain to peel.
- Not sanding enough: Old finish left on the wood will block the new stain and create patchy spots.
- Using the wrong stain: Gel stains are best for veneer or previously finished cabinets. Penetrating stains need bare, open-grain wood.
- Not testing the color: Grey stains can surprise you. Always test first.
- Applying thick coats: More stain doesn’t mean better results. Thick layers take longer to dry and may peel.
- Skipping the topcoat: Unsealed stain won’t last in kitchens or bathrooms.
- Rushing reassembly: Wait until everything is fully cured before reattaching doors to avoid fingerprints and smudges.
- Forgetting ventilation: Oil-based stains and topcoats need good airflow. Open windows and wear a mask.
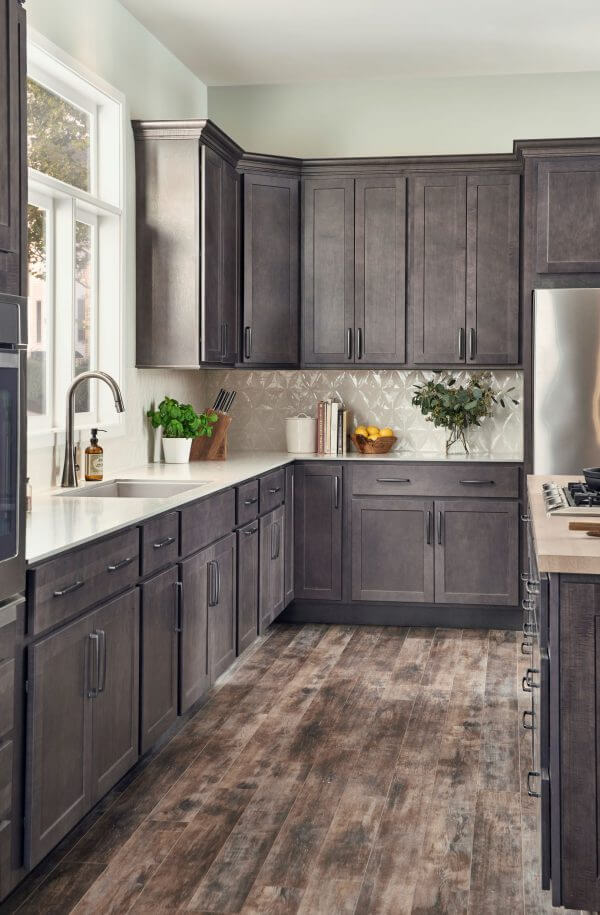
Credit: quickshipkitchens.com
Comparing Grey Stains: Popular Brands And Their Features
Choosing a high-quality stain makes a big difference in color, durability, and ease of use. Here’s how some popular brands compare for grey cabinet projects:
| Brand | Type | Drying Time | Finish Quality | Notes |
|---|---|---|---|---|
| Minwax Wood Finish | Oil-based | 8 hours | Rich, classic grey | Good for hardwoods |
| Varathane Premium | Water-based | 2 hours | Fast drying, low odor | Best for indoor use |
| General Finishes Gel Stain | Gel | 6 hours | Easy on veneer | Thick, less mess |
| Rust-Oleum Ultimate | Water-based | 1 hour | Good for light woods | Budget-friendly |
Pro tip: Buy small cans for testing before committing to a full-size can. Even the same color from different brands can look very different.
Caring For Grey-stained Cabinets
After all your hard work, you want your cabinets to stay beautiful for years. Grey-stained cabinets are durable, but a few habits help keep them looking fresh:
- Wipe spills right away, especially water or oil.
- Use a soft, damp cloth for cleaning. Avoid harsh chemicals or abrasives.
- Polish hardware occasionally to keep it shiny.
- If you see small scratches, touch up with leftover stain on a cotton swab.
Grey stain hides dust well, but sunlight can fade any finish over time. Try to limit direct sunlight or use window shades if your cabinets are near a window.
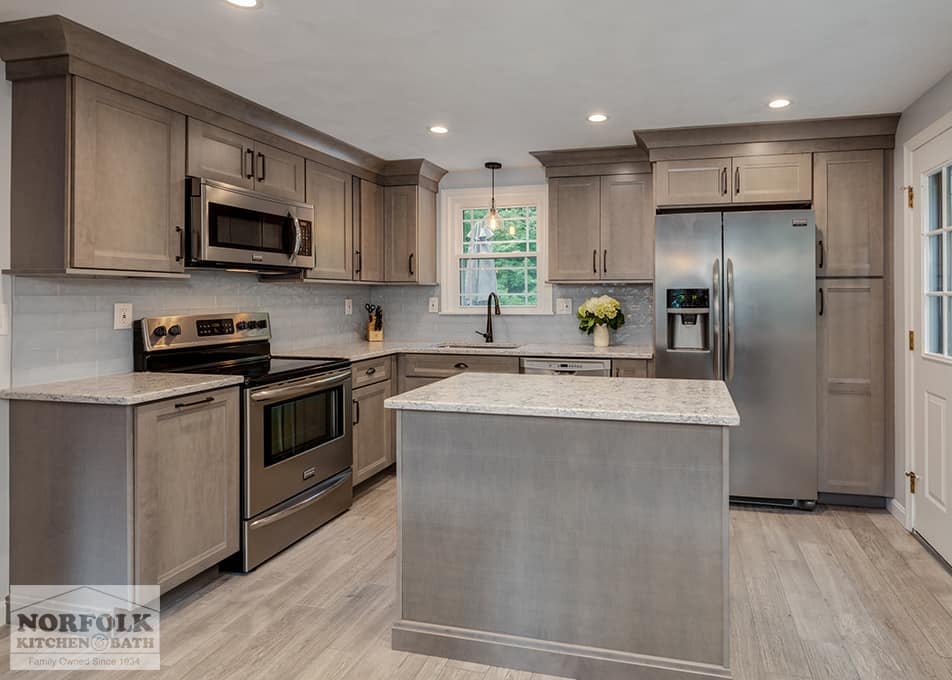
Credit: www.norfolkkitchenandbath.com
Real-world Examples: How Grey Stain Transforms Cabinets
Seeing is believing. Here are three real-life examples to help you imagine the results:
- Modern Farmhouse Kitchen: Homeowners used a light grey stain on maple cabinets, paired with white subway tile and black hardware. The result was a bright, clean look that felt warm and welcoming.
- Industrial Loft: A deeper charcoal stain was used on oak cabinets. Concrete countertops and open shelves gave the space an urban, modern vibe.
- Classic Bathroom: Soft grey stain on birch cabinets, with brushed nickel handles, created a spa-like feel. The wood grain added texture, making the small bathroom look larger.
Non-obvious insight: The same grey stain can look very different under warm or cool lighting. Consider changing light bulbs to see the true color before finishing your project.
Cost, Time, And Skill Level: What To Expect
Staining cabinets grey is one of the most affordable kitchen or bath upgrades you can do yourself. Here’s what most people can expect:
| Factor | DIY Project | Hiring a Pro |
|---|---|---|
| Cost | $80–$200 (materials only) | $800–$2,500 |
| Time Needed | 2–4 days (including drying time) | 1–2 days |
| Skill Level | Beginner–Intermediate | Not applicable |
While hiring a pro saves time, doing it yourself lets you control the details and save money. Most beginners can handle this project with patience and careful prep.
When Not To Stain Cabinets Grey
Staining isn’t always the best choice. Here are times to consider other options:
- If your cabinets are made of laminate (plastic-like surface), stain won’t absorb and will peel.
- If the wood has deep damage, cracks, or water stains, the flaws may show through the stain.
- If you want a pure, solid color, paint is a better choice than stain.
- If your kitchen gets little natural light, a very dark grey can make it feel gloomy.
Environmental And Health Considerations
Many stains and topcoats contain strong chemicals. Here’s how to work safely:
- Use low-VOC (volatile organic compounds) products when possible. These have less odor and are safer indoors.
- Wear gloves, goggles, and a mask.
- Work in a well-ventilated area, with windows open or a fan running.
- Dispose of rags and stain cans properly. Some products can catch fire if left in a pile.
For more on safe wood finishing, see the EPA’s Safer Choice Program.

Credit: www.primecabinetry.com
Frequently Asked Questions
How Long Does It Take To Stain Cabinets Grey?
The full process usually takes 2–4 days. This includes cleaning, sanding, applying stain, drying time, and adding a protective topcoat. Drying times are the biggest factor. Rushing leads to smudges or peeling, so patience pays off.
Can I Stain Cabinets Grey Without Sanding?
Skipping sanding is risky. Most stains need bare wood to absorb evenly. If you don’t sand, the stain may sit on top and peel. For previously finished cabinets, a gel stain can work with minimal sanding, but even then, a light sanding helps the stain grip better.
What’s The Best Grey Stain For Kitchen Cabinets?
There’s no single “best” stain, but Minwax Classic Grey (oil-based) and Varathane Weathered Gray (water-based) are top choices. Pick the one that matches your wood type and how dark or light you want the finish.
How Do I Prevent Blotchy Or Uneven Color?
Use a pre-stain wood conditioner on softwoods like pine or woods known to absorb stain unevenly. Always test the stain on a hidden area first. Wipe off excess stain evenly, and work in small sections to avoid lap marks.
Can I Change Grey-stained Cabinets Back To Wood Or Another Color?
It’s possible, but you’ll need to sand off all the grey stain down to bare wood. This can be hard on cabinets with thin veneer. After sanding, you can restain with a different color or paint. If you might want to change colors in the future, avoid very dark greys or multiple coats.
Staining cabinets grey is a project that rewards care and patience. With the right tools, a little practice, and these step-by-step instructions, you can transform your space and enjoy the results for years to come.