
Making espresso at home can feel complex, especially if you don’t own a big, expensive espresso machine. But what if you could create something close to espresso—strong, bold, and layered in flavor—using a simple, affordable device? That’s where the Aeropress comes in. Many coffee lovers are surprised to learn just how versatile this small brewer is. With the right technique, you can make a cup that’s very similar to espresso, perfect for lattes, cappuccinos, or just sipping straight. This guide will show you how to use Aeropress for espresso-style coffee, step by step, with clear explanations and practical tips.
What Makes Espresso Different?
Before you begin, it helps to understand what makes espresso unique. Espresso is not just strong coffee. It’s brewed under high pressure—usually 9 bars or more—and uses very fine coffee grounds. The result is a small, concentrated shot with a rich flavor and a layer of creamy foam called crema.
Aeropress cannot create the same pressure as a real espresso machine. However, it can produce a bold, concentrated coffee that tastes close to espresso. When you use the right grind, water temperature, and pressing technique, you can get a cup with a creamy mouthfeel and a satisfying intensity. This is often called “Aeropress espresso.”
Why Use Aeropress For Espresso-style Coffee?
There are several good reasons:
- Affordable: Espresso machines can cost hundreds or even thousands of dollars. Aeropress is much cheaper.
- Portable: It’s lightweight and easy to carry. Great for travel or small kitchens.
- Easy to Clean: Aeropress parts rinse off quickly.
- Customizable: You control the grind, dose, and brew time.
Many coffee shops and baristas use Aeropress for competitions. Its flexibility makes it popular among coffee fans who like to experiment.
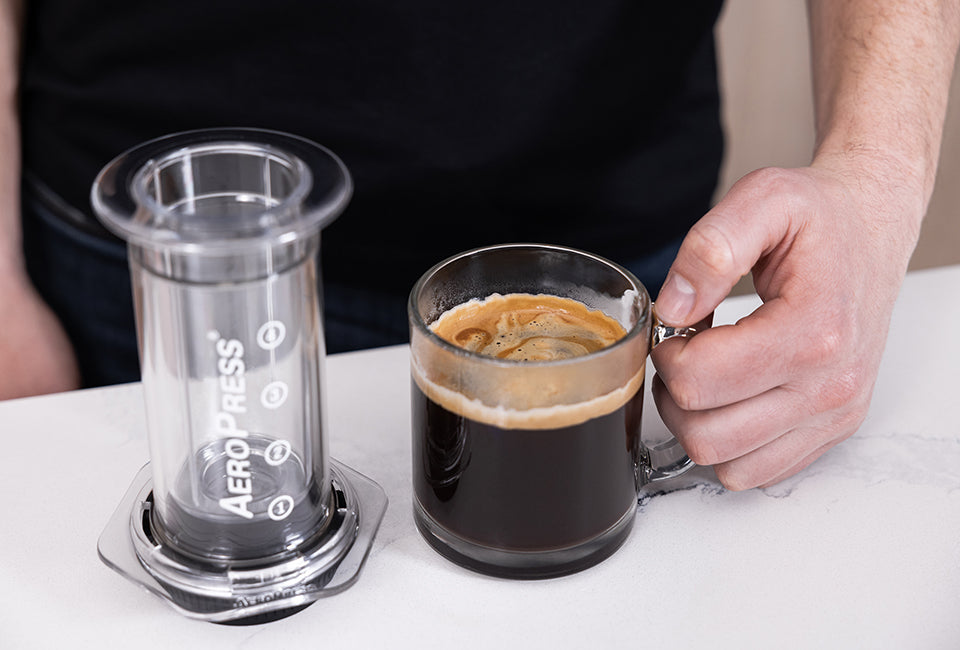
Credit: aeropress.com
What You Need For Aeropress Espresso
To get the best results, gather the right tools:
- Aeropress (with plunger and chamber)
- Aeropress paper filter (or metal filter for a heavier cup)
- Fresh coffee beans (medium-dark roast recommended)
- Burr grinder (for even grind)
- Digital scale (for accurate measurements)
- Kettle (preferably with a gooseneck spout)
- Timer (phone or watch works)
- Stirrer (plastic or wooden is best)
- Mug or espresso cup
- Hot water (around 90-96°C or 195-205°F)
Having these items ready will help you brew consistently.
Choosing The Right Coffee Beans
Not all coffee beans work well for Aeropress espresso. Here’s what to look for:
- Roast level: Medium to dark roasts bring out the bold flavors and smooth body you want in espresso.
- Freshness: Use beans roasted within the past two weeks.
- Origin: Single-origin coffees offer unique flavors, while blends give a balanced taste.
- Grind size: For espresso style, grind should be fine—like table salt or a bit finer. Too coarse and your coffee will taste weak; too fine and it may clog the Aeropress.
Example: Comparing Roast Levels
Here’s a simple comparison of roast types for Aeropress espresso:
| Roast Level | Flavor Profile | Recommended? |
|---|---|---|
| Light | Bright, acidic, fruity | No (too sharp) |
| Medium | Balanced, sweet, nutty | Yes |
| Dark | Bold, chocolate, smoky | Yes |
How To Grind Coffee For Aeropress Espresso
Grind size is critical for espresso-like coffee. If the grind is too coarse, water flows through quickly and the cup is weak. If too fine, it becomes hard to press, and you risk bitter flavors.
- Target grind: Finer than table salt but not powdery like Turkish coffee.
- Amount: Use 16-18 grams for a single shot, 20-22 grams for a double.
If you don’t own a burr grinder, ask your local coffee shop to grind beans for Aeropress espresso.
Non-obvious tip: Always grind just before brewing. Pre-ground coffee loses aroma and flavor fast. Also, don’t overfill the Aeropress; too much coffee can make pressing difficult.
Setting Up Your Aeropress
Before you start, set up your Aeropress:
- Place a paper filter in the cap and rinse it with hot water. This removes paper flavor and preheats the brewer.
- Attach the cap to the chamber.
- Place the Aeropress on top of your mug.
You can use the standard method (upright) or the inverted method (upside-down). The inverted method gives you more control and prevents leaks, so it’s recommended for espresso-style brewing.
Standard Vs. Inverted Method
| Method | Pros | Cons |
|---|---|---|
| Standard | Simple, less risk of spills | Can drip before pressing |
| Inverted | Full immersion, more control | Requires careful flipping |
Most Aeropress espresso recipes use the inverted method for better results.
Step-by-step Aeropress Espresso Recipe
Now, let’s go through the entire process in detail. The following steps are for a strong, espresso-style shot.
Step 1: Weigh And Grind Your Coffee
- Measure 18 grams of coffee for a single shot (or 20 grams for a double).
- Grind to a fine consistency—slightly coarser than true espresso.
Step 2: Set Up The Aeropress (inverted Method)
- Place the plunger into the chamber, stopping just before the “4” mark.
- Stand the Aeropress upside down on a stable surface.
Step 3: Add Coffee Grounds
- Pour the ground coffee into the chamber. Gently shake to level the bed.
Step 4: Heat Water
- Heat water to 94°C (201°F). If you don’t have a thermometer, boil water and let it sit for 30 seconds.
Step 5: Bloom The Coffee
- Start your timer.
- Pour about 40 grams of hot water over the grounds. This is about double the coffee dose.
- Stir gently for 10 seconds to wet all the grounds. This releases trapped gas and unlocks flavors.
Step 6: Add More Water
- Slowly pour up to 60-70 grams total water (for a single shot). For a double, use 80-100 grams.
- Stir again for 5 seconds.
Step 7: Steep
- Let the coffee steep for 45-60 seconds. This is longer than regular Aeropress recipes to extract more flavor.
Step 8: Attach The Filter Cap
- Place the rinsed filter cap on the chamber and twist to lock.
Step 9: Flip And Press
- Carefully flip the Aeropress onto your mug.
- Press down slowly and steadily. Use your body weight, not just your arms.
- The whole pressing should take 20-30 seconds. You’ll feel resistance; this is normal.
Step 10: Enjoy Or Dilute
- You now have a small, strong shot—similar to espresso.
- Taste it as is, or add hot water for an Americano, or steamed milk for a latte.
Pro tip: Clean the Aeropress right away. Just pop the coffee puck into the trash and rinse the parts.
Key Variables To Fine-tune
Aeropress espresso is flexible. Here are the main factors to adjust:
- Coffee dose: More coffee = stronger shot.
- Water amount: Less water = more concentrated cup.
- Grind size: Finer gives more extraction but can be harder to press.
- Brew time: Longer steeping boosts intensity.
- Pressure: Pressing slower gives a smoother taste.
Experiment to find your favorite balance.
Credit: aeropress.com
How To Create Crema With Aeropress
Crema is the golden foam on top of real espresso. Aeropress can’t match the high pressure of espresso machines, but you can get a light crema-like foam.
- Use fresh, medium-dark beans.
- Grind fine and use a higher coffee dose.
- Press quickly at the end for a burst of pressure.
Non-obvious insight: Some people add a small spoon of sugar to the cup before pressing. This can help “catch” the crema and make it more visible, just like in Italian-style espresso.
Making Aeropress Espresso For Milk Drinks
Aeropress espresso is perfect for home lattes and cappuccinos. Here’s how:
- Brew a double shot as above.
- Heat and froth 120 ml milk (whole milk gives best texture).
- Pour espresso into a cup.
- Add steamed milk, holding back the foam with a spoon.
- Spoon foam on top for cappuccino.
You can use a simple hand frother or shake hot milk in a jar for foam if you don’t own a steam wand.
Common Mistakes And How To Avoid Them
Aeropress is forgiving, but some errors can ruin your coffee. Watch out for these:
- Wrong grind size: Too coarse = weak; too fine = hard to press, bitter.
- Stale beans: Old coffee tastes flat.
- Not enough coffee: Weak, watery shot.
- Water too hot/cold: Too hot can burn; too cold under-extracts.
- Pressing too fast: Can cause splashes and uneven extraction.
- Skipping bloom phase: Makes coffee taste sour or dull.
Always adjust one variable at a time. Keep notes to track what works.
Comparing Aeropress Espresso To Machine Espresso
How close does Aeropress espresso come to the real thing? Here’s a side-by-side look:
| Feature | Espresso Machine | Aeropress |
|---|---|---|
| Pressure | 9 bars | 0.5–1 bar (manual) |
| Crema | Thick, stable | Thin, short-lived |
| Flavor | Complex, rich | Bold, less syrupy |
| Cost | High | Low |
| Ease of Use | Learning curve | Easy |
The main differences are pressure and crema. But Aeropress still delivers a satisfying, espresso-like drink.
Popular Aeropress Espresso Recipes
Different baristas have developed their own Aeropress espresso-style recipes. Here are a few you can try:
1. Classic Short Shot
- 18g fine coffee
- 60g water (94°C)
- 1 min steep, 30 sec press
2. Double Shot
- 20g fine coffee
- 90g water (94°C)
- 1: 15 min steep, 30 sec press
3. Speedy Shot
- 16g fine coffee
- 50g water (96°C)
- 30 sec total brew time, fast press
Each recipe gives a slightly different flavor. Try them and note your favorite.
Advanced Aeropress Espresso Techniques
For those who want to go deeper:
Use A Metal Filter
A metal filter lets more oils through, giving a heavier body and richer mouthfeel. It’s reusable and eco-friendly, but some people notice more sediment.
Try The Fellow Prismo Attachment
The Fellow Prismo is a special Aeropress accessory that creates back pressure, closer to espresso machines. It makes thicker, crema-rich shots. It’s popular with Aeropress fans who want the best possible espresso style.
Pre-infusion
Let the coffee “bloom” with a small amount of water for 20 seconds, then add the rest. This improves extraction and brings out more sweetness.
Cold Water “shock”
For a smoother cup, try adding 10g of cold water at the end before pressing. This “shocks” the coffee and softens harsh flavors.
Cleaning And Maintenance
Aeropress is easy to keep clean:
- After brewing, push the plunger to eject the coffee puck.
- Rinse the plunger, chamber, and filter cap.
- Wash with mild soap once a week to remove any oil buildup.
Don’t put the plunger away wet—let it air dry to avoid mold.
When To Use Aeropress Espresso
Aeropress espresso is ideal for:
- Making lattes or cappuccinos at home without an espresso machine
- Traveling or camping
- Small kitchens
- Quick, affordable espresso drinks
- Experimenting with different beans and recipes
It’s not for those who need classic, thick crema every time. But for most, it’s a great balance of taste, price, and simplicity.
Aeropress Espresso For Iced Drinks
Try making iced espresso drinks:
- Brew a double shot as above.
- Pour over a glass filled with ice.
- Add milk, sweetener, or syrups as you like.
The bold Aeropress espresso flavor stands up well to ice and milk.
How To Troubleshoot Common Problems
If your Aeropress espresso isn’t coming out right, try these fixes:
- Too weak: Use more coffee, finer grind, or less water.
- Too bitter: Use a coarser grind, cooler water, or shorter steep.
- Hard to press: Grind is too fine, or you’re using too much coffee. Try backing off a bit.
- No crema: Use fresher beans, or try the Prismo attachment.
Keep a log of your changes so you can repeat your best results.
Useful Tips For Better Aeropress Espresso
- Preheat your mug and Aeropress for better extraction.
- Use a scale for accuracy—guessing leads to uneven results.
- Try different stirring techniques (circular, back-and-forth) to see what you like best.
- Clean the filter after each use. Paper can absorb oils that affect taste.
- If you want a hotter shot, rinse everything with boiling water before brewing.
Understanding The Limitations
Aeropress is not a replacement for a full espresso machine. You won’t get the same thick crema or syrupy body. But with care and practice, you can come close, especially for milk-based drinks.
Many coffee professionals use Aeropress for its simplicity and clean-up speed. For home use, it offers great value and consistent results.

Credit: www.youtube.com
Resources For Aeropress Fans
If you want to learn more, check out the official Aeropress site and the World Aeropress Championship. You’ll find hundreds of recipes and tips from global baristas. For more on espresso technique, see this Wikipedia page about espresso.
Frequently Asked Questions
What Grind Size Should I Use For Aeropress Espresso?
Use a grind that is finer than table salt, but not as fine as powder. It should feel a bit gritty, like sand. Too fine and it’s hard to press; too coarse and the shot is weak.
Can Aeropress Make Real Espresso?
Aeropress cannot make true espresso because it doesn’t reach high enough pressure. But it can make a strong, concentrated coffee that is very close, especially for lattes and iced drinks.
How Much Coffee And Water Do I Need?
For a single shot, use 16-18 grams of coffee and 50-70 grams of water. For a double, use up to 22 grams coffee and 100 grams water. You can adjust these based on taste.
How Do I Get More Crema With Aeropress?
Use fresh, medium-dark beans, a fine grind, and press quickly at the end. Try the Prismo attachment for better crema. Adding a little sugar before pressing can also help capture the foam.
Can I Use Pre-ground Coffee?
Freshly ground beans give better flavor and crema. But if you must use pre-ground coffee, ask for an espresso or Aeropress grind at the store. Use it within a week for best results.
Creating espresso-style coffee with an Aeropress is rewarding and fun. With a little practice, you’ll find your perfect recipe and enjoy delicious, strong coffee at home—no fancy machine required.