
Using a pressure cooker can change the way you cook, saving you both time and energy. The Nuwave Pressure Cooker is one of the most versatile tools in modern kitchens. It can make meals faster, lock in flavor, and keep your food nutritious. But if you’re new to pressure cooking, the process can seem confusing. Don’t worry—by the end of this guide, you’ll feel confident using your Nuwave Pressure Cooker for everyday meals and special occasions alike.
In this detailed article, you’ll learn how to use the Nuwave Pressure Cooker from start to finish. We’ll cover setup, usage, safety, cleaning, troubleshooting, and provide tips even many experienced users don’t know. Whether you just bought your Nuwave or want to get more out of it, every step will be clear and practical.
Understanding Your Nuwave Pressure Cooker
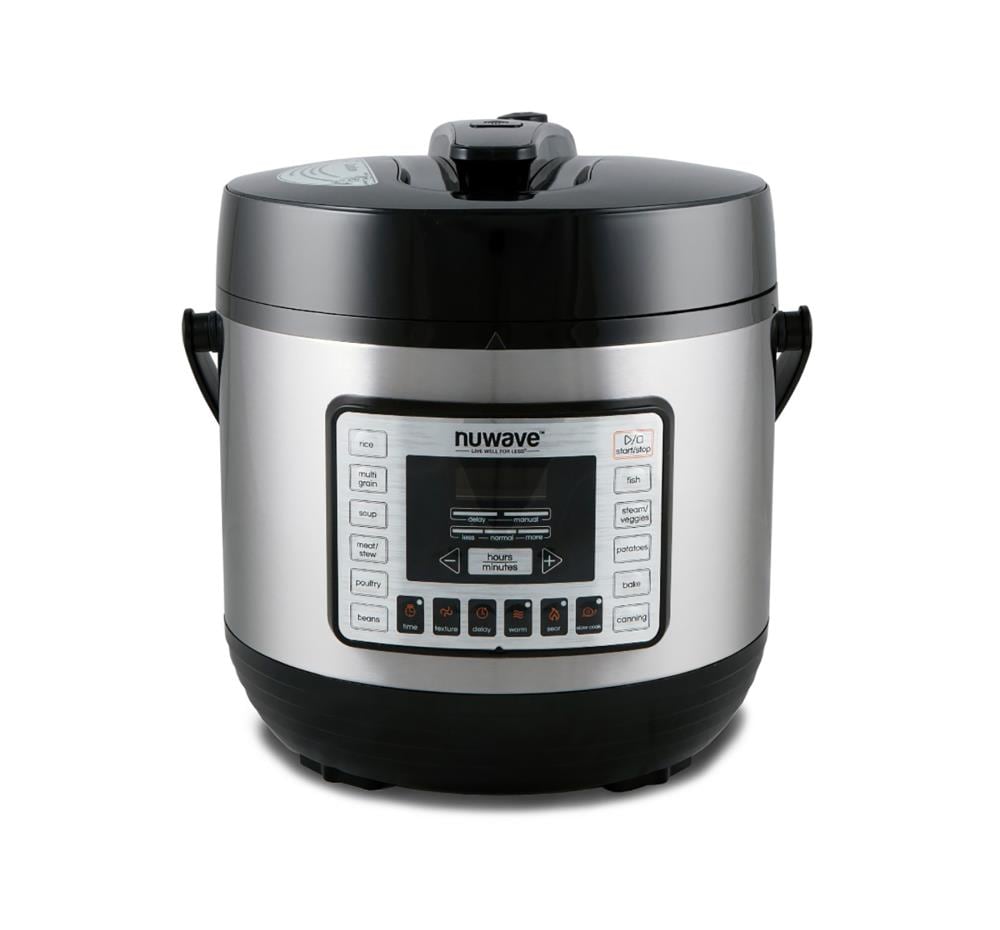
Before you start cooking, it’s important to know the parts and features of your Nuwave Pressure Cooker. This helps you use it safely and get the best results.
Key Components
The Nuwave Pressure Cooker usually includes:
- Cooking pot (removable, non-stick)
- Lid with sealing ring and locking mechanism
- Pressure release valve (manual or automatic)
- Control panel with digital display and buttons
- Steam rack or trivet
- Measuring cup and spatula (sometimes included)
The control panel is where you select cooking programs, set timers, and adjust pressure or temperature. The lid is designed to lock tightly for safety and to trap steam.
Common Features
Most Nuwave models offer:
- Multiple pressure settings (low, medium, high)
- Preset cooking functions (rice, soup, meat, beans, poultry, etc.)
- Delay timer and keep-warm function
- Saute/browning feature
- Safety locks and pressure sensors
Knowing these features helps you use the cooker correctly and adapt recipes easily.
First-time Setup
When you unpack your Nuwave Pressure Cooker, it’s not ready to use right away. Follow these steps to make sure your first meal is safe and delicious.
- Remove all packaging from inside and outside the cooker.
- Wash the cooking pot, lid, sealing ring, and accessories in warm soapy water. Rinse and dry thoroughly.
- Check the sealing ring (a silicone ring under the lid). Make sure it is positioned properly and not twisted.
- Inspect the pressure release valve and float valve. These must move freely and should be clean, with no food residue.
- Wipe the exterior of the cooker with a damp cloth. Never submerge the main unit in water.
Water Test (initial Test Run)
Running a water test is an important first step. This checks that your cooker seals and heats correctly.
- Add 3 cups of water to the cooking pot.
- Close the lid and set the pressure release valve to “Sealing.”
- Select the “Manual” or “Pressure Cook” setting. Set for 5 minutes at high pressure.
- The cooker will take a few minutes to reach pressure, then begin counting down.
- When time is up, use the pressure release valve to “Quick Release” the steam.
- Open the lid once all pressure is released.
If the cooker builds pressure and counts down, your Nuwave is ready to use. If not, check the sealing ring and valves again.
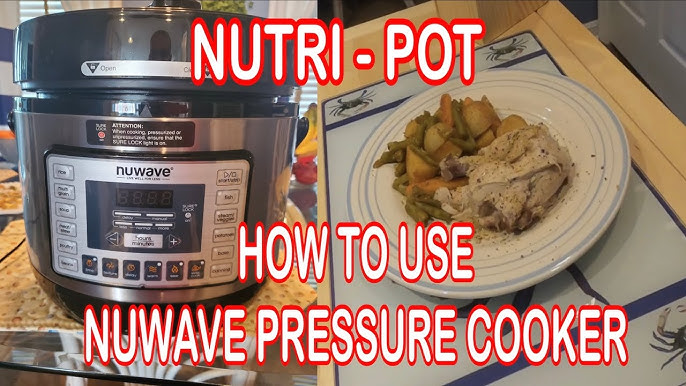
Credit: www.youtube.com
How To Use Nuwave Pressure Cooker: Step-by-step
Once you’re familiar with the basics, you can start cooking real meals. Here’s how to use your Nuwave Pressure Cooker for most recipes.
1. Prepare Your Ingredients
Chop, measure, and gather all ingredients before you start. This makes the process smooth and prevents mistakes. The Nuwave cooks quickly, so you won’t have much time to prepare once it starts.
2. Add Ingredients To The Pot
Put all your ingredients into the removable cooking pot. If your recipe calls for browning or sauteing, use the “Saute” function before pressure cooking. This helps build flavor for dishes like stews or chili.
Tip: Never fill the pot more than two-thirds full. For foods that expand (beans, rice, grains), fill only halfway. Overfilling can block the pressure valve and cause safety problems.
3. Secure The Lid
Close the lid and turn it to the locked position. You’ll hear a click. Make sure the sealing ring is properly in place, and that the pressure release valve is set to “Sealing.”
4. Select Cooking Program And Adjust Settings
Use the control panel to choose your cooking function. For example, select “Beans,” “Poultry,” or “Manual.” You can usually adjust:
- Pressure level (low, medium, high)
- Cooking time (increase or decrease with +/- buttons)
- Delay timer (start cooking later)
- Keep warm (automatic or manual)
Choose the settings that match your recipe.
5. Start Cooking
Press the “Start” or “Cook” button. The cooker will begin preheating. You’ll see “On” or “Preheat” on the display. After a few minutes, the cooker will reach the right pressure, and the cooking time will start counting down.
Tip: The time it takes to reach pressure depends on how much food and liquid you have. Usually, it takes 5–15 minutes.
6. Release Pressure Safely
When cooking time is finished, you need to release the pressure before opening the lid. There are two main ways:
- Natural Release: Let the cooker sit. Pressure drops slowly on its own (good for soups, meats).
- Quick Release: Turn the pressure release valve to “Venting.” Steam comes out fast (good for vegetables, pasta).
Always use a utensil or towel to turn the valve—never your bare hands. Wait until all steam is out and the float valve drops before opening the lid.
7. Open And Serve
Carefully open the lid away from your face. Stir your food and check for doneness. If it needs more time, you can reseal and cook a few minutes longer.
Cooking Functions And When To Use Them
The Nuwave Pressure Cooker is more than just a pressure cooker. It often replaces several appliances, thanks to its many preset functions.
Common Preset Programs
- Rice: Automatically adjusts for white or brown rice.
- Soup/Broth: For thin or thick soups; keeps ingredients tender.
- Beans/Chili: Handles dried or canned beans without soaking.
- Poultry: Chicken, turkey, and other birds; keeps meat juicy.
- Meat/Stew: Beef, pork, lamb; breaks down tough cuts quickly.
- Steam: For vegetables, fish, or dumplings.
- Saute/Brown: For browning meat or vegetables before cooking.
Each preset uses specific pressure and timing. You can adjust time/pressure for your recipe, but presets give you a good starting point.
Manual Vs. Preset Cooking
Manual mode lets you choose pressure and time for any recipe. This is helpful for custom dishes or when following recipes found online.
Preset mode is easier for beginners. Just select the food type, and the cooker does the rest.
Safety Tips For Using Nuwave Pressure Cooker
Pressure cooking is safe if you follow basic rules. The Nuwave model has built-in safety features, but you should always be careful.
- Never open the lid while the cooker is under pressure.
- Always check the sealing ring for cracks or damage before use.
- Don’t overfill the pot. Stay below the “Max” line.
- Use enough liquid. Pressure cookers need steam to work. Most recipes need at least 1 cup (240 ml) of liquid.
- Keep the pressure valve clean and free of food debris.
- Replace worn parts (sealing ring, valves) as needed.
- Don’t force the lid open. If it won’t open, there’s still pressure inside.
Advanced Safety Features
- Lid lock: Won’t open until pressure is fully released.
- Automatic shutoff: Turns off if the cooker overheats.
- Pressure sensors: Prevent overpressure by releasing excess steam.
Some users miss that the sealing ring absorbs odors and flavors over time. For best results, have a separate ring for savory and sweet dishes.
Cleaning And Maintenance
Taking care of your Nuwave Pressure Cooker keeps it working like new. Proper cleaning also prevents odors and keeps your food tasting fresh.
After Each Use
- Unplug the cooker and let it cool.
- Remove the cooking pot and wash with warm, soapy water. Rinse and dry well.
- Clean the lid—remove the sealing ring and wash separately.
- Wipe the exterior with a damp cloth.
- Check the valves for any blockages. Clean with a small brush or toothpick if needed.
Deep Cleaning (weekly Or Monthly)
- Remove the sealing ring and soak in vinegar water if it smells.
- Clean the pressure release valve and float valve thoroughly.
- Wash the steam rack and all accessories.
Maintenance Tips
- Replace the sealing ring every 12–18 months or sooner if it’s cracked or stretched.
- Store the lid upside down on the cooker. This keeps the sealing ring from trapping odors.
- Never use abrasive cleaners on the non-stick pot.
Here’s a quick comparison of cleaning needs for different Nuwave parts:
| Part | Dishwasher Safe? | How Often to Clean |
|---|---|---|
| Cooking Pot | Yes | After every use |
| Lid | Yes (top rack) | After every use |
| Sealing Ring | Yes | Weekly or as needed |
| Main Unit | No | Wipe as needed |
Cooking Times And Liquid Guidelines
Different foods need different times and amounts of liquid. Here’s a handy guide for common foods cooked in the Nuwave Pressure Cooker.
| Food | Pressure Level | Cook Time (min) | Minimum Liquid (cups) |
|---|---|---|---|
| White Rice | High | 4–6 | 1 |
| Brown Rice | High | 20–22 | 1.25 |
| Chicken Breast | High | 8–10 | 1 |
| Beef Stew | High | 35–40 | 1.5 |
| Beans (soaked) | High | 8–10 | 3 |
| Vegetables | Low | 2–4 | 0.5 |
Tip: Always check your Nuwave manual for specific recommendations. These times are general guidelines.
Common Mistakes And How To Avoid Them
Even experienced users can make mistakes with pressure cookers. Here are some issues and how to prevent them:
1. Not Enough Liquid
Pressure cookers need steam to build pressure. If there’s too little liquid, your food may burn or the cooker will display an error.
Solution: Always use at least 1 cup (240 ml) of liquid.
2. Overfilling The Pot
Too much food or liquid can block the pressure valve and cause leaks or mess.
Solution: Never fill above the “Max” line. For foods that expand, fill only halfway.
3. Forgetting To Set The Valve
If the pressure release valve is not set to “Sealing,” your cooker won’t pressurize.
Solution: Double-check the valve before starting.
4. Opening Too Soon
Opening the lid before all pressure is released is dangerous.
Solution: Wait until the float valve drops and all steam is out.
5. Not Cleaning Properly
Food stuck in valves or seals can cause steam leaks or strange odors.
Solution: Clean all parts thoroughly after each use.
6. Using Wrong Cooking Times
Too much or too little time can ruin your food.
Solution: Follow tested recipes and adjust only as needed.

Credit: grasduikers.be
Special Tips For Better Results
Here are a few expert tips that many beginners miss:
- Layer flavors: Use the “Saute” function to brown onions, garlic, or spices before pressure cooking. This adds depth to soups, stews, and curries.
- Use separate sealing rings: One for savory, one for sweet. This prevents flavor transfer, especially if you bake desserts in your cooker.
- Add dairy and thickening agents after cooking: Ingredients like cream, milk, or flour can burn or foam. Stir them in at the end.
- Natural release for meats: Letting pressure drop naturally keeps meats tender and juicy.
- Quick release for vegetables: Keeps veggies crisp and bright in color.
- De-glaze the pot: After sauteing, add a splash of liquid and scrape up browned bits before pressure cooking. This prevents burn warnings.
- Don’t skip the water test: Even after months of use, running a water test after cleaning can catch issues before they ruin a meal.
Example Recipe: Classic Chicken Stew
Let’s walk through a full recipe to see the Nuwave Pressure Cooker in action.
Ingredients
- 1.5 lbs (700g) chicken thighs (boneless, skinless, cut in chunks)
- 2 cups chicken broth
- 3 carrots (sliced)
- 3 potatoes (cubed)
- 1 onion (diced)
- 2 celery stalks (sliced)
- 2 tbsp olive oil
- 2 cloves garlic (minced)
- 1 tsp dried thyme
- 1 tsp salt
- 0.5 tsp black pepper
- 1 cup frozen peas
- 2 tbsp flour (optional, for thickening)
Instructions
- Select “Saute.” Add olive oil, onions, and garlic. Cook for 2 minutes.
- Add chicken pieces. Brown for 3–4 minutes.
- Add carrots, potatoes, celery, broth, thyme, salt, and pepper. Stir well.
- Cancel “Saute.” Lock lid and set valve to “Sealing.”
- Select “Poultry” or set to High Pressure for 10 minutes.
- When done, allow natural release for 10 minutes, then quick release any remaining pressure.
- Open lid, stir in peas. If you want it thicker, mix flour with a little water and stir in. Use “Saute” to simmer until thickened.
This recipe serves 4–6 people and takes about 40 minutes total (including prep and pressure build/release). You get tender chicken and vegetables in a rich broth, with less effort than stovetop cooking.
Troubleshooting Nuwave Pressure Cooker Problems
Even with the best care, you might face some problems. Here’s how to fix common issues:
Cooker Won’t Pressurize
- Check the sealing ring—is it properly in place?
- Is the lid locked and the valve on “Sealing”?
- Do you have enough liquid?
- Is the float valve stuck? Clean it.
Steam Leaking From Sides
- Sealing ring may be dirty, damaged, or not seated correctly.
- Overfilled the pot—remove some food/liquid.
- Lid not locked properly.
Error Codes On Display
- “Lid” error: Lid isn’t closed properly.
- “E3” or similar: Pot overheated, usually due to too little liquid or stuck food.
- “PrSE”: Pressure sensor error, may require customer support.
For more details, check your Nuwave manual or contact their support. Also, the official Nuwave support page offers digital manuals and troubleshooting help.
Comparing Nuwave To Other Pressure Cookers
If you’re wondering how the Nuwave compares to other brands, here’s a quick look at key features:
| Feature | Nuwave Pressure Cooker | Instant Pot | Crock-Pot Express |
|---|---|---|---|
| Preset Programs | 8–12 | 10–14 | 8–12 |
| Pressure Levels | Multiple | Multiple | High only |
| Saute Function | Yes | Yes | Yes |
| Non-stick Pot | Yes | No (stainless steel) | Yes |
| Warranty | 1 year | 1 year | 1 year |
Nuwave stands out for its user-friendly display and wide range of safety features. Its non-stick pot is easy to clean, but some users prefer stainless steel for durability.
Credit: www.lowes.com
Frequently Asked Questions
How Much Water Do I Need In The Nuwave Pressure Cooker?
You need at least 1 cup (240 ml) of liquid for the cooker to build pressure. For foods that absorb water (like rice or beans), follow recipe guidelines, as you may need more.
Can I Cook Frozen Meat In The Nuwave Pressure Cooker?
Yes, you can cook frozen meat directly in the Nuwave. Just add a few extra minutes to the cooking time. Always check that meat reaches a safe internal temperature before serving.
Why Is Steam Leaking From The Sides Of The Lid?
This often means the sealing ring is not in place, is dirty, or is damaged. Clean or reposition the ring and try again. If it’s old or stretched, replace it.
Can I Open The Lid While Cooking?
Never open the lid while the cooker is under pressure. Wait until the float valve drops and all steam is released before opening for safety.
How Do I Get Rid Of Odors In The Sealing Ring?
Soak the sealing ring in a mix of vinegar and water for 1 hour. Rinse and dry well. For strong odors, keep separate rings for sweet and savory foods.
The Nuwave Pressure Cooker is an amazing tool for quick, healthy, and flavorful meals. With the right setup, care, and a few smart tricks, you’ll get perfect results every time. Whether you’re making a fast weeknight dinner or a big family stew, this cooker can save you hours in the kitchen.
With practice, you’ll unlock more possibilities and enjoy cooking even more.