
If you own or manage a Raypak heater, you may come across a confusing error: No Pilot Sensed Ignition Failure. This message can appear suddenly, leaving your pool cold or your building without hot water. Many people struggle to understand what this message means, why it appears, and—most importantly—how to fix it. Some even replace expensive parts or call for service without knowing the basics. Let’s break down everything you need to know about this error, from how ignition systems work to step-by-step troubleshooting, common mistakes, and long-term solutions. By the end, you’ll feel confident dealing with the “No Pilot Sensed Ignition Failure” on any Raypak unit.
Understanding Raypak Ignition Systems
Before fixing the problem, it helps to know how Raypak ignition systems work. Raypak is a leading brand for heaters used in pools, spas, and commercial buildings. Most modern Raypak heaters use electronic ignition rather than a standing pilot (older systems). This means the heater only lights the flame when heat is needed, saving energy and reducing risk.
What Is A Pilot Ignition?
The pilot is a small flame or a spark that lights the main burner. In electronic systems, you often have a spark igniter that creates a spark to start the flame, and a flame sensor or pilot sensor that checks if the flame is really there.
How Ignition Failure Happens
If the system tries to light the burner but does not “sense” a pilot flame, it will shut down for safety. The system will display “No Pilot Sensed Ignition Failure. ” This is a built-in protection so gas does not flow without burning, which could be very dangerous.
What Does “no Pilot Sensed Ignition Failure” Mean?
This message means the heater tried to start, but the flame sensor did not detect a flame. The system stops the ignition process, closes the gas valve, and alerts the user. This error can be caused by many things, from dirt on the sensor to deeper electrical or gas issues.
It’s not always clear at first glance whether the problem is simple or complex. That’s why it’s important to understand the possible causes, symptoms, and best ways to diagnose the issue.
Credit: www.troublefreepool.com
Key Causes Of No Pilot Sensed Ignition Failure
Let’s look at the most common reasons for this error:
1. Dirty Or Faulty Flame Sensor
The flame sensor (sometimes called a thermocouple or flame rod) can get dirty or corroded. If it cannot sense the flame, the system will not work.
2. Igniter Problems
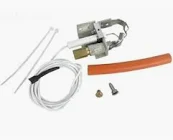
The igniter creates the spark that lights the pilot. If it’s not working, there’s no flame to sense.
3. Gas Supply Issues
If there’s no gas reaching the burner, nothing will ignite.
4. Blocked Pilot Orifice
Dirt, spider webs, or debris can block the tiny opening where gas comes out for the pilot.
5. Wiring Or Control Board Faults
Broken wires, loose connections, or a failed control board can stop the signal from reaching the sensor or igniter.
6. Low Gas Pressure
If gas pressure is too low, the pilot may not stay lit.
7. Improper Grounding
The sensor needs a good electrical ground to detect the flame. Poor grounding causes false errors.
8. Moisture Or Corrosion
Water, humidity, or chemical corrosion can affect the sensor or electronics.
Less Obvious Causes
Some less obvious reasons often missed by beginners:
- Voltage drops: If your power supply is unstable, the control board may not work correctly.
- Aftermarket parts: Using non-Raypak or low-quality replacement sensors or igniters can cause detection problems.
How To Diagnose The Error
The first step is not to panic. Most ignition failures are fixable. Here’s a practical, step-by-step approach:
1. Observe The Heater’s Behavior
Watch the heater when it tries to start. Listen for clicking (the igniter), look for small flames, and check if any lights or error codes appear. This tells you where the process stops.
2. Check For Obvious Issues
- Is the heater plugged in and getting power?
- Is the gas supply valve open?
- Are the switches (including the service switch) turned on?
3. Inspect The Flame Sensor
- Locate the flame sensor (a thin metal rod near the burner).
- If it’s dirty or covered with white or gray buildup, it needs cleaning.
4. Test The Igniter
- Listen for a “click” or see a spark.
- If there’s no spark, the igniter could be faulty.
5. Check Gas Flow
- Smell for gas (carefully! ).
- Confirm the gas line is open and the meter shows flow.
6. Look For Blockages
- Check the pilot orifice for dirt, spider webs, or insects.
7. Inspect Wiring And Connectors
- Look for loose, corroded, or broken wires.
- Gently tug connectors to see if they’re secure.
8. Check For Moisture Or Corrosion
- Look for signs of water or rust around the control board and sensors.
9. Review Error Codes
- Some Raypak models show additional error codes or light patterns. Read the manual for your model to interpret these codes.
Step-by-step Troubleshooting And Solutions
Let’s break down each cause with clear steps and example fixes.
1. Cleaning Or Replacing The Flame Sensor
A dirty sensor is the top reason for this error.
- Turn off power and gas to the heater.
- Locate the flame sensor.
- Gently rub it with steel wool or a fine abrasive pad until shiny.
- Reinstall the sensor.
- Turn the system back on and try to start.
If cleaning doesn’t work, the sensor may need replacement. Always use the correct part for your Raypak model.
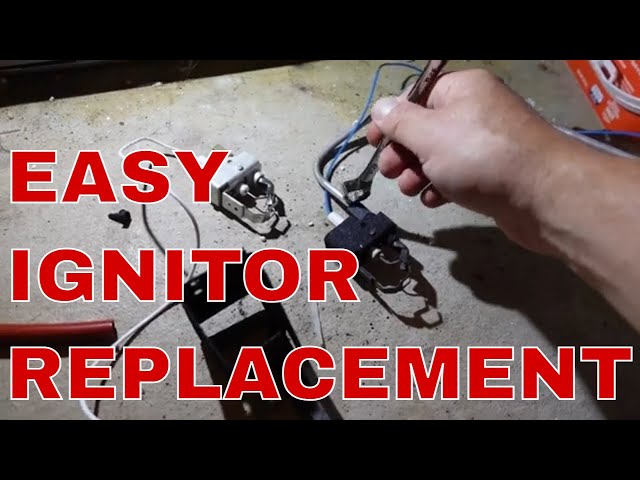
2. Testing And Replacing The Igniter
- Turn off power and gas.
- Remove the igniter and inspect for cracks or heavy wear.
- Use a multimeter to check resistance (see your manual for correct values).
- If faulty, replace with a matching igniter.
3. Restoring Gas Flow
- Make sure the main gas valve is open.
- Check for kinks or damage in the gas line.
- If you suspect low pressure, call your gas supplier.
4. Clearing The Pilot Orifice
- Turn off gas and power.
- Remove the pilot assembly.
- Use compressed air or a small wire to clear the orifice.
- Reinstall and test.
5. Repairing Wiring And Connections
- With power off, inspect all wires.
- Tighten loose connections.
- Replace corroded or burned wires.
6. Addressing Moisture And Corrosion
- Dry out any wet areas.
- Clean corrosion with electrical contact cleaner.
- Seal or repair leaks to prevent future problems.
7. Fixing Improper Grounding
- Check the ground wire from the control board to the chassis.
- Tighten or replace as needed.
- Make sure the ground is connected to a real earth ground.
8. Control Board Replacement
If all else fails, the control board may be bad. This is less common but possible after power surges or lightning strikes.
- Order an official Raypak replacement board.
- Follow the manual for installation.
How Raypak Ignition Compares To Other Brands
Raypak uses robust, modern ignition technology. But how does it stack up to other pool heater brands? Here’s a quick comparison:
| Feature | Raypak | Hayward | Pentair |
|---|---|---|---|
| Ignition Type | Electronic (DSI/HSI) | Electronic & Pilot | Electronic (HSI) |
| Flame Sensing | Rod sensor | Thermocouple/Rod | Rod sensor |
| Error Codes | Yes, digital | Some models | Yes, advanced |
| Reliability | High | Medium-High | High |
Raypak’s electronic ignition is considered reliable, but like all brands, it needs regular maintenance to avoid false errors.
Common Mistakes When Fixing Ignition Failure
Many owners and even some technicians make mistakes that cost time and money. Here are frequent errors:
1. Replacing Parts Too Soon
Some people buy a new flame sensor or control board before cleaning or checking the old one.
2. Ignoring The Ground Connection
Many skip checking the ground, but it’s essential for flame sensing.
3. Not Checking Gas Pressure
If your gas supply is weak, no fix will work until it’s restored.
4. Using Non-oem Parts
Cheaper aftermarket sensors or igniters may not work properly.
5. Skipping Regular Maintenance
Dirt and corrosion build up fast in outdoor heaters.
6. Not Reading The Manual
Each model is slightly different. The manual has specific steps and error code meanings.
Preventing Future Ignition Failures
You can avoid most ignition errors with regular care. Here’s how:
- Clean the flame sensor every season.
- Check for spiders or insects in the pilot area.
- Inspect wiring for damage after storms or heavy use.
- Keep the heater area dry and free of chemicals.
- Test the heater monthly even in the off-season.
This simple routine prevents most failures and keeps your Raypak heater running smoothly.
Real-world Example: Troubleshooting A Pool Heater
Let’s look at a real example. A hotel maintenance team found their Raypak pool heater showing “No Pilot Sensed Ignition Failure.” The pool was cold, and guests were unhappy. Here’s how they solved it:
- Checked power and gas: Both were on.
- Listened for igniter: No clicking sound was heard.
- Inspected igniter: Found it cracked and worn.
- Replaced igniter: Used a genuine Raypak part.
- Cleaned flame sensor: Light sanding removed deposits.
- Checked gas flow: Confirmed with a manometer.
- Restarted heater: Heater fired up and ran normally.
They avoided replacing the expensive control board by carefully checking each component first.
Cost Breakdown: Typical Repairs For Ignition Failure
Heater repairs range from simple to expensive. Here’s a breakdown of average costs:
| Repair/Part | DIY Cost (USD) | Professional Cost (USD) |
|---|---|---|
| Flame Sensor Cleaning | $0 (your time) | $75–$125 |
| Flame Sensor Replacement | $20–$50 | $120–$200 |
| Igniter Replacement | $40–$80 | $150–$250 |
| Control Board Replacement | $150–$250 | $350–$600 |
| Gas Line Repair | $20–$100 | $200–$400 |
Tip: Many issues can be fixed with basic cleaning and checks. Only call a professional for complex problems or if you smell gas.
Safety First: When To Call A Professional
Warning: If you ever smell strong gas, hear hissing, or see visible flames outside the burner, stop immediately and call a professional or your gas supplier. Do not attempt repairs if you are unsure or uncomfortable with electrical or gas systems. Your safety comes first.
Advanced Diagnostics: For Technically Skilled Users
If you’re experienced with electronics and gas systems, you can try advanced checks:
- Use a multimeter to measure sensor voltage.
- Check gas pressure with a manometer.
- Inspect control board for burned or damaged components.
- Use diagnostic LED lights (on some models) to read detailed error codes.
Always turn off power and gas before opening the heater.
How To Find Genuine Raypak Parts
For reliable repairs, always use genuine Raypak parts. Aftermarket parts may cause more errors. Purchase from Raypak dealers, pool supply stores, or trusted online sources. If unsure, check the serial number and part number in your manual or on the Raypak website.
Energy Savings And Environmental Impact
Fixing ignition problems isn’t just about comfort. A working ignition system saves gas, reduces emissions, and prevents waste. According to the U.S. Department of Energy, regular heater maintenance can improve efficiency by up to 10–20%, lowering your bills and environmental footprint.
When Replacement Is Better Than Repair
If your heater is over 10–15 years old, or needs frequent repairs, replacement may be smarter than constant fixing. New Raypak models are more efficient and have better safety features. Always compare the cost of repairs versus a new unit before making a decision.
Comparing Raypak Models: Ignition Reliability
Different Raypak models use slightly different ignition technologies. Here’s a quick look at popular models and their features:
| Model | Ignition Type | Typical Lifespan | Common Issues |
|---|---|---|---|
| Raypak 206A | DSI (Direct Spark) | 8–12 years | Sensor corrosion, spider webs |
| Raypak 406A | HSI (Hot Surface) | 10–15 years | Igniter wear, moisture |
| Raypak Versa | Electronic | 10–15 years | Wiring issues, dirty sensor |
Note: Lifespan depends on maintenance and environment.
Credit: www.youtube.com
Pro Tips For Long-term Reliability
- Install a surge protector to shield the control board from electrical damage.
- Use a heater cover to protect from rain and debris.
- Keep area clear of leaves, insects, and chemicals.
- Schedule professional maintenance yearly if possible.
- Log all repairs and error codes for future reference.
The Role Of Weather And Environment
Outdoor heaters face harsh conditions: rain, snow, humidity, and even pool chemicals in the air. These speed up corrosion and sensor failure. If you live in a wet or coastal area, inspect your heater more often and consider extra protection, like a weatherproof enclosure.
Understanding Error Code Variations
Some Raypak models display codes like “IF” (Ignition Failure), “SFS” (Safety Failure Sensor), or blink lights in patterns. Always check your manual or the Raypak website for model-specific error code meanings. If you’re unsure, take a photo of the display to help with troubleshooting or when calling a technician.
Resources For Raypak Owners
Raypak offers manuals and troubleshooting guides on their official website. You can also find helpful forums and videos from experienced owners. For detailed technical support, visit Raypak Official.

Credit: forum.inyopools.com
Frequently Asked Questions
What Does “no Pilot Sensed Ignition Failure” Mean On A Raypak Heater?
This message means the heater tried to ignite, but the flame sensor did not detect a flame. The system shuts down for safety to prevent unburned gas from flowing.
How Do I Clean A Raypak Flame Sensor?
Turn off power and gas. Gently remove the sensor and rub it with steel wool or a fine sandpaper until it’s clean and shiny. Reinstall and restart the heater.
Can I Use Any Flame Sensor Or Igniter With My Raypak Heater?
No. Always use genuine Raypak parts designed for your model. Aftermarket parts may not work properly and can void your warranty.
What Should I Do If Cleaning The Sensor Does Not Fix The Problem?
Check the igniter, gas supply, wiring, and control board. If you are unsure or smell gas, call a professional technician to inspect the system.
How Often Should I Perform Maintenance To Prevent Ignition Failures?
At least once a year, or more often in harsh environments. Clean the sensor, check for debris, and inspect wiring regularly for best results.
Dealing with a “No Pilot Sensed Ignition Failure” on your Raypak heater can be stressful, but most problems have simple solutions. With the right knowledge, careful troubleshooting, and regular maintenance, you can keep your heater running safely and efficiently for many years.