
Replacing a mechanical pool timer with a digital one can make life much easier for pool owners. If you have ever struggled with old, ticking timers that get stuck, lose time, or are hard to program, you are not alone. Many people want to upgrade but are not sure how to do it safely and correctly. This guide explains everything you need to know about swapping your mechanical pool timer for a modern, reliable digital timer. You will learn about the benefits, the tools and steps involved, mistakes to avoid, and how to get the most from your new device.
Why Replace A Mechanical Pool Timer?
A mechanical timer controls when your pool pump turns on and off. It usually has a dial and pins you must set by hand. Over time, these timers can wear out. Springs break, gears get stuck, and the timer can lose time or fail completely.
This can lead to high electricity bills, dirty pool water, and even pump damage.
Digital timers solve many of these problems. They are more accurate, easier to program, and often include extra features. For example, you might be able to set multiple on-off cycles, use a remote or smartphone app, or save energy with built-in schedules.
Many pool owners switch to digital timers for these reasons:
- Accuracy: Digital timers keep time better, even during power outages (many have battery backup).
- Flexibility: You can set complex schedules, including weekends, holidays, or variable run times.
- Convenience: Most digital timers are easier to set and read, especially for people who dislike small pins or dials.
- Efficiency: With better scheduling, you run your pump only as needed, saving money.
- Advanced features: Some models include Wi-Fi, remote control, or integration with smart home systems.
Understanding Your Current Pool Timer
Before replacing your timer, you need to know what you have. Most pool timers are installed in a metal or plastic box near the pump. They are wired directly to the electrical supply. Here is how to identify the main types:
- Mechanical timers: These have a round dial with numbers and moveable pins or tabs. You turn the dial to set the time and insert pins for on/off periods.
- Digital timers: These have a screen (LCD or LED) and buttons for programming. If you already have this, you might want to upgrade to a newer model.
Check the model number, voltage (usually 120V or 240V), and amperage (how much current it handles). You can often find this information inside the timer box or on the back of the cover. If in doubt, take a photo and look up the model online or ask a pool professional.
You should also note:
- The number of circuits (does it control just the pump, or other devices too?)
- The wiring (how many wires and what colors are used)
- The location (indoors, outdoors, weatherproof box)
Choosing The Right Digital Timer
Not all digital pool timers are the same. Picking the right one for your pool is important. Here are the main things to consider:
1. Voltage And Amperage
Your new timer must match the power supply and pump load. Most pool pumps use either 120V or 240V circuits. Check your existing timer and pump for the correct rating. Using the wrong voltage can be dangerous.
- 120V timers: Used for smaller pumps or above-ground pools.
- 240V timers: Common for in-ground pools and larger equipment.
Also, check the amperage (amps). The timer must handle at least as much current as your pump draws. If your pump uses 15 amps, pick a timer rated for 15A or more.
2. Number Of Circuits
Some timers control only the pump. Others can control multiple devices, like pool lights, heaters, or waterfalls. Decide if you need a single-circuit or multi-circuit timer.
3. Outdoor Rating
If your timer is outside, it must be weatherproof (usually rated NEMA 3R or higher). Look for models made for outdoor installation.
4. Features
- Multiple programs: Set different schedules for different days or times.
- Battery backup: Keeps settings during power outages.
- Manual override: Lets you turn the pump on/off without changing the schedule.
- Smart controls: Some timers work with apps, voice assistants, or home automation.
- Backlit display: Easier to read at night.
5. Brand And Warranty
Choose a reputable brand with good reviews and a solid warranty. Popular brands include Intermatic, Honeywell, and GE.
6. Budget
Digital timers range from $40 (basic models) to $200+ (advanced, Wi-Fi enabled). Think about your needs and how much you want to spend.
Here is a simple comparison of common timer types:
| Type | Voltage | Circuits | Weatherproof | Special Features | Price Range |
|---|---|---|---|---|---|
| Basic Digital | 120/240V | 1 | Yes | Battery backup | $40–$80 |
| Multi-Circuit Digital | 120/240V | 2–4 | Yes | Multiple schedules | $80–$150 |
| Smart Wi-Fi Timer | 120/240V | 1–4 | Yes | App control, voice assist | $120–$250 |
Tools And Materials Needed
Before starting the replacement, gather all the tools and materials. Working with electricity can be dangerous. Always turn off power at the breaker box before touching wires. If you are not comfortable with electrical work, call a licensed electrician.
You will need:
- New digital pool timer (make sure it matches your needs)
- Screwdrivers (flat and Phillips)
- Wire strippers and cutters
- Voltage tester or multimeter
- Electrical tape
- Wire nuts (connectors)
- Drill (if mounting new box)
- Pencil or marker (for labeling wires)
- User manual for the new timer
- Safety gloves and glasses
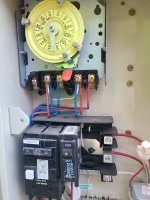
Credit: www.troublefreepool.com
Step-by-step Replacement Process
Switching from a mechanical to a digital pool timer is not as hard as it seems, but it requires careful work. Follow these steps to ensure a safe and smooth upgrade.
Step 1: Turn Off Power
Go to your main electrical panel. Find the breaker that controls the pool pump and timer. Switch it to OFF. Use a voltage tester to check that there is no power at the timer box. This is very important for your safety.
Step 2: Open The Timer Box
Unscrew the cover and open the box. Take a photo of the wiring before you disconnect anything. This can help you remember where each wire goes later.
Step 3: Label The Wires
Use tape and a marker to label each wire (for example, “Line,” “Load,” “Ground”). This avoids confusion when you install the new timer.
Step 4: Disconnect The Old Timer
Loosen the wire screws and remove the wires from the mechanical timer. Carefully remove the timer from the box. If the box is in good shape and fits the new timer, you can reuse it. If not, install the new box provided with your digital timer.
Step 5: Install The New Digital Timer
Follow the instructions in the user manual. Most digital timers have clearly marked terminals for Line (power in), Load (to pump), and Ground. Connect each wire to the correct terminal. Use wire nuts if needed and make sure all connections are tight.
Step 6: Mount The Timer
Secure the timer to the box using screws. Make sure it is straight and the display is easy to read. If you are using a new box, drill holes and use anchors as needed.
Step 7: Double-check Wiring
Check that all wires are connected correctly. Compare with your labels and the photo you took earlier. Make sure there are no loose wires.
Step 8: Set The Program
Before closing the box, program your desired schedule using the buttons and display. Most digital timers have a simple step-by-step setup. Set the current time, on/off times, and any special schedules.
Step 9: Restore Power And Test
Turn the breaker back ON. Watch the timer and pump. The display should light up, and the pump should turn on and off according to your schedule. Test the manual override function if available.
Step 10: Close The Box
If everything works, close the timer box and secure the cover. Make sure the box is weatherproof if outdoors.
Here is a visual summary for the key steps:
| Step | Action | Notes |
|---|---|---|
| 1 | Turn off power | Always verify with a voltage tester |
| 2 | Open and label wires | Take photos for reference |
| 3 | Remove old timer | Check box condition |
| 4 | Install new timer | Follow wiring diagram closely |
| 5 | Program and test | Set schedule before closing box |
Common Problems And How To Avoid Them
Many people make small mistakes when replacing a pool timer. Here are some common issues and how to avoid them:
1. Not Turning Off Power Completely
Some circuits are mislabeled or have more than one power source. Always check with a voltage tester, not just the breaker label.
2. Mixing Up Wires
If you do not label wires before disconnecting, it is easy to forget what goes where. Always label and photograph before starting.
3. Using The Wrong Timer
If your timer does not match the voltage or amperage of your pump, it can overheat, fail, or even cause a fire. Always check the ratings.
4. Poor Weatherproofing
If your timer is outdoors, make sure the box is sealed and rated for outdoor use. Water can damage the timer or cause dangerous shorts.
5. Forgetting To Program Backup Battery
Some digital timers need a backup battery inserted to keep the clock running during power outages. Do not skip this step.
6. Skipping The Manual
Many programming mistakes happen because people guess instead of reading the instructions. Spend a few minutes with the manual for best results.
Pro tip: If your timer has extra features like Wi-Fi, follow the app setup steps as well. This often requires connecting your smartphone and may need your home Wi-Fi password.

Credit: www.amazon.com
Advanced Tips For Digital Timer Setup
Setting up your new digital timer is not just about getting the pump to run. You can optimize your pool’s energy use, water quality, and even extend the life of your equipment with a few smart tricks.
1. Optimize Run Times
Most pools need the pump to run long enough to circulate all the water once per day. This is called one “turnover. ” The needed time depends on your pool size and pump speed.
- For most home pools, 6 to 8 hours per day is enough.
- Run the pump during off-peak electricity hours if your utility offers cheaper rates.
2. Use Multiple Cycles
Some digital timers let you set more than one on/off period per day. Running the pump for a few hours in the morning and again in the late afternoon can improve water clarity and chemical balance.
3. Integrate With Smart Home
If your timer supports Wi-Fi, connect it to your smart home system. You can control the pump from your phone, get alerts, or even link it to weather forecasts for more efficient operation.
4. Schedule For Cleaning And Heating
If you use a pool cleaner or heater, set the timer to run the pump during those cycles. This ensures proper water flow and saves energy.
5. Track Energy Use
Some advanced timers provide energy usage data. Use this to fine-tune schedules and save money.
Safety Tips For Diy Installation
Electricity and water are a dangerous mix. Always prioritize safety. Here are some key points to remember:
- If you are not sure about wiring or local codes, hire a licensed electrician.
- Always use a GFCI (Ground Fault Circuit Interrupter) outlet for pools.
- Keep the timer box closed and locked to prevent tampering.
- Check connections every year for corrosion or looseness.
- Replace worn or damaged wires immediately.
Real-world Example: Swapping A Timer In A Family Pool
Let’s look at a typical replacement. The Smith family had a 15-year-old mechanical timer for their 18,000-gallon in-ground pool. The timer would sometimes skip hours or get stuck, causing algae problems. They bought a 240V digital timer with a weatherproof case and battery backup.
They turned off the power, labeled the wires, and took photos before disconnecting the old timer. They followed the wiring diagram in the manual, connected the wires, and mounted the new timer in the same box. After programming a 7 am to 11 am and 4 pm to 8 pm schedule, the pool ran more efficiently.
Electricity bills dropped by 12%, and the water stayed clear.
A small detail that helped: they used color-coded tape for each wire, making future checks easier. They also set a calendar reminder to test the battery backup every six months.
Digital Timer Maintenance And Troubleshooting
Once your new timer is running, it needs little maintenance. Still, check these points every few months:
- Make sure the display is clear and the time is correct.
- Test the manual override button.
- Replace the backup battery as needed (usually every 1–2 years).
- Inspect for signs of moisture, rust, or insects in the box.
- Clean the display and buttons if dirty.
If the timer stops working:
- Check the circuit breaker and power supply.
- Make sure the backup battery is not dead.
- Reset the timer and reprogram if needed.
- If the display is blank, check for loose wiring or blown fuses.
- If still not working, contact the manufacturer or an electrician.
Environmental And Cost Benefits
Upgrading to a digital timer is not just about convenience. It can also save energy and money.
- Energy savings: By running your pump only when needed, you can cut energy use by 20–30% compared to a timer that runs too long.
- Lower bills: Many users report savings of $10–$30 per month in summer.
- Less wear: Correct schedules mean your pump lasts longer, saving on repairs.
According to the U.S. Department of Energy, pool pumps are one of the biggest energy users in homes with pools. Smarter control helps both your wallet and the environment.
For more details on energy-saving pool equipment, see this U.S. Department of Energy guide.
Should You Hire A Professional?
If you are comfortable with electrical work, replacing a pool timer is a good DIY project. However, if you are unsure, or if your pool wiring is old or complex, it is wise to hire a pro.
Professional installation usually costs $100–$250, depending on your area and timer type. This ensures a safe and code-compliant job. Many pool service companies offer this upgrade.
Comparing Mechanical Vs. Digital Pool Timers
Here is a side-by-side look at the main differences:
| Feature | Mechanical Timer | Digital Timer |
|---|---|---|
| Accuracy | Can drift, needs resetting | Very accurate, battery backup |
| Programming | Manual pins/tabs | Button or app control |
| Features | Basic on/off | Multiple schedules, smart options |
| Maintenance | Gears wear out | Minimal, just battery change |
| Cost | Lower initial | Saves more over time |
Non-obvious Insights For Beginners
- Digital timers can save you more than just time. By running the pump only when needed, you avoid over-chlorination and reduce chemical costs. Many new users do not realize chemical savings add up over the season.
- Some digital timers can be upgraded with add-on modules. For example, you might start with a basic model and later add Wi-Fi or extra circuits without buying a whole new timer. Check if your chosen model allows this.
- Programming for seasonal changes is easy. With digital timers, you can set different schedules for summer and winter, or even for vacations, so your pool is always ready without manual changes.
- If you have solar pool heating or special water features, digital timers can coordinate all equipment for best results. This is much harder with mechanical models.
When Not To Replace
In some rare cases, replacing your timer may not be the best move:
- If your pool pump is very old or due for replacement soon, consider upgrading both at once.
- If your pool wiring is unsafe or very outdated, do not install a new timer until the wiring is fixed.
- If you rent your home, check with the owner before making electrical changes.
Final Thoughts
Switching from a mechanical pool timer to a digital timer is one of the smartest upgrades a pool owner can make. You get better control, more features, and save both time and money. The process is straightforward if you follow safety steps and take your time. For those unsure about wiring, hiring a pro is always a good choice. Once installed, a digital timer can improve your pool’s cleanliness, cut costs, and even extend the life of your equipment. With modern features and easy programming, you will wonder why you waited so long to upgrade.
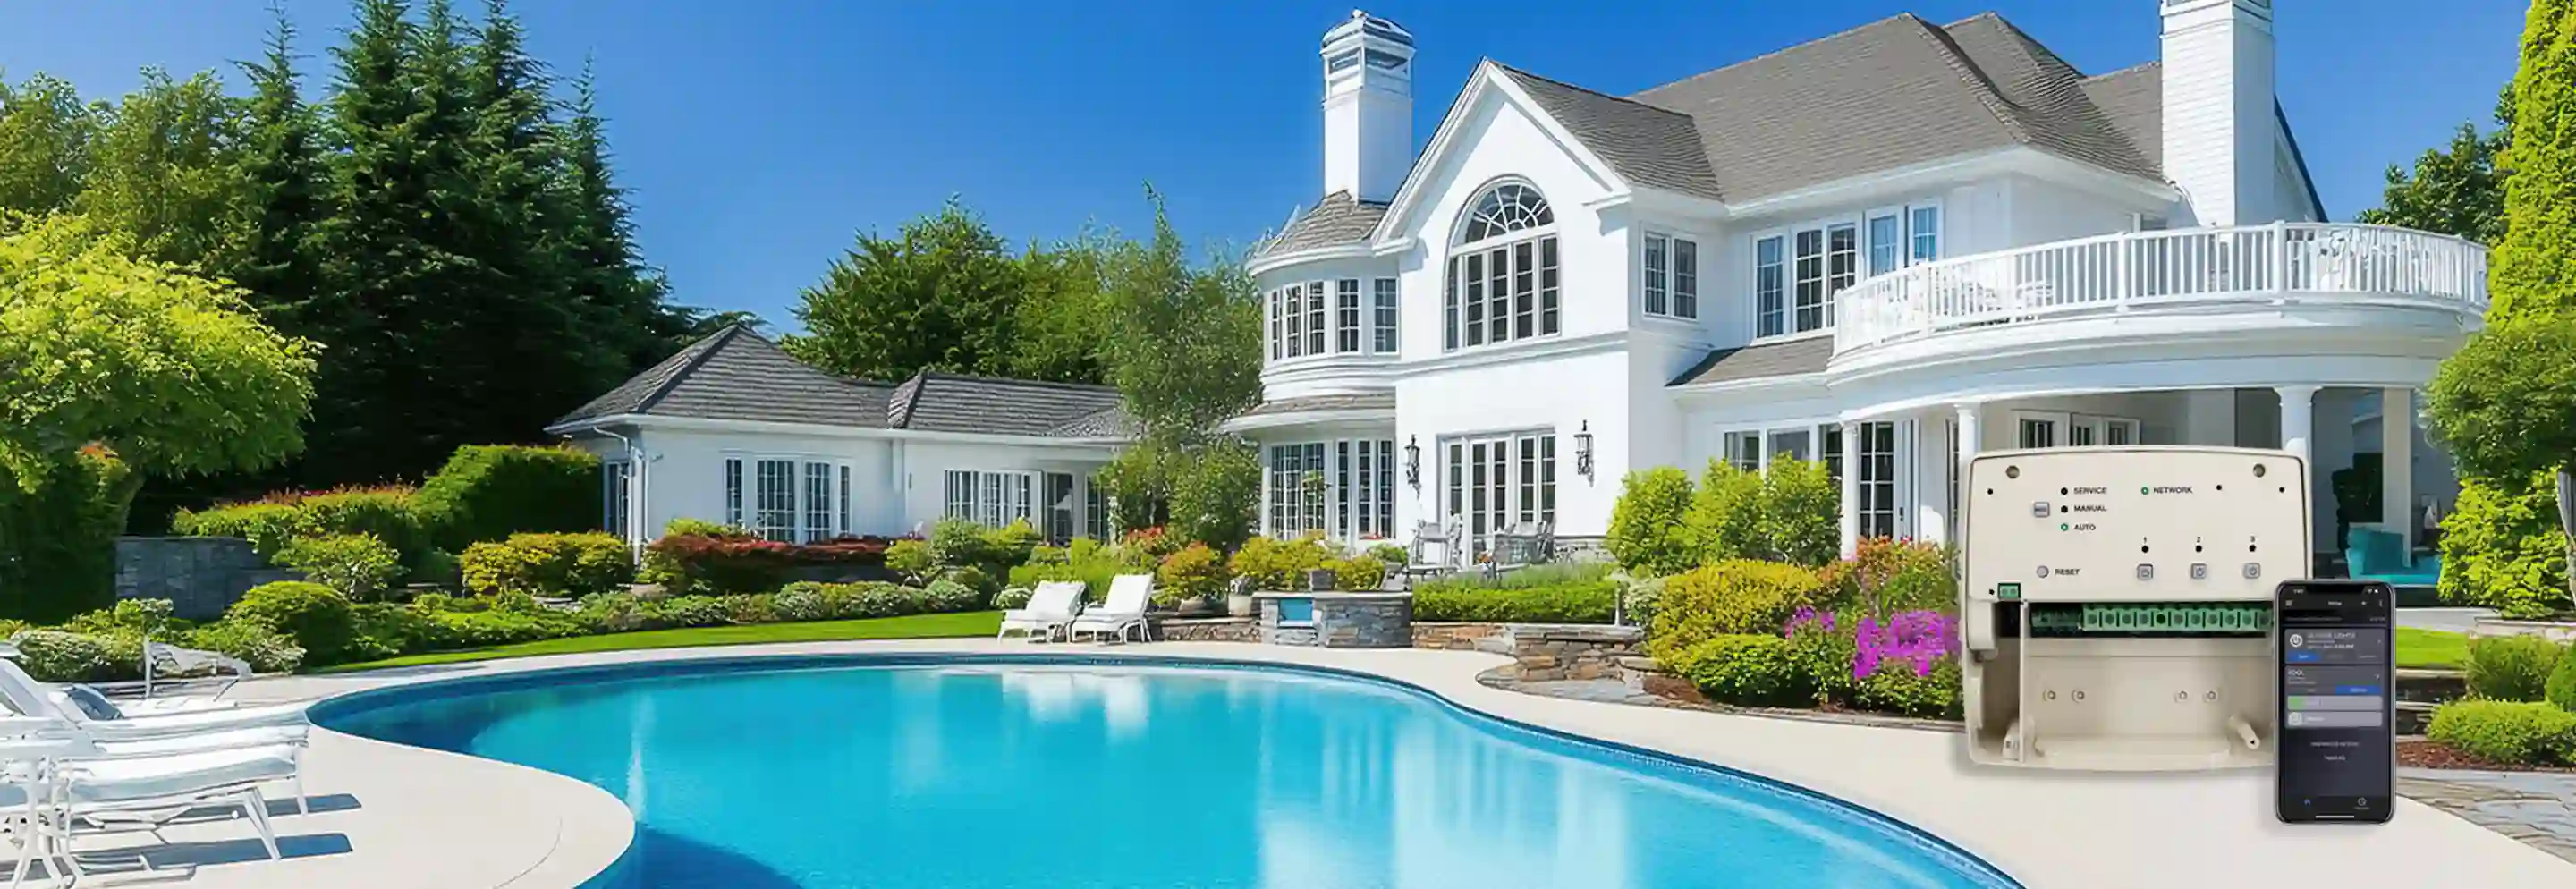
Credit: www.intermatic.com
Frequently Asked Questions
How Long Does It Take To Replace A Mechanical Pool Timer With A Digital One?
For most people, the whole process takes 1 to 2 hours if you have the right tools and basic wiring knowledge. If you need to install a new box or troubleshoot wiring, it may take a bit longer.
Can I Install A Digital Timer Myself, Or Do I Need An Electrician?
If you are comfortable with basic electrical work and follow safety steps, you can do it yourself. Always turn off power and check with a voltage tester. If you are unsure, or if your wiring is old or complex, hire a licensed electrician.
Will A Digital Timer Work During Power Outages?
Most digital timers have a battery backup that keeps the clock and programs during short outages. The pump will not run without power, but the timer will remember your settings.
Do Digital Timers Need Maintenance?
Digital timers need very little maintenance. Just check the display, test the manual override, and replace the backup battery every 1–2 years. Inspect the box for moisture or insects.
What If My Pool Pump Is 240v But My Timer Is For 120v?
You must match the timer voltage to your pump. Using the wrong voltage is unsafe. Buy a timer rated for 240V if your pump needs it. Double-check all labels before installation.