If you have a swimming pool, keeping the water warm and clean is always a challenge. A solar pool cover is one of the best solutions. These covers trap heat from the sun and help stop water evaporation, saving energy and money. But not every pool is the same shape or size. Sometimes, a single large cover is hard to use. That’s why many pool owners decide to cut their solar pool cover into sections. This allows for easier handling, cleaning, and better coverage—especially for odd-shaped or large pools. But how do you actually do it right? What are the benefits, risks, and best practices? In this guide, you’ll learn everything you need to know about cutting a solar pool cover into sections, from planning to maintenance, so your pool stays warm and protected with less effort.
Why Cut A Solar Pool Cover Into Sections?
Most solar pool covers come in large, single sheets. While these work for some pools, they can be difficult to handle, especially for one person. Cutting the cover into sections offers several key benefits:
- Easier handling: Large covers are heavy and awkward. Smaller sections are lighter and can be put on or taken off easily, even by children or older adults.
- Faster application: You don’t have to struggle with folding or rolling a massive cover. Each section can be managed in seconds.
- Better fit: For pools with steps, curves, or unique shapes, a single cover may not fit well. Sections allow you to cover every part of your pool precisely.
- Less wear and tear: Dragging a large cover can cause rips or stretch marks. Smaller pieces are less likely to be damaged.
- Targeted use: If you use your pool partly (for example, just the shallow end), you can remove only the sections you need.
A 2022 study by the U.S. Department of Energy showed that solar covers reduce pool heating costs by up to 70% when used correctly. Cutting your cover into sections makes it more likely you’ll actually use it, maximizing these savings.
Types Of Solar Pool Covers And Sectioning Options
Before you start cutting, it helps to understand the main types of solar pool covers. This will affect how you cut, handle, and maintain the sections.
Bubble (blanket) Covers
These are the most common. They look like giant sheets of bubble wrap, usually 8–16 millimeters thick. The bubbles face down to touch the water, trapping heat efficiently.
- Best for: Most in-ground and above-ground pools
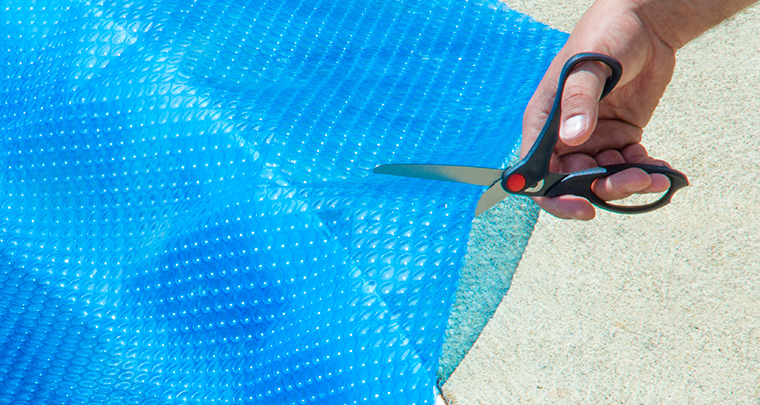
- Easy to cut: Yes; scissors or a sharp knife works well
Solar Rings And Squares
Pre-made floating discs or squares that cover part of the surface. You usually don’t cut these, but knowing about them helps if you want to create your own “rings” by cutting your cover into small sections.
- Best for: Spas, small pools, or quick coverage
- Easy to cut: Not needed, but possible for custom shapes
Liquid Solar Covers
A chemical that creates an invisible layer on the pool surface. Not cuttable, but worth knowing as an alternative for hard-to-cover shapes.
Pre-cut Custom Covers
Some suppliers offer custom-cut covers for unique pool shapes. These are more expensive but save you time. Still, many owners choose to buy a standard cover and trim it themselves to save costs.
Planning Your Cuts: What To Consider
Before you touch the scissors, careful planning is key. Making the wrong cuts can waste money and leave your pool exposed. Here’s what to think about:
- Pool shape: Is your pool rectangular, oval, L-shaped, or freeform? Odd shapes benefit most from sectioned covers.
- Pool size: Large pools (over 30 feet) are much easier to manage with sections.
- Steps and features: Built-in steps, ladders, or fountains make a single cover difficult to fit.
- Usage patterns: Do you often swim in just one part of the pool? Sectioned covers let you remove only the needed areas.
- Storage space: Where will you keep the sections? Multiple small pieces may be easier to store and dry.
Example: Sectioning For A 16×32-foot Pool
For a rectangular 16×32-foot pool, many owners cut the cover into three or four sections running the short way (across the 16-foot width). Each section is then about 8–11 feet long, making them easy to lift and fold.
Section Size Chart
Here’s a quick reference for common pool sizes and recommended sectioning:
| Pool Size | Recommended Sections | Approx. Size per Section |
|---|---|---|
| 12×24 ft | 2 | 12×12 ft each |
| 16×32 ft | 3–4 | 16×8–11 ft each |
| 18×36 ft | 4 | 18×9 ft each |
| Irregular shapes | 3–5 | Custom sizes |
Tools And Materials You’ll Need
Cutting a solar pool cover doesn’t require many tools, but using the right ones will give you a cleaner edge and a better fit.
- Sharp scissors: Heavy-duty or fabric scissors work best. Dull blades can snag or tear the material.
- Utility knife: For thicker covers, a sharp utility knife with a new blade gives smooth cuts.
- Tape measure: Accurate measurements are crucial.
- Permanent marker: To mark cutting lines, especially on clear covers.
- Straight edge or ruler: Helps make straight cuts, especially for rectangular pools.
- Chalk or masking tape: Useful for marking curves or awkward shapes.
- Safety gloves: Optional, but can protect hands from sharp edges.
A surprising tip: Don’t worry about “sealing” the edges. Most bubble covers are made from polyethylene, which doesn’t fray or absorb water, so no special treatment is needed after cutting.

Credit: www.amazon.com
Step-by-step Guide To Cutting A Solar Pool Cover Into Sections
Here’s how to cut your solar pool cover into sections for the best fit and easiest use.
Step 1: Clean And Prepare The Pool
Remove debris and make sure the pool water is at its normal level. This helps you measure accurately and prevents dirt from getting under the cover.
Step 2: Lay Out The Cover
Spread the cover over the pool, bubble side down. Let it rest for a few hours in the sun if possible. The heat will soften the material, making it easier to cut and fit.
Step 3: Mark The Sections
With the cover in place, use a permanent marker to draw the lines where you want to cut. For straight pools, mark lines across the width or length. For freeform shapes, trace around the edge of the pool, then mark lines for sections based on natural curves or features.
- For steps or built-in benches, mark extra flaps or separate pieces to cover these areas.
- If you are sectioning for solo use, keep each piece under 8–10 feet long for easy lifting.
Step 4: Make The First Cut
Remove the cover from the pool and lay it on a clean, flat surface. Use scissors or a utility knife and a straight edge to cut along the marked lines. Take your time—smooth, slow cuts look and work better.
Step 5: Test The Fit
Place each section back on the pool, one at a time. Trim small areas as needed for a snug fit around steps, curves, or ladders. Remember, it’s better to cut a little less and trim again if needed.
Step 6: Label The Sections (optional)
If your pool shape or sections look similar, label each piece with a marker (“A,” “B,” “C,” etc. ) On the corner. This makes it quicker to place them in the right order.
Step 7: Store The Pieces
When not in use, fold or roll each section and store in a shaded, dry area. Avoid dragging pieces over rough ground to prevent tears.
Pros And Cons Of Cutting Your Cover Into Sections
It’s worth weighing the advantages and possible drawbacks before making the first cut.
| Pros | Cons |
|---|---|
| – Easier to move and store – Better fit for complex pools – Reduces wear and tear – Allows partial coverage | – More seams for debris to collect – Slight heat loss at section joins – Takes longer to cover/uncover entire pool – Sections can get mixed up if not labeled |
Most pool owners find the ease of use outweighs the minor drawbacks, especially for large or uniquely shaped pools.
Credit: www.poolsupplies.com
Common Mistakes To Avoid
Even with the right tools and planning, some mistakes are easy to make:
- Cutting too small: If you cut the sections too short or narrow, gaps will let heat escape and debris enter.
- Not aligning bubbles: Make sure all sections have bubbles facing down. Mixing up sides reduces heat retention.
- Ignoring curves and steps: Skipping custom cuts for steps leaves areas uncovered. Take the time to trace these features.
- Using dull blades: A dull tool can rip or stretch the cover, reducing its life span.
- Overlapping too much: While some overlap is good, too much can cause bunching and uneven coverage.
How To Maintain Sectioned Solar Pool Covers
Cutting your cover is just the start. Regular care will make sure your investment lasts for years.
- Rinse after use: Hose down the cover to remove chlorine and dirt.
- Dry before storing: Roll or fold sections only when dry to prevent mold.
- Store in shade: Prolonged sunlight damages most pool covers when not floating on water.
- Inspect for damage: Check seams and edges for tears. Small holes can be patched with repair kits or waterproof tape.
Extending Cover Lifespan
Most solar covers last 3–5 years. Sectioned covers often last longer because they are handled more gently and are easier to clean. Some manufacturers claim up to 7 years of life if well maintained.

Credit: www.poolsupplies.com
When Not To Cut Your Cover Into Sections
While sectioning works for many, there are times you might want to keep your cover in one piece:
- Small, rectangular pools: If the cover is light and easy to manage, there’s little advantage to cutting.
- Pools with automatic rollers: These often require a single, continuous sheet.
- High wind areas: More seams mean more chances for wind to get under the cover and lift it off.
If you’re not sure, try using the cover whole for a week. If it feels too heavy or awkward, then consider sectioning.
Advanced Tips For Perfect Sectioning
Experienced pool owners often share clever tricks that beginners miss:
- Overlap sections by 2–3 inches: This prevents gaps but still makes it easy to lift each piece.
- Use Velcro strips: Attach self-adhesive Velcro along the edges so sections stick together but are easy to pull apart.
- Add handles: Sew or glue strong fabric tabs to the corners for easier lifting.
- Create a “hinge”: Leave a narrow strip uncut between sections for a foldable design, especially for rectangular pools.
- Store on reels: Use multiple smaller reels instead of one large one for rolling up each section.
A non-obvious insight: Sometimes, it’s better to have one larger section for the main pool and smaller ones just for steps or side features. This hybrid method balances ease and full coverage.
Real-world Examples: How Owners Section Their Covers
Many pool owners have found creative ways to get the most from their solar covers. Here are a few examples:
- Freeform pool in California: Owner cut the cover into five irregular pieces to fit the curves and included a small triangle for the spa area.
- Rectangular pool in Australia: Family cut their cover into three equal sections, each with a handle, so their children could help without struggling.
- L-shaped pool in Florida: Owner used four sections, with two for the main pool and two smaller ones for the “leg” of the L-shape, ensuring complete coverage.
Each case shows there’s no single “right way”—it depends on your pool, your needs, and how you use it.
Comparing Costs: Buying Pre-cut Vs. Diy Sectioning
Cost is always a concern. Let’s compare the price of buying a pre-cut, custom-fitted cover versus buying a large cover and sectioning it yourself:
| Option | Average Cost (16×32 ft pool) | Pros | Cons |
|---|---|---|---|
| Pre-cut custom cover | $400–$700 | Perfect fit Professional finish | Expensive Longer delivery time |
| DIY sectioned cover | $150–$350 | Cheaper Customizable at home | Requires time and tools May need trimming adjustments |
Most homeowners choose the DIY route for savings and flexibility.
Expert Opinions And Research
Industry professionals agree that sectioned solar covers are more user-friendly for most pool owners. According to the Pool & Hot Tub Alliance, “cutting a solar blanket into manageable pieces increases usage and helps maintain proper water temperature, especially for large or irregular pools.”
Research from the U.S. Department of Energy confirms that properly used solar covers can reduce water evaporation by 95%, and sectioned covers are more likely to be used regularly because they’re easier to handle.
For more technical details on pool energy saving and solar covers, see this authoritative U.S. Department of Energy guide.
Frequently Asked Questions
How Do I Know How Many Sections To Cut For My Pool Cover?
It depends on your pool’s size, shape, and how heavy the cover feels to you. Most people choose 2–4 sections for rectangular pools and 3–5 for freeform shapes. Try to keep each section light enough for easy handling.
Will Cutting My Cover Into Sections Reduce Its Heating Efficiency?
A small amount of heat may escape at the seams, but this loss is minimal. As long as the sections overlap slightly and cover the surface well, you will still get most of the heating and evaporation benefits.
Do I Need To Seal Or Finish The Edges After Cutting?
No. Most solar covers are made from material that does not fray or absorb water. Just make clean, straight cuts. There’s no need for tape, glue, or special treatments.
Can I Use A Pool Cover Reel With Sectioned Covers?
Yes, but you will need multiple smaller reels, one for each section, or use a hybrid method: roll larger sections and fold or stack smaller ones. Some owners use hooks or racks for storage.
How Long Should A Sectioned Solar Pool Cover Last?
With proper care, a sectioned cover can last 3–7 years. Handling smaller sections gently and storing them out of direct sunlight when not in use will extend their life.
Cutting your solar pool cover into sections is a smart way to make pool care simpler and more effective, especially for bigger or oddly shaped pools. It takes a bit of planning and careful measuring, but the rewards—easier handling, better fit, and longer cover life—are worth the effort. Whether you’re a new pool owner or looking to upgrade your current setup, sectioning your solar cover puts you in control of warmth, savings, and convenience. With the guidance above, you’ll be ready to enjoy a cleaner, warmer pool with less work all season long.