When you remodel a bathroom or install new flooring, you might find your toilet flange is sitting too high above the finished floor. This can cause leaks, rocking toilets, and even damage to your home. Many homeowners face this issue after laying tile, adding thick vinyl, or changing floor height.
Lowering a toilet flange is not just about making the toilet fit—it’s about preventing future plumbing problems and protecting your investment.
This guide explains how to lower a toilet flange with confidence. You will learn what a flange is, why its height matters, the different methods to lower it, and how to avoid the most common mistakes. Even if you have little plumbing experience, clear steps and practical tips will help you finish the job right the first time.
What Is A Toilet Flange And Why Flange Height Matters
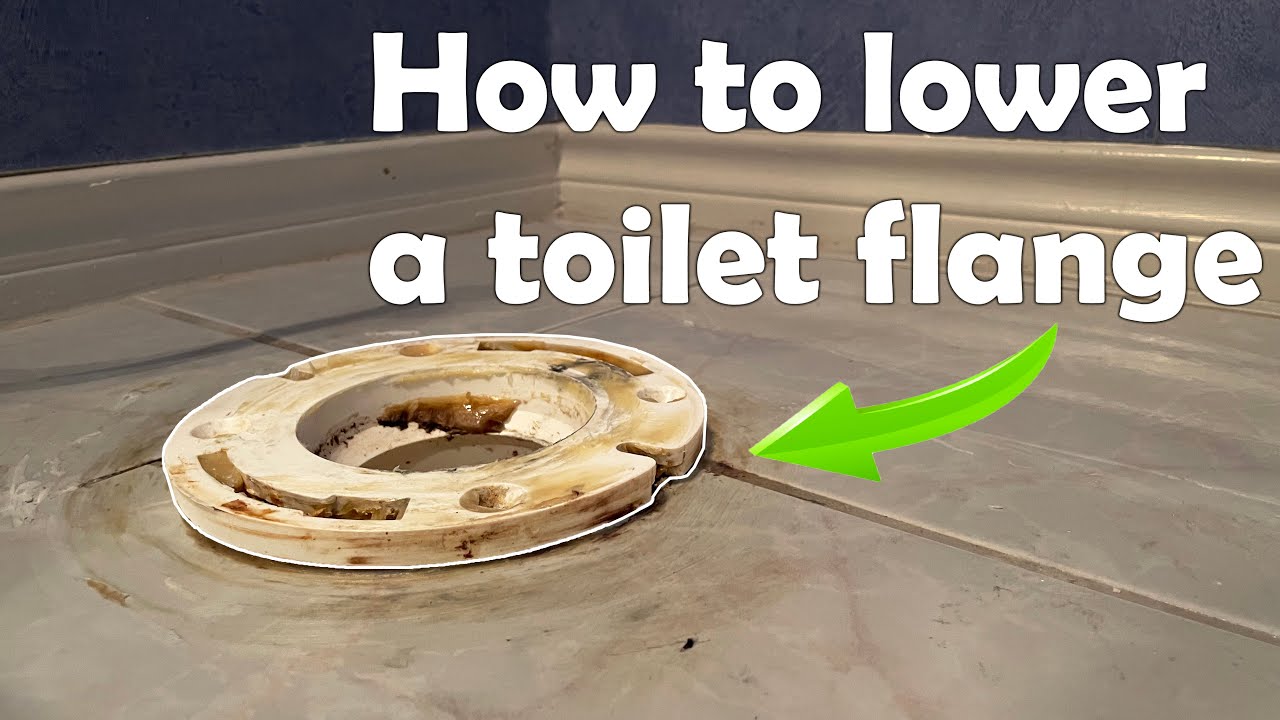
A toilet flange is a circular fitting that connects your toilet to the drain pipe. It holds the toilet in place and seals the connection so water and waste flow into the plumbing system without leaking. Most flanges are made from PVC, ABS plastic, or cast iron.
The correct height of the flange is crucial. Ideally, the top of the flange should sit level with or up to 1/4 inch above the finished floor. If the flange sits too high, the toilet might not sit flat, leading to leaks, rocking, and even cracked porcelain.
If the flange is too low, the wax ring can fail, causing water damage and unpleasant odors.
Many people make the mistake of ignoring flange height when installing new flooring. For example, new tile may raise the floor, causing the old flange to be too high. Understanding this problem is the first step to a quality fix.
Signs Your Toilet Flange Is Too High
You might suspect a flange issue if you notice:
- The toilet rocks or feels unstable after installation.
- Water seeps out at the base of the toilet.
- You see gaps between the toilet and floor.
- The toilet does not sit flush with the floor, even with a new wax ring.
These signs can appear right away or after a few flushes. If you ignore them, you risk water damage under the floor and expensive repairs.
Tools And Materials You Will Need
Before starting, gather all necessary tools and materials. Having everything ready saves time and prevents mistakes. Here’s what you’ll need:
- Adjustable wrench
- Screwdriver (flathead and Phillips)
- Putty knife
- Mini hacksaw or oscillating multi-tool
- Shop vacuum
- Heavy-duty gloves
- New wax ring or rubber toilet seal
- Replacement flange (if needed)
- Flange repair kit (optional)
- PVC or ABS cement (for plastic pipes)
- Level
- Measuring tape
- Safety goggles
- Rags or towels
- Bucket
Not all projects require every tool. The exact list depends on the method you use, as explained below.
Methods To Lower A Toilet Flange
Several methods can solve a high toilet flange. The right choice depends on your floor material, flange type, and how much you need to lower it. Here are the main ways:
- Removing and Replacing the Flange
- Trimming the Existing Flange
- Adding a Subfloor Patch
- Using a Flange Spacer (If Only Slightly High)
- Professional Pipe Cutting (for Cast Iron)
Let’s look at each method step by step.

Credit: www.reddit.com
Method 1: Removing And Replacing The Flange
If the flange is much too high or damaged, the safest solution is to remove it and install a new one at the correct height. This method takes more time but gives the most reliable result.
Step 1: Turn Off Water And Remove The Toilet
- Shut off the water supply valve behind the toilet.
- Flush to empty the tank.
- Use a sponge or towel to soak up remaining water.
- Disconnect the water supply line.
- Remove the caps and unscrew the toilet bolts.
- Lift the toilet straight up and set it on a towel.
Tip: Toilets are heavy. Use proper lifting technique or ask for help.
Step 2: Remove The Old Flange
- Scrape away the old wax ring with a putty knife.
- Unscrew the flange from the floor.
- If the flange is glued to a plastic pipe, use a mini hacksaw or oscillating tool to cut it off.
- For cast iron, you may need a pipe snapper or special flange removal tool.
Step 3: Adjust Pipe Height
- Check the pipe height with a measuring tape.
- Cut the pipe down so the new flange will sit level with the finished floor.
- Clean the pipe end with sandpaper.
Step 4: Install The New Flange
- Dry-fit the new flange first.
- Apply PVC or ABS cement to both the pipe and flange, then press them together.
- Screw the flange to the floor, making sure it’s perfectly level.
Step 5: Reinstall The Toilet
- Place a new wax ring or rubber seal on the flange.
- Lower the toilet, align the bolts, and press down evenly.
- Tighten bolts gently—do not overtighten.
- Reconnect the water supply, turn on the valve, and test for leaks.
This method gives you a like-new installation and solves height issues for good.
Method 2: Trimming The Existing Flange
If your flange is plastic (PVC or ABS) and only a little too high, you can trim it down instead of removing it. This saves time and reduces the risk of damaging the pipe.
Step 1: Remove Toilet And Clean Area
Follow the same steps as above to remove the toilet and old wax ring.
Step 2: Mark And Cut
- Use a level and measuring tape to mark how much needs to be trimmed.
- Wear safety goggles.
- Use an oscillating multi-tool or mini hacksaw to carefully cut around the flange.
- Remove small sections at a time for best control.
Step 3: Smooth And Test Fit
- Sand the cut edge smooth.
- Dry-fit the toilet to check for a perfect fit.
Step 4: Install New Wax Ring And Toilet
- Place a new seal.
- Lower and bolt down the toilet.
- Reconnect water and test.
Non-obvious insight: Even small uneven cuts can cause leaks. Take your time and check the level twice before reinstalling.

Credit: www.youtube.com
Method 3: Adding A Subfloor Patch
Sometimes, the flange is high because the surrounding floor is lower or has rotted away. Instead of lowering the flange, you may need to build up the area around it.
Step 1: Assess Floor Damage
- Inspect the subfloor around the flange.
- If it’s soft, cracked, or lower than the rest of the floor, cut out the damaged section.
Step 2: Cut And Install Patch
- Use plywood of the same thickness as the rest of the subfloor.
- Cut a patch to fit snugly around the flange.
- Screw the patch to the joists.
Step 3: Seal And Level
- Apply construction adhesive to seal gaps.
- Check that the finished floor will now be level with the flange.
Step 4: Replace Flooring And Toilet
- Install new flooring over the patch.
- Reinstall the toilet as described above.
This method is often missed but is essential for long-term durability. Most beginners forget to check the subfloor, focusing only on the flange.
Method 4: Flange Spacer (if Only Slightly High)
If your flange is less than 1/4 inch too high, using a flange spacer can help. A spacer is a plastic or rubber ring that sits under the toilet, filling the gap.
How To Use A Spacer
- Clean the flange and surrounding area.
- Dry-fit the spacer to check the height.
- Apply silicone caulk under the spacer to prevent leaks.
- Place the toilet on top and bolt it down.
Important: Spacers are for small gaps only. If the flange is much too high, this is not a safe solution.
Credit: www.youtube.com
Method 5: Professional Pipe Cutting (for Cast Iron)
If you have an old cast iron flange, lowering it can be tricky. Cutting cast iron pipes requires special tools and skill.
When To Call A Pro
- If you do not have a pipe snapper or experience with cast iron.
- If the pipe is cracked or rusted.
A plumber can cut the pipe, fit a new flange, and ensure a proper seal. This is sometimes the only safe way to lower a cast iron flange.
Comparing Toilet Flange Lowering Methods
To help you decide which method is best, here’s a comparison of common approaches:
| Method | Skill Level | Best For | Risks | Average Time |
|---|---|---|---|---|
| Remove & Replace Flange | Intermediate/Advanced | Flanges >1/4″ too high, damaged flanges | Pipe damage, leaks if poorly fitted | 2–3 hours |
| Trim Existing Flange | Intermediate | PVC/ABS flanges, slightly high | Uneven cuts, leaks | 1–2 hours |
| Add Subfloor Patch | Intermediate | Low or damaged subfloor | Bad patch can sag over time | 2–4 hours |
| Flange Spacer | Beginner | Small gaps (<1/4″) | Leaks if misused | 30–60 mins |
| Professional Cutting | Advanced/Pro | Cast iron flanges | High risk, injury, costly if DIY | Varies |
Step-by-step Example: Lowering A Pvc Flange After Tile Installation
Let’s walk through a common real-world example: You just tiled your bathroom, and now your PVC flange sits about 1/2 inch above the tile.
Step 1: Confirm The Problem
- Use a straight edge and tape measure to check the gap.
- If the flange is more than 1/4 inch above the tile, lowering is needed.
Step 2: Prepare The Area
- Remove the toilet as described earlier.
- Lay towels to protect the new tile.
Step 3: Cut The Flange
- Mark the cut line at floor level.
- Use an oscillating tool to trim the flange evenly.
Step 4: Clean Up
- Vacuum dust and debris.
- Sand the cut edge smooth.
Step 5: Dry Fit And Install
- Test fit the toilet.
- Install a new wax ring.
- Lower the toilet, tighten bolts, and check for leaks.
This approach solves the problem and keeps your new floor safe.
Common Mistakes When Lowering A Toilet Flange
Many beginners make these errors:
1. Cutting Too Much
Always measure twice, cut once. If you cut the flange too low, you will need a flange extender or a new flange.
2. Not Checking For Level
A flange that isn’t level can lead to leaks and rocking, even after lowering.
3. Skipping Subfloor Repairs
If the subfloor is damaged, a new flange won’t solve the problem. Fix any soft or rotted wood before you start.
4. Reusing Old Wax Rings
Wax rings are single-use. Always install a new ring or seal for every toilet reset.
5. Overtightening Bolts
This can crack the toilet base or flange. Tighten evenly, just enough to keep the toilet stable.
6. Ignoring Local Plumbing Codes
Some areas require specific types of flanges or seals. Check codes before starting.
How To Choose The Right Wax Ring Or Seal
The right seal is as important as the flange height. You have two main options:
- Standard Wax Ring: Reliable and affordable. Best for flanges that are level or slightly above the floor.
- Extra-Thick Wax Ring: Useful if the flange is still a bit high after lowering.
- Rubber or Foam Seal: More forgiving and reusable, but can compress over time.
Here’s a quick comparison:
| Seal Type | Best For | Reusable | Leak Risk | Cost |
|---|---|---|---|---|
| Standard Wax Ring | Normal installs | No | Low if installed right | Low |
| Extra-Thick Wax Ring | High flanges, uneven floors | No | Medium | Medium |
| Rubber/Foam Seal | DIY, reusable needs | Yes | Low | High |
Safety Tips For Lowering A Toilet Flange
Plumbing projects can be messy and even dangerous if not done with care. Protect yourself and your home:
- Wear gloves and goggles when cutting.
- Always turn off the water supply before removing the toilet.
- Lift with your legs, not your back.
- Keep a bucket and towels handy for spills.
- Double-check all measurements before you cut.
- Wash hands thoroughly after handling old wax rings.
When To Call A Professional Plumber
Lowering a toilet flange is a good DIY project for those with basic skills and the right tools. However, call a licensed plumber if:
- The flange is cast iron or old and rusted.
- You find major subfloor damage or mold.
- You’re unsure about local codes.
- The job feels overwhelming.
A professional can finish the job quickly and safely, especially in tricky cases. For more information on plumbing codes and standards, you can visit the International Association of Plumbing and Mechanical Officials.
Key Takeaways And Practical Advice
Lowering a toilet flange is about more than just cutting or removing parts. You need to:
- Assess the problem fully—measure, check the subfloor, and understand your flange type.
- Choose the right method for your situation. Not every fix works for every floor or toilet.
- Use the correct tools and take safety seriously.
- Don’t rush. A careful, patient approach saves money and headaches later.
- Always install a new wax ring or seal, and test for leaks before finishing.
Many homeowners forget to check the subfloor or reuse old seals, leading to repeat repairs. Take the extra steps now for a long-lasting, leak-free toilet.
Frequently Asked Questions
How Do I Know If My Toilet Flange Is Too High?
Check the gap between the top of the flange and the finished floor. If it’s more than 1/4 inch above the floor, it’s likely too high. Signs include a rocking toilet, leaks, or visible gaps at the toilet base.
Can I Use Extra Wax Rings Instead Of Lowering The Flange?
Stacking multiple wax rings is not recommended. They can compress unevenly and leak over time. Lowering the flange or using a proper spacer is safer and lasts longer.
What If My Toilet Flange Is Cast Iron And Too High?
Lowering a cast iron flange usually requires special tools and skill. It’s best to hire a professional plumber to avoid damaging the pipe or creating leaks.
Is It Ok For The Flange To Sit Below The Finished Floor?
No. The flange should be level with or slightly above the floor. If it’s too low, use a flange extender or consider raising the floor around the flange.
Do I Need A Permit To Lower A Toilet Flange?
In most homes, minor repairs do not need a permit. However, check with your local building department, especially if you are replacing pipes or doing major subfloor work.
Lowering a toilet flange can seem challenging, but with the right information, tools, and careful steps, you can fix this common problem and enjoy a sturdy, leak-free toilet for years to come.