
Building your own kitchen island with a sink and dishwasher is a big project, but it can transform your kitchen. You get more workspace, a place to wash dishes, and a stylish centerpiece for your home. Many people dream of having a kitchen island, but think it’s too difficult or expensive.
In reality, with the right planning and tools, you can create a functional island that looks professional and meets your needs. This guide covers every step, from planning and design to plumbing, electrical work, installation, and finishing touches. Whether you’re a DIY enthusiast or a homeowner hiring some help, you’ll learn how to avoid common mistakes and get the results you want.
Planning Your Kitchen Island
Before you start building, you need a clear plan. A kitchen island with a sink and dishwasher is not just a piece of furniture—it’s a major kitchen upgrade. Good planning will save you money, time, and frustration.
Setting Your Goals
Ask yourself what you want from your island. Some homeowners want extra counter space for cooking. Others need more storage. If you are adding a sink and dishwasher, you must think about water supply, drainage, and electricity. Decide how you will use the island most of the time.
Measuring Your Space
Space is the most important factor. You need enough room to walk around the island easily, even when the dishwasher door is open. The National Kitchen and Bath Association recommends at least 36 to 42 inches of space around all sides. If your kitchen is small, a big island may not work.
Choosing The Right Size
Islands come in many sizes. Here’s a quick comparison to help you decide:
| Island Size (inches) | Recommended Kitchen Size | Seats | Good For |
|---|---|---|---|
| 48 x 24 | Small (10′ x 10′) | 0-2 | Extra prep space |
| 60 x 36 | Medium (12′ x 12′) | 2-3 | Prep + seating |
| 72 x 36+ | Large (15′ x 15′ or more) | 4+ | Full kitchen island |
If you want both a sink and a dishwasher, you’ll need at least a medium-sized island (60 x 36 inches or larger).
Deciding Island Shape
Most islands are rectangular, but L-shapes and square islands are also popular. Think about your kitchen workflow. Place the sink near where you prep food, and leave space for other appliances.
Matching Island Style
The island should match your kitchen’s style. For example, if your cabinets are white, use a similar finish. If your kitchen is modern, choose clean lines and simple hardware. A well-matched island looks like it was always part of your kitchen.
Getting Permits
Adding plumbing and electrical can require building permits. Check your city’s rules before you start. Skipping permits can cause problems when you sell your home or if something goes wrong.
Designing Your Kitchen Island
A good design makes the building process easier and ensures your island works well for years.
Layout And Workflow
The best kitchen islands fit the “kitchen work triangle. ” This is the idea that the sink, stove, and refrigerator should be close together but not too crowded. Place your island sink where it’s easy to use while cooking and cleaning.
Choosing Sink And Dishwasher Placement
Most people put the sink in the center of the island, with the dishwasher right next to it. This makes it easy to rinse dishes and load them into the dishwasher. Some prefer the sink on one side, leaving more counter space. The key is to keep plumbing simple and efficient.
Selecting Materials
Here are some common materials and their pros and cons:
| Material | Cost | Durability | Appearance |
|---|---|---|---|
| Solid Wood | $$-$$$ | High | Warm, classic |
| Plywood with Laminate | $ | Medium | Modern, many colors |
| Stone (Granite, Quartz) | $$$ | Very high | Luxury, elegant |
| Butcher Block | $$ | Medium | Natural, warm |
For the countertop, choose a water-resistant material near the sink.
Planning Storage
Islands can add lots of storage. Think about:
- Deep drawers for pots and pans
- Open shelves for cookbooks
- Pull-out trash bins near the dishwasher
Custom storage makes your island more useful.
Electrical Outlets
Building codes often require at least one outlet on a kitchen island. Plan where you want to plug in appliances or charge phones. Outlets can be hidden under the counter for a clean look.
Buying The Right Appliances
Your island will need a kitchen sink and a dishwasher. Choosing wisely helps avoid problems later.
Picking The Right Sink
Island sinks are usually smaller than main sinks, but you still want enough space for washing large pans. Popular choices:
- Single-bowl sinks for simple washing
- Double-bowl sinks for multitasking
- Farmhouse-style sinks for a bold look
Look for sinks with a depth of at least 8 inches to reduce splashing.
Choosing A Dishwasher
Modern dishwashers are quiet and energy-efficient. Standard size is 24 inches wide. Choose a model with controls on the top for a cleaner look. Also, check the water and energy ratings to save money over time.
Extra Features
Some islands include a pull-out faucet, a built-in soap dispenser, or filtered water taps. These features add convenience and style, but make sure you have space and access to plumbing.
Preparing For Plumbing And Electrical Work
The most challenging part of building a kitchen island with a sink and dishwasher is running water, drain, and electrical lines to the island.
Understanding Plumbing Basics
You need two main plumbing connections:
- Water supply lines (hot and cold)
- Drain line
Both must be brought up from the floor, usually through the crawl space or basement below. You’ll also need a vent for the drain line to prevent slow drainage and bad smells.
Electrical Requirements
The dishwasher and outlets need power. Most dishwashers use a 120-volt connection. Outlets must be GFCI-protected to avoid electrical shock near water.
Planning For Ventilation
If your dishwasher is in the island, make sure it has enough airflow. Some dishwashers get hot during the drying cycle. Leave space around the appliance and don’t block the vents.
Hiring Professionals Vs. Diy
If you’re not familiar with plumbing and electrical work, consider hiring a licensed plumber and electrician. Mistakes can cause leaks, shorts, or even house fires. Doing it yourself can save money, but only if you understand local codes.
Building The Island Structure
Now it’s time to construct the base of your kitchen island.
Gathering Materials And Tools
Here’s what you’ll need for a basic island frame:
- 2×4 lumber for the frame
- Plywood for the sides and back
- Screws and nails
- Wood glue
- Level and measuring tape
- Saw and drill
If you’re adding cabinets, you can use ready-to-assemble (RTA) cabinets to speed up the build.
Building The Frame
- Mark the Floor: Outline the island shape with painter’s tape to check the size and position.
- Build the Base Frame: Assemble a rectangle using 2x4s, making sure it’s square and level.
- Add Vertical Supports: Attach upright 2x4s at the corners and every 16 inches along the sides.
- Install Plywood Panels: Cut plywood to size for the sides and back. Secure with wood glue and screws.
- Create Openings: Cut holes in the plywood for the sink and dishwasher. Make sure the openings match your appliances’ dimensions.
Reinforcing The Structure
A stone or quartz countertop is heavy. Add extra support under the countertop, especially around the sink cut-out.
Installing Pre-built Cabinets
If you use cabinets instead of building from scratch:
- Set the cabinets in place
- Secure them together with screws
- Anchor the cabinets to the floor so they don’t shift
Installing Plumbing And Electrical
With the frame ready, run plumbing and electrical lines before closing up the island.
Running Water Lines
- Shut off the main water supply before you start.
- Use PEX tubing for flexibility and easy installation.
- Run hot and cold lines to the island’s base.
- Add shut-off valves where the lines enter the island.
Installing The Drain
- Slope the drain pipe at least 1/4 inch per foot to avoid clogs.
- Use a sanitary tee to connect to the main drain.
- Install a loop vent or “air admittance valve” if you can’t run a vent pipe to the roof.
Wiring Electrical Outlets
- Run electrical conduit from your panel to the island.
- Install a GFCI outlet on the side of the island.
- Connect dishwasher wiring to a dedicated circuit.
Testing Connections
Before closing the walls, test all plumbing and electrical connections for leaks and proper operation. Fix any problems now—don’t wait until the island is finished.

Credit: www.youtube.com
Installing The Sink And Dishwasher
Now you’re ready to put in the main appliances.
Fitting The Sink
- Drop the sink into the pre-cut opening.
- Apply waterproof silicone caulk around the rim.
- Connect the faucet and water lines.
- Attach the drain and test for leaks.
Installing The Dishwasher
- Slide the dishwasher into place next to the sink.
- Connect the water supply line and drain hose.
- Plug in or hardwire the dishwasher according to the manufacturer’s instructions.
- Level the dishwasher so it sits evenly with the cabinets.
Making Final Adjustments
Check that the doors of the sink cabinet and dishwasher open fully. Adjust the position if needed. Seal any gaps with caulk to prevent water damage.
Adding The Countertop
The countertop is the finishing touch and needs to be both strong and beautiful.
Measuring And Cutting
- Measure carefully, especially around the sink and dishwasher.
- For stone or quartz, have a professional make the cuts.
- For wood or laminate, use a fine-tooth saw for clean edges.
Securing The Countertop
- Lay a bead of construction adhesive on the top of the island frame.
- Set the countertop in place and press down.
- Secure with screws from underneath (not through the surface).
Finishing The Edges
Use edge banding or molding to hide raw edges, especially with plywood or laminate countertops. Seal wood edges with polyurethane to protect from water.
Storage, Seating, And Finishing Touches
Now add the features that make your island useful and attractive.
Installing Cabinets And Drawers
Add cabinet doors, drawers, or open shelves. Use soft-close hinges for a luxury feel. Place heavy-duty slides in deep drawers for pots and pans.
Planning Seating
If you want bar seating, leave at least 12 inches of overhang for knees. Add stools that match your kitchen’s style and are the right height for the counter.
Lighting
Good lighting makes your island more functional. Pendant lights are a popular choice. Hang them about 30-36 inches above the countertop. Make sure they don’t block your view or get in the way when cooking.
Painting And Finishing
Paint or stain the island to match your kitchen. Use durable, easy-to-clean finishes. Consider a bold color for the island base to create a focal point.
Final Checklist
- Test all appliances and outlets
- Check for leaks under the sink and dishwasher
- Clean the island and remove any dust or debris
- Add decorative touches like a fruit bowl or vase
Common Mistakes To Avoid
Building a kitchen island with a sink and dishwasher isn’t easy. Here are mistakes many beginners make:
- Not checking building codes. Skipping permits can lead to costly fixes later.
- Ignoring workflow. Placing the sink or dishwasher too far from the main work area makes the island less useful.
- Using weak materials. Heavy countertops need strong support.
- Forgetting waterproofing. Water leaks can ruin cabinets and floors.
- Not allowing enough space. Crowded kitchens are uncomfortable and unsafe.
- Poor ventilation for the dishwasher. Overheating can damage the appliance.
- Not testing plumbing and electrical before finishing. Always check for leaks and working outlets first.
- Choosing style over function. Islands must be practical and easy to use.
Real-world Examples And Ideas
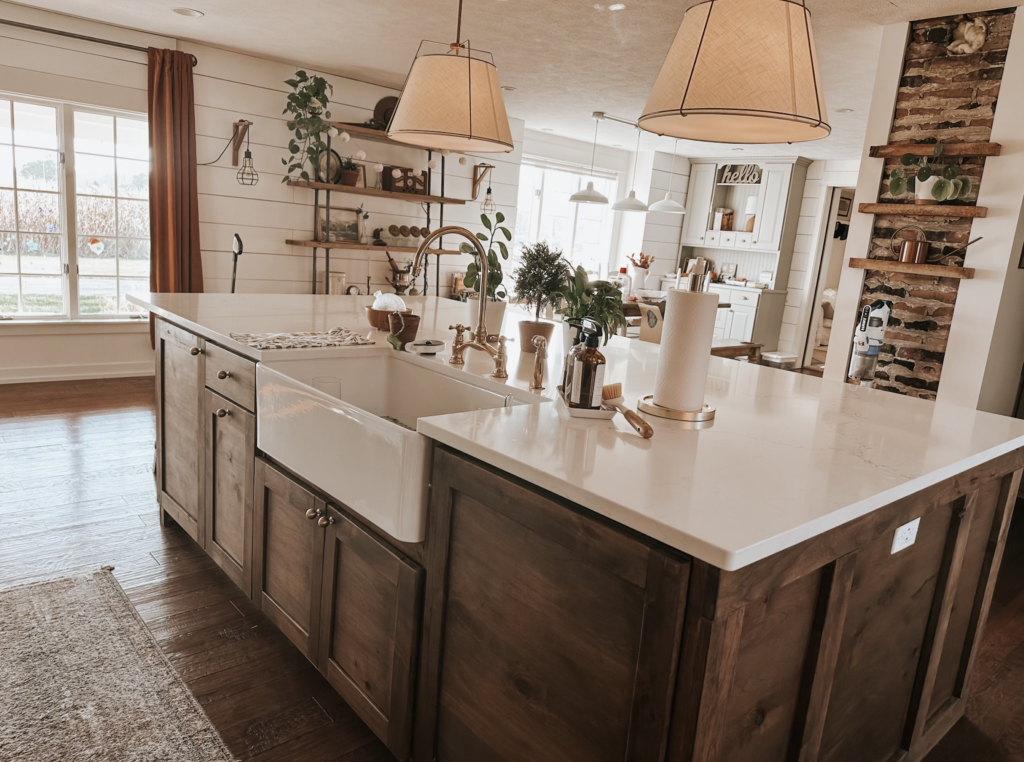
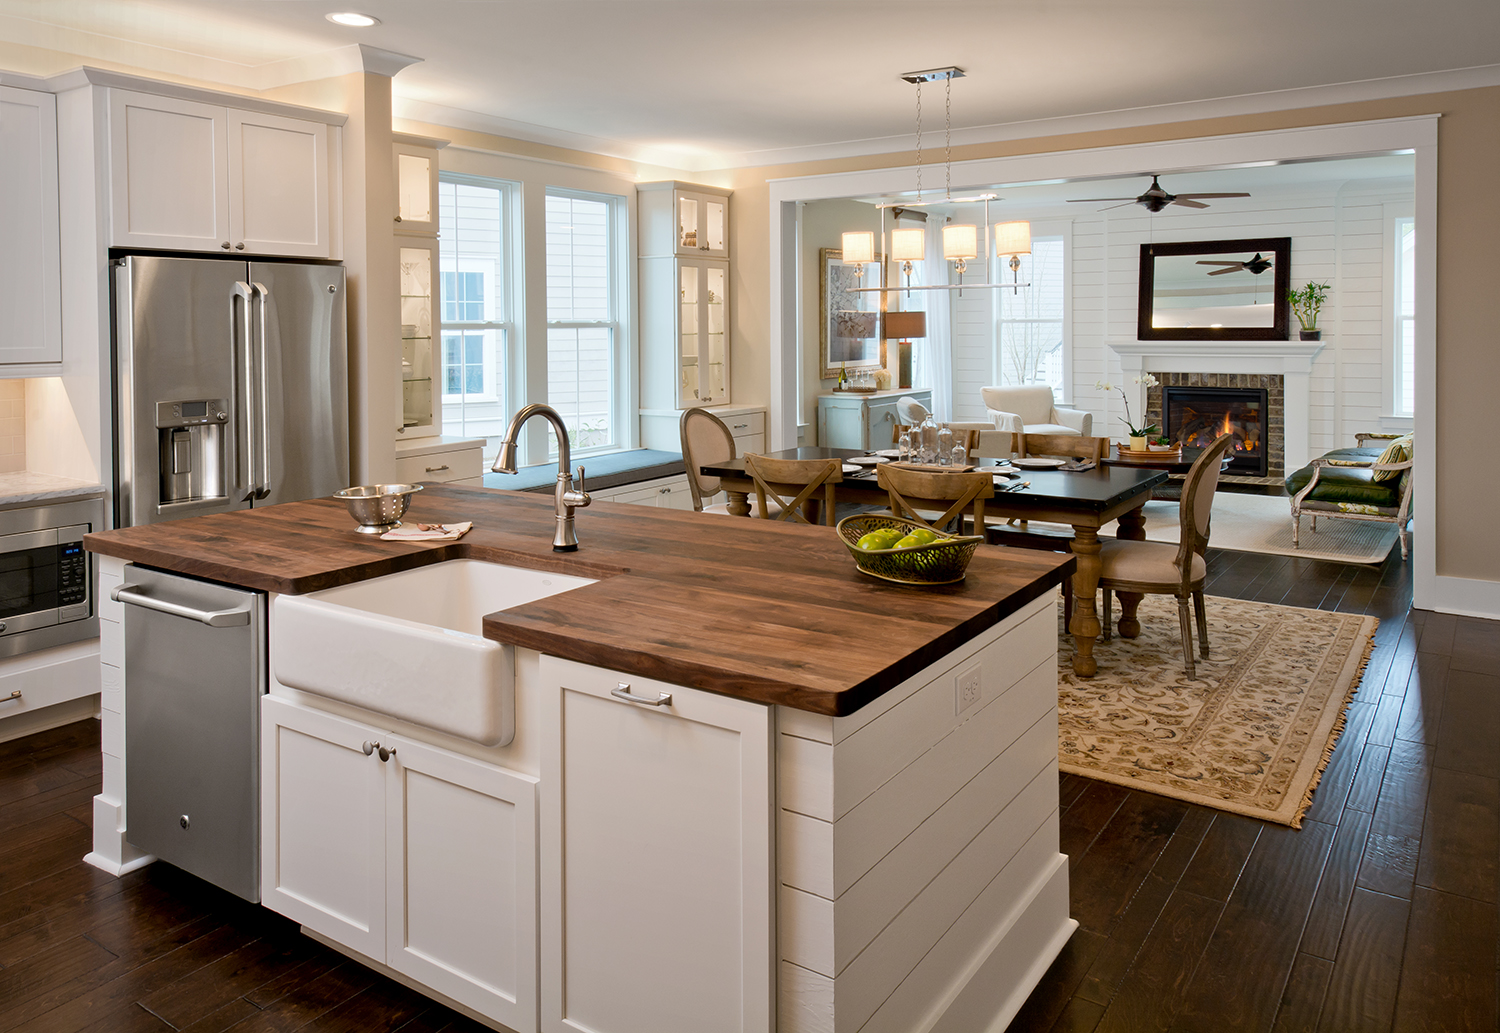
Many homeowners have created beautiful and practical islands. For example, one homeowner in Texas added a 6-foot island with a farmhouse sink and hidden dishwasher in a kitchen just 12 feet wide. They used a quartz countertop and built custom drawers for baking pans. Another couple in Canada installed a compact island with a prep sink and a slimline dishwasher. They found that the extra water line cost only $200 to run but saved hours of cleaning each week.
A clever tip: If you have a small kitchen, use a portable dishwasher in your island. It can be rolled away when not in use, freeing up space.
Budgeting For Your Kitchen Island
How much does it cost to build a kitchen island with a sink and dishwasher? Here’s a breakdown:
| Item | Low-End Cost | High-End Cost | Notes |
|---|---|---|---|
| Base Cabinets/Frame | $350 | $1,500+ | DIY vs. custom cabinets |
| Countertop | $200 | $2,500+ | Material choice matters |
| Sink & Faucet | $150 | $800+ | Size and features |
| Dishwasher | $400 | $1,200+ | Standard vs. high-end |
| Plumbing/Electrical | $500 | $2,000+ | DIY or hire a pro |
| Finishing (paint, hardware) | $100 | $400 |
Total cost can be as low as $1,700 for a small, DIY project or over $8,000 for a large, custom island with premium features. Always budget for unexpected costs like repairs or extra materials.
Credit: timberandtwinehome.com
Maintenance And Cleaning Tips
A kitchen island with a sink and dishwasher needs regular care to stay looking good and working well.
- Wipe up water spills quickly to avoid damaging wood or laminate.
- Clean the sink with mild soap; avoid harsh chemicals that scratch surfaces.
- Check under the sink for leaks once a month.
- Run your dishwasher empty with a cleaning tablet every few weeks.
- Tighten screws and hinges if drawers or doors become loose.
For more on kitchen maintenance, see Family Handyman.
Frequently Asked Questions
What Size Should My Kitchen Island Be If I Want A Sink And Dishwasher?
A good minimum size is 60 inches by 36 inches. This gives enough room for both appliances, plus workspace on either side. If you want seating, add at least 12 inches of overhang for each seat.
Do I Need A Plumber And Electrician To Install A Sink And Dishwasher?
If you are not experienced with plumbing and electrical work, it’s safer to hire professionals. Mistakes can cause leaks or electrical hazards. In many areas, building codes require licensed workers for these jobs.
Can I Add A Kitchen Island With A Sink And Dishwasher To A Small Kitchen?
Yes, but you must plan carefully. Choose compact appliances, and make sure there’s at least 36 inches of walkway around the island. Consider a smaller sink or a slimline dishwasher to save space.
How Do I Connect Plumbing To A Kitchen Island In A Finished Floor?
You usually need to run water supply and drain lines under the floor, then bring them up through the base of the island. This may require cutting into the floor and patching it after. If you have a basement, access is easier.
Is A Permit Required To Add A Kitchen Island With Plumbing And Electrical?
In most places, yes. You’ll need a building permit for any new plumbing or electrical work. Always check with your local city or county office before starting. Not getting a permit can lead to fines or problems when selling your home.
Building a kitchen island with a sink and dishwasher is a big project, but the results are worth it. You gain a more efficient, beautiful kitchen and add value to your home. With careful planning, quality materials, and attention to detail, you can create an island that becomes the heart of your home for years to come.
Credit: www.housingdesignmatters.com