
Every kitchen tells a story, and if you look up, you might see some chapters written in grease and dust on your light fixtures. Kitchen lights work hard, shining through countless meals, celebrations, and everyday moments. But over time, steam, cooking oil, and airborne particles settle on these fixtures, leaving them sticky, dull, and sometimes even a little smelly. Not only does this look unpleasant, but it can also reduce the amount of light in your kitchen, affect air quality, and even present a fire risk if grease builds up too much. Fortunately, you don’t need special skills or expensive products to restore your kitchen lights to their original shine. With the right approach, a bit of patience, and some useful tips, you can make your kitchen fixtures sparkle like new—and keep them that way.
If you’ve ever wiped a kitchen counter and wondered why the light still feels dim or dirty, you’re not alone. Many people forget about their light fixtures when cleaning, or they are unsure how to clean them safely. In this guide, you’ll discover everything you need to know about how to clean greasy kitchen light fixtures. You’ll learn which tools and cleaners work best, step-by-step instructions for every type of fixture, and insider tips for tackling stubborn grease. By the end, you’ll feel confident and ready to give your kitchen the brightness it deserves.
Why Kitchen Light Fixtures Get So Greasy
Kitchens are different from other rooms because they deal with food, heat, and moisture. When you cook, especially with oil or butter, tiny droplets become airborne. Steam from boiling water or simmering sauces carries grease and dust upward. Over time, this mixture settles on every surface above your stove and countertops—including your light fixtures.
Even with a range hood or exhaust fan, some grease escapes. Add in dust, pet hair, and regular household dirt, and your once-bright lights can become dull and grimy. Glass, metal, and plastic fixtures all collect grease differently, but none are immune.
Some studies have shown that kitchens can be among the greasiest rooms in a home, especially if you cook often. According to the U.S. Department of Agriculture, cooking oils and fats can travel up to three feet from the stove, landing on nearby surfaces and fixtures. So, even if you’re careful, you can expect a gradual buildup over weeks and months.
Safety First: Preparing To Clean Kitchen Light Fixtures
Before you start cleaning, safety is essential. Kitchen fixtures are often connected to electricity, and water or cleaning sprays can be dangerous if they reach wires or sockets. Follow these steps every time:
- Turn off the power at the light switch. For extra caution, switch off the circuit breaker.
- Let bulbs cool for at least 15-20 minutes before touching them. Bulbs get very hot during use.
- Use a sturdy step stool or ladder for ceiling or high fixtures. Make sure it’s stable and placed on a flat surface.
- Remove any jewelry and tie back long hair to avoid accidents.
- Lay an old towel or drop cloth below the fixture to catch drips, dust, or broken glass.
- Wear gloves if using strong cleaners, or if you have sensitive skin.
Taking these precautions helps prevent shocks, burns, and falls—three common cleaning accidents in kitchens.
Types Of Kitchen Light Fixtures And Their Cleaning Needs
Every kitchen is unique, and so are its light fixtures. Some are simple globes; others are ornate chandeliers or modern LED panels. Here’s a quick overview of the most common types and what makes them challenging to clean:
| Fixture Type | Typical Material | Grease Buildup | Cleaning Difficulty |
|---|---|---|---|
| Ceiling-Mounted Dome | Glass/Plastic | Moderate | Easy-Moderate |
| Pendant Lights | Glass/Metal | High (often above stove/island) | Moderate |
| Recessed (Can) Lights | Metal/Plastic | Low-Moderate | Moderate |
| Track Lighting | Metal/Plastic | Low-High (depends on location) | Moderate |
| Chandeliers | Glass/Crystal/Metal | High (if above kitchen table) | Challenging |
| Under-Cabinet Lights | Plastic/LED Strip | High (close to cooking area) | Easy-Moderate |
Glass and metal are the most common materials, but each type needs a slightly different approach. Knowing your fixture type helps you choose the right cleaning method and avoid damage.
Essential Tools And Supplies For Cleaning Greasy Fixtures
Having the right tools can make cleaning faster, safer, and more effective. Here’s what you’ll need:
- Soft microfiber cloths (at least 2-3)
- Non-scratch sponges
- Dish soap (degreasing works best)
- White vinegar
- Baking soda
- Spray bottle
- Old toothbrush
- Bucket of warm water
- Paper towels or lint-free rags
- Screwdriver (for removing covers)
- Gloves
- Step stool or ladder
For stubborn grease, you might also want:
- Commercial degreaser (check label for safe use on your fixture)
- Magic eraser sponge
- Cotton swabs (for tight corners)
- Compressed air can (for dust in electronic components)
Avoid using abrasive pads, bleach, or ammonia-based cleaners on plastic or painted surfaces, as these can scratch or discolor your fixture.
Step-by-step Guide: How To Clean Different Kitchen Light Fixtures
Each type of fixture has its own cleaning steps. Below you’ll find detailed instructions for every major style, so you can confidently tackle whatever’s lighting up your kitchen.
Cleaning Ceiling-mounted Domes And Flush Fixtures
These are the classic glass or plastic domes found in many kitchens. They collect dust and grease on both the outside and inside.
- Turn off power and let the dome cool.
- Remove the dome carefully. Usually, they are held by screws or clips. Hold it securely, as it can slip easily.
- Soak in warm, soapy water. Fill your sink or a large basin with warm water and a few drops of degreasing dish soap. Let the dome soak for 10-15 minutes.
- Wipe with a soft cloth or sponge. Gently scrub away grease. For stubborn spots, sprinkle a little baking soda on your sponge.
- Rinse thoroughly to remove soap residue.
- Dry completely with a lint-free towel.
- Wipe the fixture base and bulb with a damp cloth. Never spray water directly onto the fixture base.
- Reassemble and restore power.
Pro Tip: For extra shine, spray a 1:1 mix of white vinegar and water on the dome before drying.
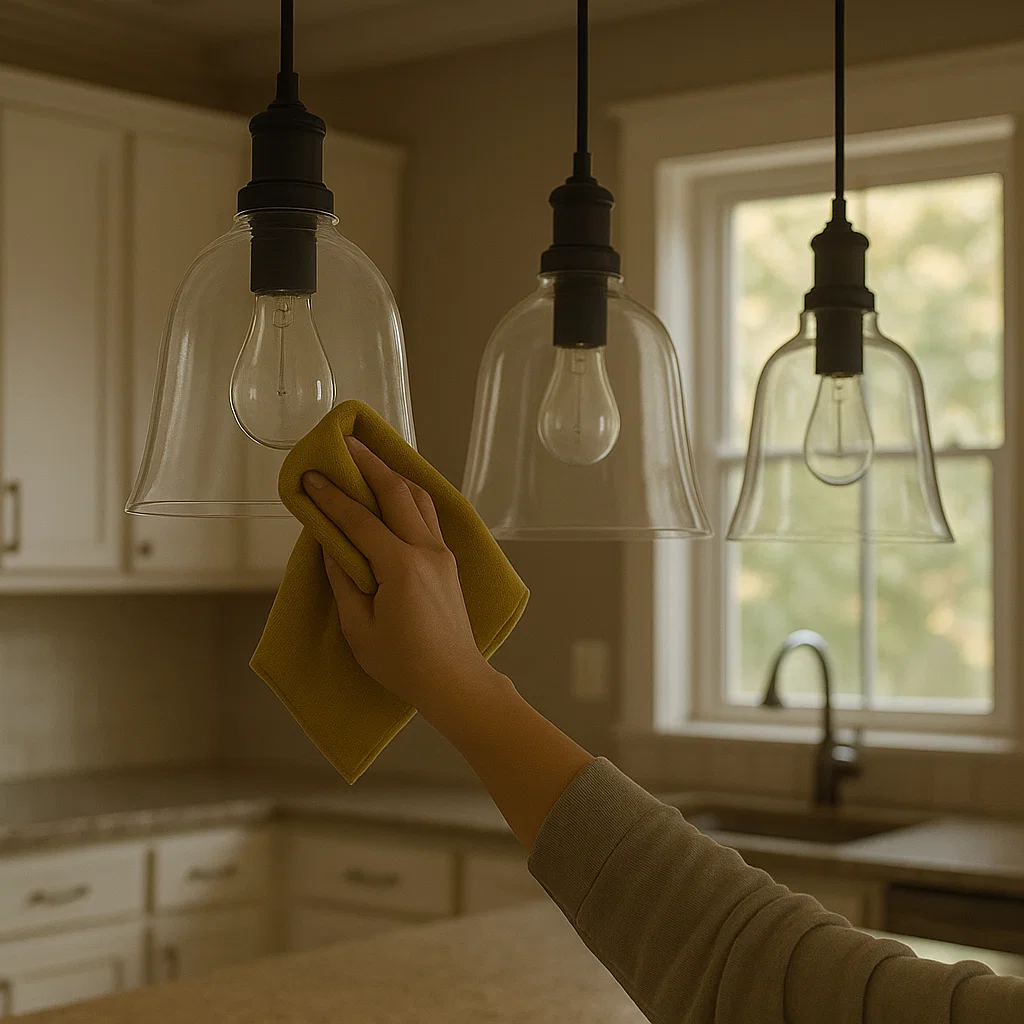
Cleaning Pendant Lights
Pendants are often hung above islands or counters, making them magnets for grease and dust.
- Turn off power and allow to cool.
- Remove glass or metal shades if possible. If not, clean in place.
- Clean shades in warm, soapy water. Use a non-scratch sponge for glass, or a microfiber cloth for metal.
- Use a toothbrush to reach crevices and around the base.
- For metal parts, wipe with a vinegar-soaked cloth to remove fingerprints and grease.
- Dry all pieces before reassembling.
Insider Insight: If your pendant cords are sticky, wrap a microfiber cloth around them and gently pull downward to clean without tugging the wires.
Cleaning Recessed (can) Lights
Recessed lights are flush with the ceiling and can collect dust and light grease.
- Turn off power and let cool.
- Remove trim if possible. Most pop out with gentle pressure.
- Dust the inside using a microfiber cloth or compressed air.
- Wipe with a damp (not wet) cloth and mild soap if greasy.
- Do not get water inside the fixture—this can cause electrical problems.
- Replace trim and restore power.
Cleaning Track Lighting
Track lights often have adjustable heads, making them tricky to clean.
- Turn off power at the breaker.
- Remove bulbs and gently wipe each one with a cloth dampened in soapy water. Dry completely.
- Wipe track and heads with a microfiber cloth. For stuck grease, use a vinegar solution.
- Check for dust inside the housing using compressed air.
- Reassemble carefully.
Cleaning Chandeliers
Chandeliers in kitchens may look fancy, but they collect grease quickly.
- Turn off power and let the fixture cool.
- Lay towels below to catch drips.
- Remove crystals or glass parts if possible. Soak in warm, soapy water.
- Wipe arms and base with a cloth dampened with vinegar water.
- Use a cotton swab for small crevices.
- Let crystals air dry before reassembling.
Non-Obvious Tip: For very large or delicate chandeliers, use a spray bottle to mist each part with a cleaning solution and let it drip dry.
Cleaning Under-cabinet Lights
These lights are closest to stoves, so they can get very greasy.
- Unplug or turn off power.
- Wipe the cover with a soapy sponge. For LED strips, use a just-damp cloth.
- Clean the underside of the cabinet—grease often collects above the light, too.
- Dry thoroughly before restoring power.
Cleaning Led Panels And Modern Fixtures
LED panels should not get wet inside.
- Turn off power.
- Wipe exterior with a damp microfiber cloth and a drop of dish soap.
- Dry immediately to avoid streaks.
- Avoid opening the fixture unless the manufacturer says it’s safe.
Removing Stubborn Grease: Advanced Techniques
Sometimes, soap and water aren’t enough. For old, caked-on grease, try these methods:
- Baking Soda Paste: Mix baking soda with a little water to form a paste. Spread on greasy spots, wait 10 minutes, then scrub gently.
- Vinegar Spray: Mix equal parts vinegar and water in a spray bottle. Spray onto the greasy area and let sit before wiping clean.
- Commercial Degreasers: Use only on surfaces listed as safe on the product label. Rinse off completely.
- Magic Eraser: For plastic or metal parts, a magic eraser can remove sticky residue. Test in a hidden spot first.
Hidden Problem: Fixture screws and mounting hardware can also get greasy. Soak them in soapy water, then dry fully before reinstalling.
How Often Should You Clean Kitchen Light Fixtures?
Many people clean kitchen lights only once a year, but this is not enough in busy kitchens. For best results:
- Light dusting: Every 2-4 weeks
- Full cleaning: Every 3-6 months
- After heavy cooking: Clean immediately if you fry or cook with lots of oil
Regular maintenance makes deep cleaning much faster and helps your kitchen stay bright and healthy.
Preventing Grease Buildup In The Future
Cleaning is easier if you stop grease before it settles. Here are some ways to reduce buildup:
- Use your range hood or exhaust fan every time you cook.
- Wipe down fixtures weekly with a microfiber cloth.
- Choose fixtures with smooth surfaces—they’re easier to clean than ornate ones.
- Install light covers that are easy to remove for washing.
- Cook with lids on pots and pans when possible to reduce airborne grease.
- Change your air filter regularly if you have a kitchen vent.
Extra Insight: If you fry food often, consider using a portable air purifier in your kitchen to capture airborne particles.
Safe Cleaning Products: What Works Best?
Many people ask if they need special products to clean greasy kitchen lights. The answer: not usually. Most grease can be removed with simple ingredients.
Here’s a quick comparison of common cleaners:
| Cleaner | Strengths | Best For | Precautions |
|---|---|---|---|
| Dish Soap | Gentle, cuts grease | Most surfaces | Rinse well to avoid residue |
| Vinegar | Dissolves grease, deodorizes | Glass, metal | Avoid on stone or marble |
| Baking Soda | Abrasive (mild), removes stains | Stubborn spots | Don’t use on delicate surfaces |
| Commercial Degreaser | Very effective | Heavy buildup, metal | Test on a hidden area first |
For most kitchens, dish soap and vinegar are enough. Save strong chemicals for the toughest jobs, and always rinse well.
Common Mistakes When Cleaning Greasy Light Fixtures
Even with the right tools, it’s easy to make small mistakes that can damage your fixture or make cleaning harder. Here are errors to avoid:
- Not turning off the power: This is unsafe and can cause shocks.
- Using too much water: Excess water can drip into electrical parts.
- Scrubbing with abrasive pads: These scratch glass, plastic, and even metal.
- Forgetting to dry parts: Wet fixtures attract dust and can rust.
- Not cleaning bulbs: Greasy bulbs reduce light output and can overheat.
- Reassembling with wet hands: This can cause bulbs to break or slip.
Little-Known Tip: Always check for burnt-out bulbs while the fixture is apart. Replacing them now saves time later.
Cleaning Vintage Or Delicate Fixtures
Older fixtures may have fragile glass, painted metal, or even fabric shades. Handle these with care:
- Use only mild soap and water.
- Avoid soaking; instead, wipe gently with a damp cloth.
- For fabric, use a vacuum with a brush attachment or a lint roller.
- If unsure, consult the manufacturer or an electrician.
If your fixture is a valuable antique, consider hiring a professional for cleaning.
The Impact Of Clean Fixtures On Kitchen Lighting And Safety
You might be surprised how much brighter your kitchen feels after cleaning your light fixtures. Grease and dust can block up to 30% of light, making spaces look dull and cramped. Clean fixtures also last longer, as grease can break down materials and cause corrosion.
There’s a safety benefit, too. Heavy grease buildup is flammable, especially near heat sources. By cleaning regularly, you reduce fire risk and keep your kitchen safer for your family.
Credit: www.aosom.com
Real-life Example: Transforming A Greasy Fixture
Imagine a kitchen where the pendant lights over the island seem yellow and dim, even with new bulbs. After removing the glass shades, soaking them in soapy water, and scrubbing the metal arms with vinegar, the difference is clear. The fixtures not only look new, but the kitchen feels more welcoming and brighter.
Guests notice, and so does the cook—tasks like chopping and reading recipes become easier.
Many people don’t realize how much grease can affect lighting quality. Try cleaning one fixture and compare it to an uncleaned one; the contrast is often striking.
When To Call A Professional
Some situations are best left to experts:
- Heavily soiled chandeliers or fixtures in hard-to-reach places (over stairwells, vaulted ceilings)
- Wiring issues or exposed wires
- Broken glass or sharp metal edges
- Fixtures with complex parts you’re unsure how to disassemble
Electricians and professional cleaners have the tools and experience to clean safely. If you have any doubts, it’s better to ask for help.

Credit: www.reddit.com
Sustainability: Eco-friendly Cleaning Tips
You can clean greasy kitchen lights without harming the environment:
- Use reusable microfiber cloths instead of paper towels.
- Choose natural cleaners like vinegar and baking soda.
- Dispose of dirty water down the drain, not outside.
- Recycle or donate old fixtures instead of throwing them away.
According to the EPA, using fewer chemicals and disposable products helps protect water sources and reduces landfill waste. For more tips, see the EPA’s household cleaning guidance at EPA Safer Choice.
Frequently Asked Questions
How Do I Clean Light Fixtures Without Taking Them Down?
Wipe the outside with a damp microfiber cloth and a small amount of dish soap. Use a long-handled duster for high places. For deep cleaning, removal is best, but regular surface cleaning helps reduce buildup.
Can I Put Glass Light Covers In The Dishwasher?
Some glass covers are dishwasher-safe, but always check the manufacturer’s instructions. Avoid dishwashing painted, frosted, or delicate glass, as they can chip or discolor.
Is It Safe To Clean Light Fixtures With Vinegar?
Yes, vinegar is safe for most glass and metal parts. Avoid using vinegar on stone or marble parts, as it can damage them. Always rinse and dry after cleaning with vinegar.
How Do I Remove Yellowing From Plastic Light Covers?
Mix baking soda with water to make a paste. Spread on the yellowed area, let sit for 20 minutes, then scrub gently and rinse. Severe yellowing may be permanent due to aging plastic.
What Should I Do If I See Signs Of Electrical Damage While Cleaning?
Stop cleaning immediately and do not touch any wires. Call a licensed electrician to inspect the fixture. Signs of damage include frayed wires, burn marks, and flickering lights.
—
A clean kitchen feels brighter, safer, and more welcoming. Grease on your light fixtures isn’t just a cosmetic problem—it affects how you cook, clean, and enjoy your space. By following these steps, using safe products, and cleaning regularly, you’ll keep your kitchen lights shining at their best.
Remember, a little effort now saves time and trouble later. So next time you look up and see a dull fixture, you’ll know exactly what to do—no more living in the shadows!

Credit: www.reddit.com