
A cracked pool pump housing is a problem that demands quick action. If left unfixed, it can lead to water leaks, reduced pump efficiency, high energy costs, and even damage to other pool equipment. But many pool owners feel nervous about repairing this part themselves. The good news is: fixing a cracked pool pump housing is possible for most people with basic tools, patience, and the right approach.
This guide will walk you through everything you need to know. You’ll learn how to spot cracks, understand what causes them, choose between repair or replacement, and follow a detailed step-by-step process. You’ll also see how to avoid common mistakes, get tips for maintaining your pump, and find answers to questions pool owners ask most.
Whether you want to save money, avoid equipment downtime, or just understand your pool better, these insights will help you make smart choices.
Understanding Pool Pump Housing Cracks
Before you start fixing anything, it’s important to understand what you’re dealing with. The pool pump housing is the main body of your pump, usually made from strong plastic or fiberglass. It holds the pump’s motor and other moving parts, and it’s designed to keep water in and debris out. If the housing fails, water can escape, and air can get inside, which may lead to the pump losing prime or even burning out.
Common Causes Of Cracks
Cracks in the housing don’t just happen randomly. Here are the most frequent reasons:
- Freezing weather: If water is left inside the pump during a freeze, it expands and can crack the housing. Even a small amount of water left in the pump can create enough pressure to split the plastic, especially in colder regions.
- Over-tightening bolts: Screwing bolts too hard can stress the plastic and cause hairline cracks. Over time, repeated over-tightening, even by just a little, can create invisible stress points that eventually break open.
- Aging and sun damage: Over years, plastic weakens from sun and chemical exposure. UV rays from the sun break down plastic polymers, making the housing brittle, while pool chemicals can further degrade the material.
- Vibration: Pumps not installed on a steady base vibrate, which leads to fractures. Vibration isn’t always obvious, but it slowly works the plastic, causing cracks to form over months or even years.
- Impact: Dropping tools or bumping the pump during maintenance can create cracks. Even a single hard knock in the right spot can be enough, especially if the housing is already weakened from age.
These factors are sometimes easy to overlook, especially for new pool owners. For example, a small crack from a dropped wrench may not leak right away but can expand later due to pressure changes and vibration.
Signs You Have A Crack
Some cracks are obvious, but others are hard to see. Here’s how to check:
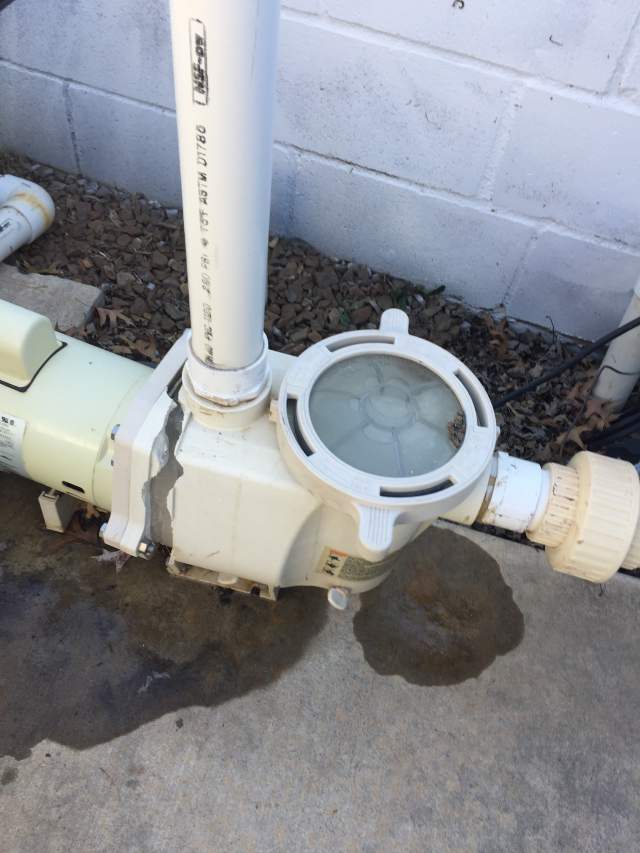
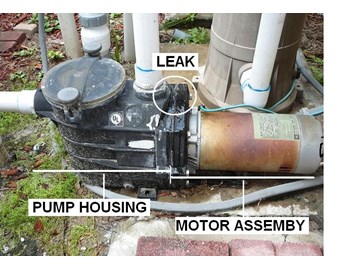
- Water leaks: If you notice water dripping or pooling under your pump, suspect a crack. Sometimes the leak is slow, and you might see a damp spot or white mineral buildup where water evaporates.
- Air in the system: Air bubbles in the pump basket or jets may indicate a housing leak. If you see bubbles returning to the pool or hear “gurgling” sounds, air is likely entering the system through a crack.
- Low pressure: If your pump isn’t moving water efficiently, a leak could be the cause. Check the pressure gauge—if it’s lower than normal with all valves open, a housing crack is one possible culprit.
- Noise: Unusual sounds, like sucking or whistling, can come from cracks. These noises may be faint at first, but they often get louder as the crack worsens.
For a full inspection, dry the pump, turn it off, and use a flashlight to look for fine lines or wet spots. Sometimes, running your hand over the housing can help you feel small cracks you can’t see. If you suspect a crack but can’t find it, try dusting the housing lightly with chalk or baby powder; any water seepage will leave a visible trail.
Assessing The Severity: Repair Or Replace?
Not all cracks are equal. Some can be fixed easily, while others mean it’s time for a new pump housing. Deciding correctly can save you money and prevent further damage.
When Repair Is Possible
You can repair the housing if:
- The crack is less than 3 inches long
- The crack isn’t at a joint or bolt hole
- The housing is not warped or weakened overall
Small surface cracks in the middle of the housing are usually good candidates for repair. If the rest of your pump is in good shape and the crack hasn’t spread, fixing it can add years to your pump’s life.
When Replacement Is Needed
Replacement is the better choice if:
- The crack is larger than 3 inches
- The crack is at a critical point (like where the motor mounts)
- Multiple cracks are present
- The pump is old and brittle
If the crack is near a joint, or if you can squeeze the housing and feel it flex or crumble, repairs might not hold up. Multiple cracks usually mean the material has become too weak from age or stress.
Here’s a quick comparison to help you decide:
| Repair | Replace |
|---|---|
| Crack less than 3″ long | Crack longer than 3″ |
| No cracks on joints/bolt holes | Crack at joint or bolt hole |
| Housing is strong | Multiple cracks or brittle plastic |
| Low cost, quick fix | Higher cost, long-term solution |
If you’re unsure, repair first and monitor for leaks, but be ready to replace if problems return. Also, remember that repeated repairs on the same pump can reduce reliability, so weigh the benefits and costs.

Credit: www.youtube.com
Gathering The Right Tools And Materials
Getting ready is half the battle. Here’s what you’ll need to fix a cracked pool pump housing:
- Epoxy resin (pool-safe, waterproof, two-part is best)
- Fiberglass cloth or patch kit (for larger cracks)
- Sandpaper (medium and fine grit)
- Cleaning solution (isopropyl alcohol or degreaser)
- Putty knife or small scraper
- Rubber gloves
- Screwdrivers and/or wrenches
- Flashlight
- Old rags or towels
- Permanent marker
For hairline cracks, just epoxy and sandpaper may be enough. For larger cracks, you’ll need fiberglass cloth or a patch kit. Never use household glue—it won’t last.
A few extra tips: use a disposable mixing tray for epoxy, and keep some masking tape handy to hold patches in place as they set. Having everything ready before you start saves time and prevents mistakes.
Step-by-step Guide To Fixing A Cracked Pool Pump Housing
Here’s the practical part. This section covers the full process, from start to finish.
1. Turn Off Power And Drain The Pump
Safety is critical. Shut off power at the breaker box. Remove the pump’s plug if it has one. Then:
- Close any valves to stop water flow.
- Open the pump lid and remove the basket.
- Use a wet/dry vacuum or towels to remove water from the housing.
Never work on a pump that’s plugged in or filled with water.
Some pumps may have a drain plug at the bottom—open it to remove all water. If you skip draining, leftover water can mix with epoxy and ruin your repair.
2. Remove The Pump And Access The Crack
You need clear access to the crack. To do this:
- Disconnect the inlet and outlet pipes (use a wrench or unscrew unions).
- Lift the pump out and place it on a towel.
- Use a flashlight to find the crack.
- Mark the ends of the crack with a permanent marker. This keeps you from missing the full length.
Tip: Take photos before disassembly to help with reassembly.
If your pump is hard-plumbed, you may need to loosen fittings or unions carefully. Don’t force pipes, as this can cause more damage. For pumps with electrical connections, make a note or take a picture of the wiring to ensure correct reassembly.
3. Clean And Prepare The Surface
Good repairs start with a clean surface. Here’s how:
- Scrub the area with a cleaning solution to remove grease, algae, and dirt.
- Rinse with water and dry completely.
- Sand the area 1–2 inches around the crack with medium-grit sandpaper. This helps the epoxy stick.
- Wipe with alcohol to remove dust.
Do not skip sanding. Smooth plastic won’t bond well with epoxy.
For best results, sand in small circular motions and slightly rough up the crack itself. This gives the epoxy more surface area to grip. If you see any old repair material, remove it completely.
4. Apply Epoxy (and Fiberglass, If Needed)
Read the instructions on your epoxy kit. Most require you to mix two parts together.
- Mix the epoxy thoroughly.
- Use the putty knife to press epoxy into the crack.
- For cracks longer than 1 inch, press a piece of fiberglass cloth (cut to size) over the epoxy.
- Apply another layer of epoxy on top of the fiberglass.
- Smooth the surface with the putty knife.
Epoxy starts to harden quickly, so work fast. Make sure there are no bubbles or gaps.
Try to overlap the repair area by at least an inch on all sides, especially for larger cracks. For deep cracks, gently force epoxy into the gap before applying the patch. If your patch kit includes mesh, use it for extra strength.
5. Let It Cure Properly
Every epoxy is different, but most need 12–24 hours to cure fully.
- Keep the pump in a dry, warm place.
- Do not touch, move, or stress the repair during this time.
- If possible, cover with a box to keep dust off.
Don’t rush this step. Premature use can ruin your repair.
If the weather is cool or humid, curing may take longer. Follow the manufacturer’s instructions for best results. Some people use a small space heater (set at a safe distance) to speed up curing, but don’t overheat the pump.
6. Test For Leaks
After curing, it’s time to check your work.
- Sand the area lightly with fine sandpaper to smooth rough edges.
- Reinstall the pump and reconnect pipes.
- Open valves and fill the pump with water.
- Power on the pump and watch for leaks.
If you see drips, power off and reapply epoxy. If it’s dry, you’re done.
Check both while the pump is off and running. Sometimes, small leaks only appear when the system is under pressure. Don’t forget to inspect the bottom and hidden sides of the housing.
7. Reassemble And Restart
Once you’re sure there are no leaks:
- Replace the pump basket and lid.
- Open all valves fully.
- Restore power at the breaker.
- Check pressure and water flow.
Listen for odd noises and watch for air bubbles, as these can signal a hidden leak.
If you hear air being sucked in or see bubbles in the pool, turn off the pump and double-check your repair. Small leaks can sometimes be fixed by adding a little more epoxy and letting it cure again.
Credit: www.metro-pool-service.com
Advanced Repair Tips For Lasting Results
Some repairs fail because beginners miss a few key details. Here’s how to get a long-lasting fix:
Use The Right Epoxy
Not all epoxies are the same. Choose marine-grade or pool-safe epoxies that resist chlorine and UV light. Regular hardware store epoxies might not last more than a few months.
Some brands even offer epoxies specially designed for pool equipment—these can cost a bit more but are worth it for durability. Reading reviews or asking your local pool store can help you choose the best option.
Reinforce With Fiberglass
For cracks over 1 inch, always use fiberglass cloth. The extra strength prevents the crack from spreading. Overlap the cloth at least 1 inch on all sides of the crack.
If you’re patching near a curve or joint, cut your fiberglass into small pieces to help it lay flat. Smooth out wrinkles with a gloved finger or putty knife.
Double-check The Edges
Many cracks grow because their ends aren’t sealed well. Use a magnifier or flashlight to check both ends. Don’t just patch the middle—cover the whole length.
A smart trick is to drill a tiny hole (1/16-inch) at each end of the crack before applying epoxy. This can stop the crack from spreading further—a technique borrowed from auto body repair.
Avoid Over-tightening
When reinstalling, don’t overtighten bolts or unions. Hand-tight is usually enough. Use a torque wrench if you have one.
Double-check all connections for snugness, but don’t force them. Too much pressure can undo your repair or start a new crack.
Monitor For A Few Days
After repair, check daily for leaks or drops in water level. Sometimes, small cracks reappear under pressure.
Run the pump for a full cycle, and inspect the repair when the pump is both running and off. If you see any issues, act quickly—a tiny fix now can prevent a big problem later.
Maintenance To Prevent Future Cracks
Prevention is better than repair. Here’s how to avoid cracks in the future:
- Winterize properly: Drain the pump before freezing weather. Use a shop vac or air compressor to blow out any water in the housing and pipes.
- Check for vibration: Make sure the pump is on a solid, level base. If it rocks or moves, shim it with rubber pads or use vibration-absorbing mounts.
- Shield from sun: Use a pump cover or build a small shelter. Even a simple tarp or shade cloth can help prevent UV damage.
- Inspect for leaks: Catching hairline cracks early can save you a major repair later. Check around the pump at least once a month, especially during heavy use.
- Avoid chemicals: Don’t splash undiluted chlorine or acid on the pump housing. If a spill happens, rinse with water immediately.
Here’s a quick maintenance comparison:
| Good Practice | Common Mistake |
|---|---|
| Drain pump in winter | Leave water in pump during freeze |
| Use pump cover | Leave pump exposed to sun |
| Inspect every month | Ignore until leaks appear |
| Hand-tighten bolts | Use power tools on bolts |
Don’t forget to check your pump during spring opening and fall closing. These are prime times for catching small issues before they become big ones.
Credit: www.inyopools.com
Professional Repair Vs. Diy: Which Is Right For You?
Some pool owners wonder if they should try this repair themselves or call a pro. Here’s a quick side-by-side:
| DIY Repair | Professional Repair |
|---|---|
| Low cost (under $50 for materials) | Higher cost ($150–$400 typical) |
| 1–2 hours of work | Usually done in 1 day |
| Gives you hands-on experience | No effort or learning required |
| Risk of errors if not careful | Guaranteed workmanship |
If you’re comfortable with basic tools and careful, DIY can save money. But if the crack is large, the pump is expensive, or you’re unsure, hiring a pro is wise.
One advantage of hiring a pro is that they may spot other issues, such as worn seals or failing bearings, that you might miss. But for most small cracks, DIY repair is enough, and you’ll learn valuable skills for future pool care.
Two Insights Beginners Often Miss
- Cracks Can Hide in Plain Sight: Many pool owners focus only on big leaks. But even tiny cracks let air in, which can damage your pump motor over time. Always check carefully, even if the leak is small. A good practice is to check for air bubbles in your pool’s return jets—these often mean air is sneaking in somewhere.
- Epoxy Choice Matters: Using regular glue or the wrong epoxy is a common mistake. Only use products rated for pools and chemicals. Otherwise, repairs will fail after a few weeks. Some specialty pool epoxies are even colored to match your pump for a cleaner look.
Another tip: after your first repair, keep a small repair kit handy. Having epoxy, sandpaper, and fiberglass cloth ready lets you fix minor cracks before they become major problems.
Common Mistakes To Avoid
- Skipping surface preparation: Not sanding or cleaning means the epoxy won’t stick. Even invisible oils or dust can cause your repair to fail quickly.
- Using the wrong adhesive: Household glue or silicone caulk won’t last. These products can break down in water or when exposed to pool chemicals.
- Rushing curing time: Using the pump before full cure can cause the crack to reopen. Always follow the epoxy manufacturer’s directions for drying time.
- Over-tightening bolts: This creates new stress points and leads to new cracks. If you’re unsure, use a torque wrench set to the manufacturer’s specs.
- Ignoring small leaks: Even a drip can lead to bigger problems. Water can damage your equipment pad and cause corrosion or mold nearby.
Avoiding these errors will save you time, money, and frustration.
When To Replace The Whole Pump
Sometimes, fixing isn’t enough. Replace the entire pump if:
- The housing is brittle or soft to the touch.
- There are multiple large cracks.
- The pump is over 10 years old and parts are hard to find.
- The repair fails after two attempts.
Replacement pumps cost more, but can improve efficiency and lower energy bills. Newer pumps are often quieter and use less energy, so a replacement can pay off over time. For more on choosing new pumps, check out this pool pump guide.
Frequently Asked Questions
How Long Does A Pool Pump Housing Repair Last?
A well-done epoxy and fiberglass repair usually lasts 1–3 years. The key factors are the quality of surface prep, the epoxy used, and whether the crack was caught early. If the housing is old or brittle, repairs may last less time.
Periodic checks can help you spot new issues before they become serious.
Can I Use Regular Glue Or Silicone To Fix A Crack?
No. Regular glue or silicone caulk is not strong enough for pool pumps. These products can’t handle water pressure, chemicals, or temperature changes. Always use a pool-safe or marine-grade epoxy for repairs. Investing in the right materials saves headaches down the line.
How Do I Know If My Repair Worked?
After curing, reassemble the pump and run it under normal pressure. Watch for leaks, listen for odd noises, and check water flow. If everything works and stays dry for several days, your repair is successful. For extra confidence, check the repair after the first week of use.
Is It Safe To Run My Pump With A Small Crack?
It’s not recommended. Even small cracks let air and water mix, which can cause your pump to lose prime, overheat, or fail. Repair the crack as soon as you notice it to avoid bigger problems. Waiting too long often makes repairs harder and more expensive.
How Can I Prevent Pool Pump Housing Cracks In The Future?
Drain your pump before winter, avoid overtightening bolts, shield the pump from direct sun, and inspect the pump monthly for early signs of damage. Proper maintenance is the best way to avoid cracks. Write a quick checklist and post it near your pool equipment for easy reference.
Repairing a cracked pool pump housing might seem tough at first, but with the right steps and materials, it’s a job many pool owners can handle. Take your time, prepare carefully, and you can restore your pump’s performance and avoid expensive replacements.
Remember, a little maintenance now prevents bigger headaches later—so keep an eye on your pump, and enjoy a smooth-running pool all season long.