
Painting the space above your kitchen cabinets can transform the entire room. That empty gap often collects dust, looks dull, or just fades into the background. But with the right paint job, it can become a highlight of your kitchen’s design. Many people avoid this project because it seems tricky: How do you reach up there? What prep is needed? Which colors work best? The good news is, painting above kitchen cabinets is simple if you plan ahead and use the right techniques. Even if you have never done a project like this before, you can get professional-looking results.
This guide will take you step-by-step through everything you need to know about painting above your kitchen cabinets. You’ll learn how to choose the right paint, prepare the area, pick tools, and avoid mistakes. You’ll also find advanced tips that many beginners miss, including ways to handle tricky corners and keep the finish looking fresh for years.
By the end, you’ll be ready to tackle this project confidently and add a fresh touch to your kitchen.
Why Paint Above Kitchen Cabinets?
That space above your cabinets is often overlooked, but it can make a big difference in your kitchen’s style and feel. Here’s why you should consider painting it:
- Adds Color and Interest: Painting this area can introduce a pop of color or a soft accent that pulls the whole room together.
- Hides Stains and Marks: Dust, grease, and old stains often collect here. A fresh coat of paint can cover these and make the area look clean again.
- Defines the Space: If your kitchen blends into other rooms, painting above the cabinets can help mark the kitchen area.
- Matches Your Decor: You can coordinate with wall color, cabinet color, or even the backsplash for a more finished look.
Many homeowners are surprised how much a simple paint job above the cabinets can change the atmosphere in the kitchen. Sometimes, it even makes the ceiling look higher.
Planning Your Project
Before you grab a brush, it’s important to plan your project. This will save you time, prevent mistakes, and help you get the best results.
Measure The Area
Start by measuring the length and height of the space above your cabinets. This will help you calculate how much paint you need. Most kitchen cabinets leave a gap of about 12-24 inches to the ceiling, but this can vary.
- Measure the length of all cabinet runs.
- Measure the height from cabinet top to ceiling.
- Multiply length by height to get total square footage.
Assess The Surface
Check what you’re dealing with:
- Is the surface drywall, plaster, or wood?
- Is it smooth or textured?
- Are there vents, pipes, or wires?
Knowing the surface type will help you choose the right primer and paint.
Choose A Color And Finish
Color selection is one of the most important steps. Here are some ideas:
- Light colors: Make the space feel larger and brighter.
- Dark colors: Add drama and can make the ceiling seem lower, which works in tall kitchens.
- Accent shades: Use a bold color to create a focal point.
Finish also matters. For kitchens, satin or semi-gloss is best because it’s easier to clean and resists grease.
Gather Your Supplies
You’ll need:
- Paint (check your measurements to buy the right amount)
- Primer (if painting over stains, dark colors, or glossy surfaces)
- Painters tape
- Drop cloths or plastic sheeting
- Step ladder or small scaffold
- Angled brush (for corners and edges)
- Small roller (for flat spaces)
- Sandpaper or sanding block
- Cleaning supplies (soap, degreaser, rags)
- Caulk (for sealing gaps if needed)
Set Your Timeline
Painting above kitchen cabinets usually takes 1-2 days, depending on prep, drying time, and number of coats. Plan for:
- Cleaning and prep: 1-2 hours
- Priming: 1-2 hours (plus drying)
- Painting: 2-4 hours (plus drying between coats)
If possible, avoid cooking while the project is underway to keep dust and grease away from wet paint.
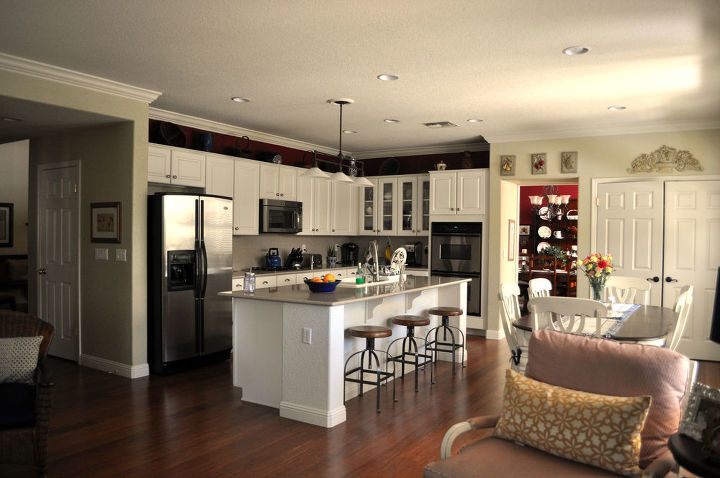
Credit: www.hometalk.com
Prepping The Area
Preparation is the most important part of any painting job, especially above kitchen cabinets. Grease, dust, and loose paint can prevent new paint from sticking.
Clear The Cabinets And Surrounding Area
Remove items from the top of cabinets, including decor, baskets, or appliances. Cover countertops, cabinet tops, and floors with drop cloths or plastic. This will protect surfaces from drips and dust.
Clean Thoroughly
This is a step many people rush, but it’s critical. The area above cabinets collects a lot of grease and dust.
- Mix warm water with a few drops of dish soap or use a degreaser.
- Scrub the surface with a sponge or rag.
- Pay special attention to corners and edges.
- Rinse with clean water and let dry completely.
If the area is very greasy, you may need to wash twice. Paint will not stick to oily surfaces.
Repair And Sand
Look for cracks, holes, or peeling paint:
- Fill small holes or cracks with spackling compound or caulk.
- Sand rough spots or peeling paint with fine sandpaper (120-220 grit).
- Wipe away dust with a damp cloth.
Tape And Protect
Use painters tape to mask off edges where the painted area meets the ceiling, walls, or cabinets. Press the tape down firmly for a sharp line. If you want to avoid getting paint on the cabinets, tape along the top edge as well.
Choosing The Right Paint And Primer
Picking the right products is key for a long-lasting finish above your kitchen cabinets.
Primer Selection
Primer helps paint stick better and covers stains. Use primer if:
- The surface is stained or greasy.
- You are painting over a dark color with a light one.
- The wall is new drywall or patched areas.
For most kitchens, a stain-blocking primer is best. Oil-based or shellac-based primers block grease and smoke stains better than water-based ones, but they smell stronger and need good ventilation.
Paint Type
For kitchens, durability is important. Choose:
- Acrylic latex paint: Easy to clean, low odor, dries fast.
- Satin or semi-gloss finish: Resists moisture, easy to wipe down, and reflects light nicely.
Avoid flat or matte paints above kitchen cabinets. They show marks easily and are hard to clean.
How Much Paint Do You Need?
One quart covers about 100 square feet, and one gallon covers about 350-400 square feet. For most kitchens, one quart to half a gallon is enough, unless you have a very large area or need multiple coats.
Painting Techniques For The Space Above Cabinets
Painting above cabinets is different from painting a standard wall. The space is small and sometimes hard to reach. Here’s how to get a smooth, even finish:
Step 1: Prime The Surface
If you’re using primer, apply it first with a brush for corners and edges, then a small roller for flat areas. Allow to dry as directed (usually 1-2 hours).
Step 2: Cut In The Edges
Use an angled brush to paint along the ceiling, cabinet tops, and corners. Take your time for clean lines. If you have steady hands, you can skip taping the ceiling, but tape helps prevent mistakes.
Step 3: Roll The Main Area
Use a small roller (4-inch or 6-inch) for the main surface. This gives an even finish and is faster than a brush. Roll in overlapping sections for full coverage.
Step 4: Smooth Out Brush Marks
After rolling, lightly drag the brush over any visible roller marks or brush strokes for a seamless look.
Step 5: Apply A Second Coat
Let the first coat dry fully (check the paint can for timing). Apply a second coat for richer color and better coverage.
Step 6: Remove Tape Carefully
Peel off painters tape before the paint is fully dry to avoid pulling up dried paint.
Step 7: Clean Up
Wash brushes and rollers right away if you plan to reuse them. Remove drop cloths and wipe down any surfaces that got splashed.
Advanced Tips For A Professional Finish
Even simple projects can look professional with a few expert tricks:
- Use a paint extender: This slows drying, giving you more time to smooth out lines.
- Feather the edges: Lightly blend where the painted area meets the ceiling or walls for a softer transition.
- Check from below: Stand on the floor and look up—this is how you’ll see the paint day-to-day. Touch up any missed spots.
- Seal the edges: If dust collects above the cabinets, run a thin bead of paintable caulk along the seam where the wall meets the cabinet top. This keeps dust from settling in cracks.
- Try a color block: If your ceiling is high, consider painting the area above cabinets a different color from the walls for a modern look.
Many beginners miss the importance of lighting. Use a portable work light to check your work. Shadows from cabinets can hide missed spots.
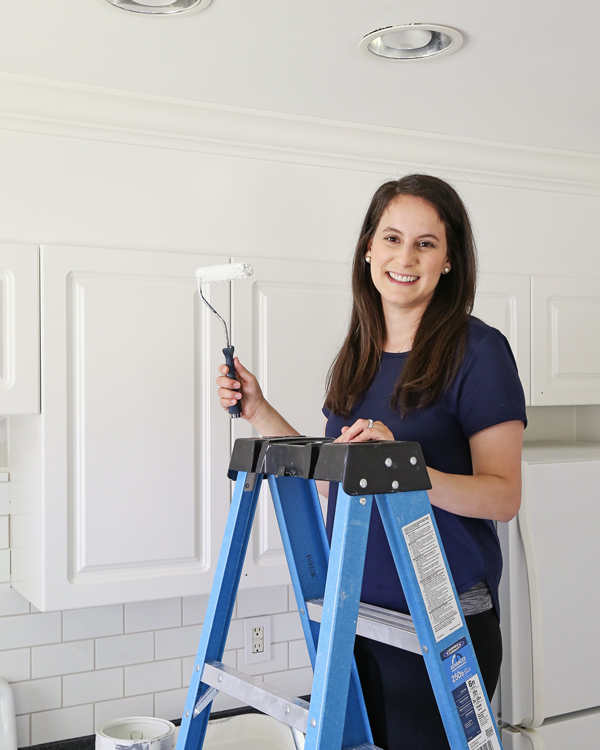
Credit: angelamariemade.com
Common Mistakes To Avoid
Painting above kitchen cabinets isn’t hard, but it’s easy to make these mistakes:
- Skipping cleaning: Grease will stop paint from sticking. Always clean well.
- Not using primer: Especially if covering stains or dark colors.
- Using the wrong finish: Flat paints get dirty and are hard to clean in kitchens.
- Overloading the brush or roller: Leads to drips and uneven coverage.
- Ignoring drying times: Rushing coats can cause peeling or uneven color.
- Missing the edges: Check corners and under the lip of the cabinet for missed spots.
- Forgetting ventilation: Paint and primer fumes build up, especially in small kitchens.
Color Ideas And Design Inspiration
Choosing a color for above your cabinets is a chance to get creative. Here are some ideas, with examples:
- White or off-white: Classic, matches most kitchens, makes the space feel open.
- Soft gray or beige: Neutral, modern, and pairs well with stainless steel appliances.
- Bold accent colors: Navy blue, forest green, or even black for a dramatic statement.
- Metallic paint: Gold or silver adds a touch of luxury (best in modern kitchens).
- Matching wall color: Creates a seamless look that makes the ceiling appear higher.
Here’s how different color choices can affect the room:
| Color Choice | Effect in Kitchen | Best For |
|---|---|---|
| White | Brightens, enlarges space | Small kitchens, traditional styles |
| Light Gray | Modern, calming | Open-plan layouts, contemporary homes |
| Bold Color (Blue, Green) | Adds personality, focal point | Statement kitchens, open shelving |
| Metallic | Reflects light, luxurious touch | Modern, high-end kitchens |
| Match Wall Color | Blends, higher ceiling effect | Low ceilings, minimalist look |
Tools: Brushes, Rollers, And Ladders
The right tools make painting above cabinets much easier and safer.
Brushes
- Angled sash brush: Great for cutting in along edges.
- Short-handle brush: Easier to control in tight spaces.
Rollers
- Small foam roller: Gives a smooth finish, fits narrow gaps.
- Mini roller with microfiber cover: Good for slightly textured walls.
Ladders And Platforms
- Step ladder: For most kitchens, a 2- or 3-step ladder is enough.
- Work platform: Better for long cabinet runs; gives you more room to move.
Don’t stand on chairs or countertops. This is unsafe and can damage your kitchen.
Here’s a quick comparison of tools for painting above kitchen cabinets:
| Tool Type | Best Use | Pros | Cons |
|---|---|---|---|
| Angled Brush | Cutting in edges | Precision, clean lines | Slower for big areas |
| Foam Roller | Flat surfaces | Even finish, no brush marks | May not reach corners |
| Step Ladder | Reaching high spaces | Stable, compact | Limited movement |
| Work Platform | Long cabinet runs | More room, safer | Bulky, needs space |
Cleaning Up And Caring For The Painted Area
A beautiful paint job will last longer if you take care of it.
- Wipe regularly: Use a damp cloth to remove dust every few weeks.
- Clean grease: If you notice grease, wipe with mild soap and water.
- Touch up chips: Keep a small jar of leftover paint for quick fixes.
- Check for moisture: If you see bubbling or peeling, check for leaks or too much humidity.
Most high-quality paints for kitchens resist stains and are easy to clean. Avoid abrasive sponges or harsh chemicals, which can dull the finish.
When To Hire A Professional
Sometimes it’s better to call in an expert, especially if:
- The area above cabinets is very high or hard to reach.
- There’s water damage, mold, or peeling that needs special care.
- You want a specialty finish (like faux painting or metallic effects).
- You’re short on time or have physical limitations.
Professional painters have the tools, experience, and safety gear to handle tricky jobs. Expect to pay $200–$500 depending on the size and complexity of the space.
Frequently Asked Questions
How Do I Keep Dust From Collecting Above My Kitchen Cabinets After Painting?
After you paint, the smooth new surface will be easier to wipe clean. For extra protection, run a thin bead of clear or paintable caulk where the cabinet meets the wall. This seals gaps where dust collects. Regularly wiping with a damp microfiber cloth helps too.
Can I Use Leftover Wall Paint For The Area Above My Cabinets?
You can use leftover wall paint if it’s a satin or semi-gloss finish. Flat or matte paint is not ideal because it’s hard to clean and shows stains. If your leftover paint is a suitable finish, it’s a great way to save money.
Do I Need To Remove The Cabinets To Paint Above Them?
No, you do not need to remove the cabinets. Just clear off the tops and use a step ladder or platform for access. Use painters tape to protect the cabinet tops from drips.
What If There Is Wallpaper Above My Kitchen Cabinets?
If there is wallpaper, it’s best to remove it before painting. Paint does not stick well to old wallpaper and the finish won’t last. If removal isn’t possible, use a strong primer designed for covering wallpaper before painting.
Can I Paint Above Kitchen Cabinets If The Space Is Very Narrow?
Yes, you can paint even in tight spaces. Use a short-handle angled brush for control. If the gap is less than 6 inches, a brush is usually easier than a roller. Take your time and use a work light to see clearly.
A fresh coat of paint above your kitchen cabinets can make your kitchen feel new again. With careful prep, the right tools, and a little patience, you can get great results—often in a single weekend. If you want more inspiration or technical guidance, check out resources from the Houzz Magazine, which offers expert advice and photos from real homeowners.
Painting above your kitchen cabinets is one of those small projects that delivers big rewards. Don’t be afraid to try bold colors or creative finishes. With each step you take, you’ll be adding value and personality to your kitchen—one brush stroke at a time.

Credit: www.remodelandolacasa.com