
Painting unfinished kitchen cabinets is one of the best ways to give your kitchen a fresh new look without spending a fortune. Many people choose unfinished cabinets because they are more affordable and allow for personal customization. But turning bare wood into a smooth, beautiful finish takes careful planning and the right steps.
If you want professional-looking results that last for years, you need to understand every part of the process—from preparation to the final touches.
Many DIYers jump into painting without knowing the details that make the difference. Some skip important steps, use the wrong tools, or pick the wrong products. The result? Peeling paint, visible brush marks, or a finish that doesn’t last. This guide will show you everything you need to know, using plain English and clear steps.
By the end, you’ll feel confident and ready to transform your kitchen cabinets with your own hands.
Why Paint Unfinished Kitchen Cabinets?
Painting unfinished cabinets comes with several benefits. First, it allows you to select the exact color and finish you want. You can match your cabinets to your walls, appliances, or even your personality. Second, painting is much cheaper than buying pre-finished cabinets or hiring professionals.
Unfinished cabinets are also easier to paint than old, finished ones. There’s no old paint or varnish to remove, and the surface is clean, raw wood. This means the paint sticks better and lasts longer. You also get the chance to fill any small holes, sand rough spots, and create a smooth, flawless look.
Many people don’t realize that painted cabinets can also increase the value of your home. According to home improvement surveys, kitchens with updated cabinets are one of the top features buyers look for. If you plan to sell your home, a fresh kitchen can give you a strong return on your investment.
What You’ll Need: Tools And Materials
Before you start, gather all the tools and materials. Having everything ready will save time and help you avoid mistakes.
Essential Tools
- Screwdriver (to remove doors and hardware)
- Sandpaper (120, 180, and 220 grit)
- Sanding block or electric sander
- Tack cloth or microfiber cloth
- Paintbrushes (high-quality, angled for detail work)
- Foam rollers or mini rollers (for smooth finishes)
- Paint tray
- Drop cloths or plastic sheeting
- Painter’s tape
- Small containers or zip bags (for hardware)
Materials
- Wood filler or spackle (for small holes and dents)
- Wood primer (high-quality, stain-blocking)
- Cabinet paint (acrylic latex or alkyd for durability)
- Degreaser or mild soap
- Clean water and sponges
- Optional: Grain filler (for open-grain woods like oak)
- Optional: Protective topcoat (polyurethane or polycrylic)
Safety Gear
- Dust mask or respirator
- Safety glasses
- Gloves
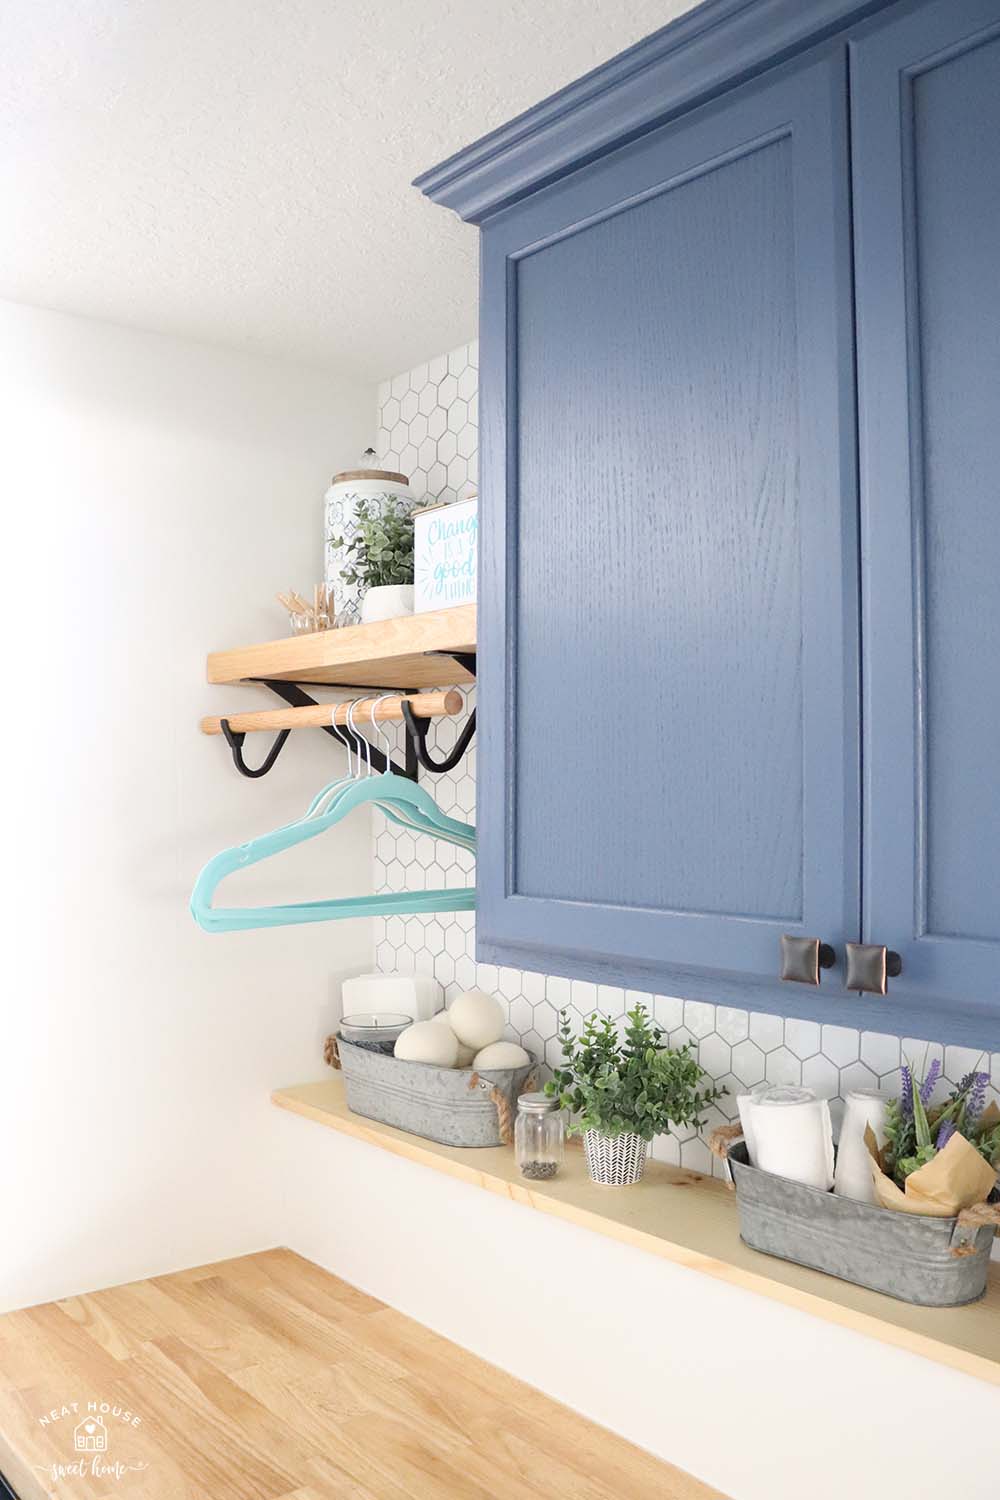
It’s easy to overlook the importance of using quality tools. Cheap brushes and rollers can leave marks or shed bristles. Investing in good supplies makes the job smoother and your finish more professional.
Credit: www.neathousesweethome.com
Planning Your Project
A successful cabinet painting project starts with good planning. This step is often ignored, but it can save you days of frustration.
Timing
Plan for at least 3-5 days to complete the job. Each coat of primer and paint needs time to dry, and rushing will ruin your finish. Some paints need 16-24 hours between coats for maximum hardness.
Workspace Setup
Choose a well-ventilated area with plenty of space. If possible, paint cabinet doors and drawers in a garage or large room. Lay drop cloths to protect the floor and surfaces. Label each door and drawer with tape, so you can return them to the right spot.
Keep all screws and hardware in small containers.
Weather Considerations
Paint dries best in moderate temperatures (60–80°F or 16–27°C) with low humidity. Too much moisture or cold air can cause paint to dry slowly or unevenly.
Preparation: The Key To A Smooth Finish
Preparation is where most DIYers cut corners, but it’s the most important step for lasting results.
Remove Doors, Drawers, And Hardware
Take off all cabinet doors, drawers, and hardware (knobs, handles, hinges). Lay them flat for easier painting. Label each piece with tape so you know where they belong.
Clean All Surfaces
Even new cabinets can have dust, oil, or fingerprints from manufacturing. Wipe every surface with a degreaser or mild soap and water. Rinse with clean water and let dry completely.
Fill Holes And Sand
Use wood filler to repair dents, holes, or scratches. Let it dry, then sand smooth with 120-grit sandpaper. Sand all surfaces lightly to remove rough spots and help the primer stick. Finish with 180- or 220-grit for a silky feel. Always sand with the grain, not against it.
Remove Dust
After sanding, wipe every surface with a tack cloth or microfiber cloth to remove dust. Dust left on the wood can ruin your paint job.
Optional: Grain Filler
For woods like oak with open grain, use a grain filler before priming. This creates a smooth surface, so the grain doesn’t show through the paint. Apply with a putty knife, let dry, and sand again.
Mask And Protect
Use painter’s tape to mask off walls, countertops, and any areas you don’t want painted. Cover floors and nearby surfaces with drop cloths.
Priming: The Foundation Of A Great Paint Job
Priming is not optional for unfinished cabinets. It seals the wood, blocks stains, and gives the paint something to grip.
Choosing The Right Primer
Pick a high-quality, stain-blocking primer. For most cabinets, a water-based acrylic primer works well. For woods that bleed (like pine or cherry), use an oil-based or shellac primer.
Applying Primer
- Stir the primer well.
- Use a brush for corners and detailed areas.
- Use a mini roller for flat surfaces.
- Apply thin, even coats. Thick coats can drip or take longer to dry.
- Let dry as directed (usually 2–4 hours).
Sand Between Coats
After the first coat dries, sand lightly with 220-grit sandpaper. This step removes small bumps and helps the next layer stick. Wipe off dust before applying a second coat, if needed.
Choosing Paint: Types, Sheens, And Colors
Not all paints are the same. The wrong paint can chip, stain, or wear out fast.
Paint Types
- Acrylic Latex: Water-based, easy to clean, low odor. Good for most kitchens.
- Alkyd Paint: Oil-modified, durable, and smooth. Cleans up with soap and water.
- Enamel Paint: Hard, glossy finish. Great for heavy-use areas.
Paint Sheens
- Satin or Semi-Gloss: Best for kitchen cabinets. Easy to clean, resists stains, and reflects light.
- Matte or Flat: Shows dirt and is hard to clean. Not recommended.
- High-Gloss: Very shiny but highlights flaws and brush marks.
Color Choices
Light colors like white or cream make kitchens feel larger and brighter. Dark colors can be dramatic but may show dust or fingerprints. Test samples on a small area before committing. Remember, strong colors can change the mood of your kitchen.
How Much Paint Do You Need?
For a standard kitchen (10–12 cabinets), you’ll need:
- 1 quart of primer
- 1–2 quarts of paint (two coats)
Always buy a little extra for touch-ups.
Painting: Techniques For A Smooth, Lasting Finish
Now it’s time to paint. The right technique separates pro results from amateur work.
Brush Vs. Roller Vs. Sprayer
- Brush: Good for detail and corners, but can leave marks if not careful.
- Foam Roller: Gives a smooth, even finish on flat surfaces.
- Paint Sprayer: Professional finish but requires practice and prep.
Most DIYers use a combination: brush for edges, roller for panels.
Steps To Paint Cabinets
- Stir paint thoroughly—never shake, which causes bubbles.
- Paint the back of doors and drawers first. Let dry, then flip to paint the front.
- Use long, even strokes with the grain.
- Don’t overload the brush or roller—thin coats are best.
- Allow 16–24 hours between coats for hardening.
- Sand lightly with 220-grit between coats for a smooth finish.
- Apply a second coat, repeating the steps above.
Common Mistakes
- Skipping primer
- Rushing drying times
- Painting in high humidity
- Using low-quality brushes
If you see drips, sand them out before adding another coat.
Applying A Protective Topcoat (optional But Recommended)
A protective topcoat is not always required, but it adds durability. For kitchens with heavy use or kids, it’s a smart choice.
Topcoat Types
- Polyurethane: Very durable, but can yellow over time (especially over white paint).
- Polycrylic: Water-based, non-yellowing, and easy to apply.
Apply 1–2 thin coats with a brush or foam roller. Allow each coat to dry completely.
Reinstalling Doors, Drawers, And Hardware
Once your paint is dry and hard (wait at least 48–72 hours), it’s time to put everything back.
- Remove painter’s tape carefully.
- Reattach hinges, knobs, and handles.
- Line up doors and drawers using your labels.
- Test all moving parts to make sure they open smoothly.
Don’t rush this step. Fresh paint can scratch if you’re not careful.
Maintenance: Keeping Your Cabinets Looking New
Painted cabinets are easy to keep clean if you follow simple rules.
- Wipe spills quickly with a damp cloth.
- Avoid harsh cleaners—use mild soap and water.
- Use felt pads on doors to prevent chips.
- Touch up chips right away to prevent peeling.
With the right care, your painted cabinets can look beautiful for years.
Real-life Example: Transforming A Small Kitchen
Let’s look at a real example. Sarah, a homeowner with a small 10×12-foot kitchen, decided to paint her unfinished oak cabinets. She followed all the steps: cleaned, filled grain, used a shellac primer, and painted with semi-gloss acrylic. The process took five days. Her total cost was $180 (compared to $2,000 for new cabinets).
Sarah’s tip: “Don’t skip sanding between coats. It made my finish really smooth. I used a foam roller for the doors and a brush for the details. The hardest part was waiting for the paint to dry, but it was worth it!”
Common Challenges And Solutions
Paint Peeling Or Chipping
This usually happens if you skip primer or paint on dirty surfaces. Always clean, sand, and prime.
Brush Marks Or Roller Streaks
Use high-quality foam rollers and good brushes. Sand lightly between coats.
Paint Not Drying
Humidity or thick coats cause slow drying. Paint in good weather and use thin layers.
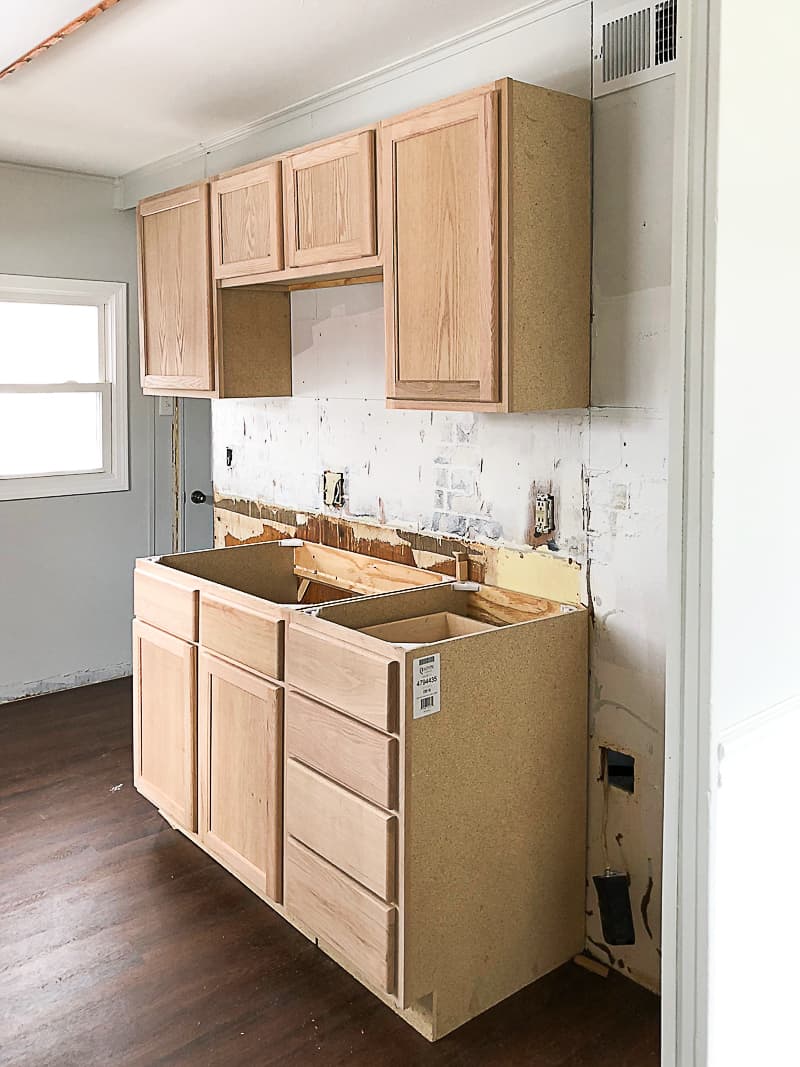
Wood Grain Showing Through
Use grain filler and sand well before painting.
Credit: www.mycreativedays.com
Data: Cost And Time Comparison
Below is a comparison between painting unfinished cabinets and buying pre-finished ones.
| Option | Average Cost (10×12 Kitchen) | Average Time Needed | Customization |
|---|---|---|---|
| Painting Unfinished Cabinets | $150–$300 | 3–5 days | High |
| Buying Pre-Finished Cabinets | $2,000–$5,000 | 1–2 days (installation only) | Low |
| Hiring Professionals | $1,500–$3,500 | 2–4 days | Medium |
Tips For A Professional Finish
- Always sand between every coat, including primer.
- Paint in thin, even layers.
- Keep your workspace clean and free of dust.
- Use bright, natural light to spot mistakes.
- Label all hardware and doors during removal.
- Test paint colors on a small area first.
- Don’t rush—allow full drying time.
Paint Brands And Product Comparison
Choosing good paint can make a big difference. Here’s a look at three popular cabinet paints:
| Brand | Type | Finish | Coverage per Quart | Special Features |
|---|---|---|---|---|
| Benjamin Moore Advance | Alkyd/Acrylic | Satin/Semi-Gloss | 350–400 sq ft | Self-leveling, durable |
| Behr Alkyd Enamel | Water-based Alkyd | Satin/Semi-Gloss | 300–350 sq ft | Hard finish, easy clean-up |
| Sherwin-Williams ProClassic | Waterborne Alkyd | Satin/Semi-Gloss | 350–400 sq ft | Stain-resistant, smooth |
Environmental And Health Considerations
Painting can release fumes (VOCs) into the air. Choose low-VOC or zero-VOC primers and paints for safer indoor air. Always keep windows open and use fans during painting. Wear a dust mask when sanding.
Some states have rules about paint disposal. Never pour leftover paint down the drain. Look for local recycling programs.
For more on paint safety and VOCs, visit the EPA’s indoor air quality page.

Credit: www.youtube.com
Myths About Painting Unfinished Cabinets
Many people believe you need to be an expert painter or buy special equipment. In reality, most people can get great results with patience and the right tools. Another myth is that painted cabinets don’t last. With proper prep and good paint, they can last 10 years or more.
Frequently Asked Questions
How Long Does It Take To Paint Unfinished Kitchen Cabinets?
The whole process usually takes 3–5 days. This includes cleaning, sanding, priming, painting (two coats), and drying time. Rushing the job often leads to poor results.
What Type Of Paint Is Best For Kitchen Cabinets?
Acrylic latex or alkyd-based paints are best. They are durable, easy to clean, and resist stains. Always choose a satin or semi-gloss finish for easier maintenance.
Do I Need To Prime Unfinished Cabinets Before Painting?
Yes, priming is essential. Primer seals the wood, blocks stains, and helps the paint stick. Skipping this step often leads to peeling and uneven color.
Can I Paint Cabinets Without Removing The Doors?
It’s possible, but not recommended. Removing doors and hardware makes it easier to paint every surface evenly. It also helps avoid drips and missed spots.
How Do I Avoid Brush Marks In The Final Finish?
Use high-quality brushes and foam rollers. Apply paint in thin, even coats, and sand lightly between each layer. Don’t overload your brush, and always work with the wood grain.
Painting unfinished kitchen cabinets is a project that pays off in both beauty and value. With the right approach, tools, and a bit of patience, you can create a kitchen that looks professionally designed. Take your time, follow each step, and soon you’ll be enjoying a kitchen that feels brand new—made by your own hands.