Everyone loves the feeling of slicing through a tomato with a sharp knife. But what happens when your knife dulls and you don’t have a sharpener at home? It’s a common problem, especially for people who cook often but don’t keep special tools. The good news: you can sharpen knives with everyday items found around the house. Many home cooks are surprised by how well these simple methods work. You don’t need to buy expensive equipment or make a trip to the store. With some patience and the right technique, your knives can be sharp again.
Knowing how to sharpen knives without a sharpener isn’t just a temporary fix—it’s a valuable kitchen skill. It can save you time and money. Also, it helps keep your cooking safe, since a dull knife is more dangerous than a sharp one.
Dull knives slip and cause more accidents. In this guide, you’ll learn different ways to sharpen knives using things you already have. You’ll also learn which methods are best for different situations, plus tips that most people miss.
Why Sharp Knives Matter
Before you start sharpening, it’s important to know why knife sharpness is so critical. A sharp knife does more than just cut food easily. It also:
- Reduces the risk of accidents because you use less force.
- Makes cleaner cuts, which help with food presentation and even cooking.
- Saves time when preparing meals.
- Protects the knife edge, so the knife lasts longer.
A dull knife smashes food fibers instead of slicing, which can make vegetables look bruised and meat tear unevenly. This affects the taste and look of your food.
How Knife Sharpening Works
Sharpening means reshaping the blade edge. Over time, the very thin edge bends or flattens. When you sharpen, you remove a tiny bit of metal to restore the fine point. Some methods also “hone” the edge. Honing straightens the edge but doesn’t remove metal. True sharpening grinds away material to make a new edge.
Most home methods use materials harder than the knife to grind the edge back. The key is holding the right angle and using a steady motion. Many people forget that pressure and angle matter more than the tool.
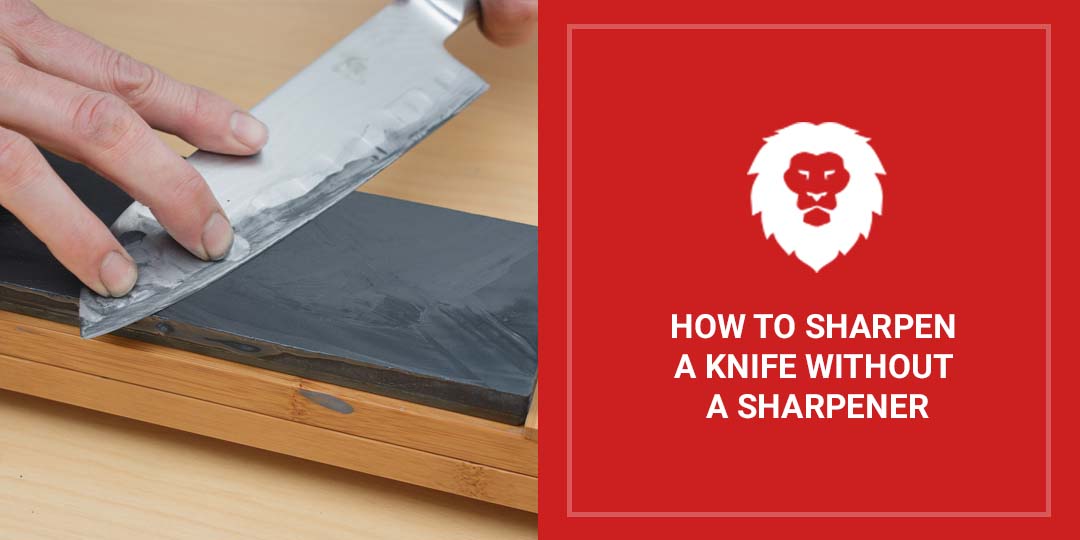
Credit: www.youtube.com
Safety First: Preparing To Sharpen
Knife sharpening—even with household items—can be risky if you aren’t careful. Always follow these safety rules:
- Work on a stable, non-slip surface.
- Wipe the knife clean before and after sharpening.
- Keep your fingers away from the blade edge.
- Use slow, controlled motions.
- Wipe away any metal dust or filings after sharpening.
If you’re unsure about your grip, practice the motion slowly before using any pressure.
Essential Knife Anatomy For Sharpening
You don’t need to be a knife expert, but understanding a few parts helps:
- Edge: The sharp cutting part.
- Spine: The top, thicker part of the blade.
- Bevel: The angle ground onto the edge.
- Heel: The back end of the blade, closest to the handle.
- Tip: The pointy front part.
When sharpening, you want to focus on the edge and keep the angle of the bevel. Most kitchen knives use a 15–20 degree angle.
Common Mistakes When Sharpening Without A Sharpener
Many beginners try these methods and get frustrated. Here are mistakes to avoid:
- Wrong angle: Too steep or too flat won’t sharpen well.
- Too much pressure: Can damage the blade.
- Uneven strokes: Makes the edge wavy or jagged.
- Ignoring both sides: You must sharpen both sides equally.
- Skipping cleaning: Dirt can scratch the blade.
Take your time and focus on technique over speed.
Popular Methods To Sharpen Knives Without A Sharpener
People have used creative solutions for centuries. Let’s look at the most reliable ways, how they work, and the steps for each.
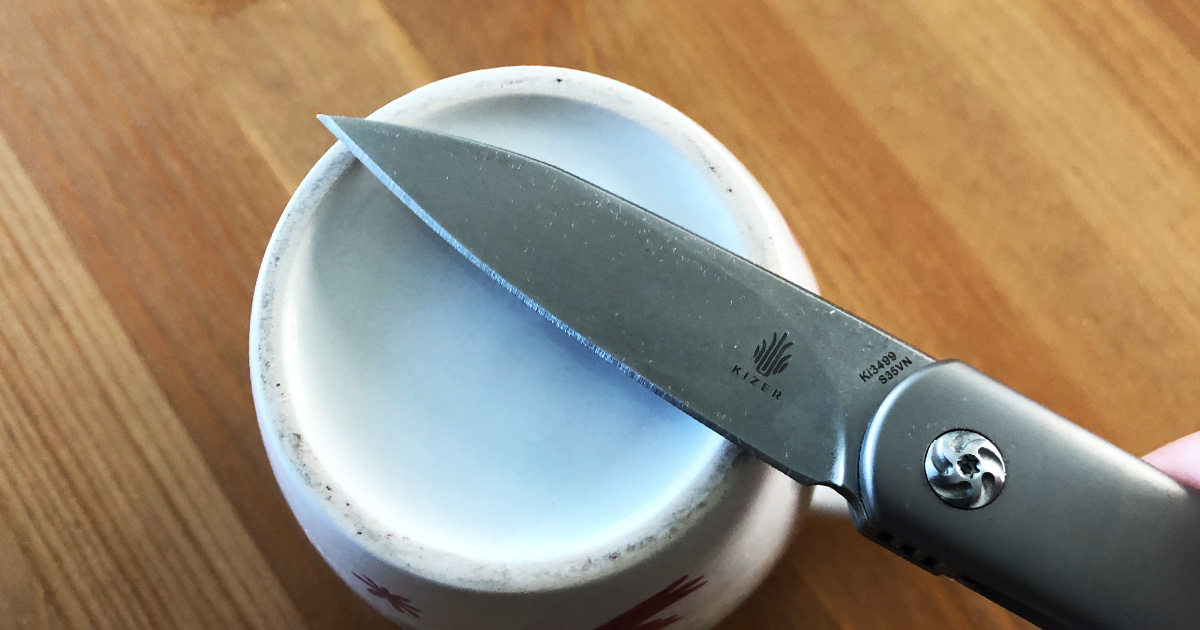
1. Sharpening With A Mug
A simple ceramic mug can act as a sharpening stone. The unglazed ring on the bottom is slightly rough—perfect for grinding a blade.
Steps:
- Flip the mug upside down.
- Make sure the bottom ring is unglazed and clean.
- Hold the knife at a 15–20 degree angle to the ring.
- Draw the blade down and across the ring, from heel to tip, using light pressure.
- Repeat 5–10 times per side, alternating.
- Wipe the blade clean.
This works well for most kitchen knives, but avoid using it for very expensive or specialty blades.
2. Using A Plate
Like a mug, the rough edge of a ceramic plate can sharpen knives.
Steps:
- Turn the plate upside down to expose the rough rim.
- Hold the blade at the correct angle.
- Sweep the edge across the rim, alternating sides.
- Use gentle, even strokes.
Plates are a great backup when you don’t have a mug handy.
3. Sharpening With A Nail File
A metal nail file (not glass) has a rough surface that can grind steel.
Steps:
- Place the file on a flat surface.
- Hold the knife at a 15–20 degree angle.
- Draw the blade from heel to tip across the file, as if slicing a thin layer.
- Repeat on both sides.
This method is best for small knives or pocket knives.
4. Using A Car Window
The top edge of a car window is surprisingly effective. It’s unfinished glass, harder than steel.
Steps:
- Lower the car window halfway.
- Place the knife edge on the top of the glass at a slight angle.
- Draw the knife along the glass, from heel to tip.
- Alternate sides.
This method gives a quick edge and is popular with outdoor cooks or campers.
5. Sharpening With A Flat Rock
If you’re outdoors, a smooth, flat rock can work like a whetstone.
Steps:
- Find a smooth stone—not too rough or sandy.
- Wet the stone with water (if possible).
- Hold the knife at a 15–20 degree angle.
- Sweep the blade across the stone, from heel to tip.
- Alternate sides for even sharpening.
This is a survival method, but it works in a pinch.
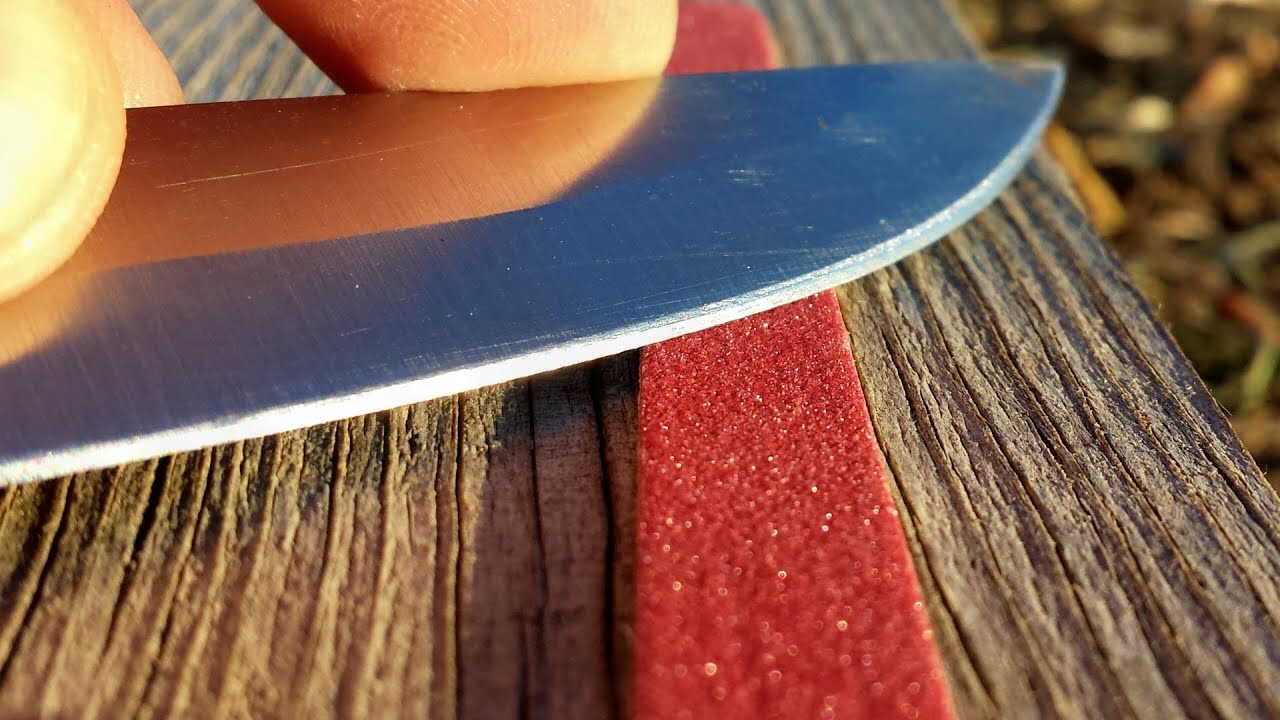
6. Using Sandpaper
Fine-grit sandpaper (400–1000 grit) can be used to sharpen a blade.
Steps:
- Place a sheet of sandpaper on a hard, flat surface.
- Hold the knife at the correct angle.
- Draw the knife along the sandpaper, keeping even pressure.
- Alternate sides.
Sandpaper is cheap and easy to find, but always clean your knife after.
7. Sharpening With Another Knife
If you have two knives, you can use one as a makeshift sharpening steel.
Steps:
- Hold one knife by the handle with the edge facing up.
- Take the dull knife and sweep its edge along the spine of the first knife at a 15–20 degree angle.
- Repeat on both sides.
This hones more than sharpens, but can bring back some edge.
8. Using A Brick
A smooth brick can act as a rough sharpening stone.
Steps:
- Clean the brick.
- Wet it slightly if possible.
- Hold the knife at the right angle.
- Draw the edge along the brick, alternating sides.
Bricks are very coarse. Only use this for very dull or cheap knives.
9. Leather Belt Stropping
After sharpening, use a leather belt to polish the edge.
Steps:
- Find a clean, thick leather belt.
- Lay it flat on a table.
- Drag the knife edge backwards (not cutting into the leather) to remove burrs.
- Repeat 5–10 times.
Stropping makes the edge smoother and sharper.
10. Honing Rod Substitutes
If you don’t have a honing rod, you can use a strong metal rod or even the back of a heavy spoon.
Steps:
- Hold the rod vertically.
- Place the knife at a slight angle and swipe down, alternating sides.
- Use gentle pressure.
This straightens the edge, but doesn’t grind metal.
Comparing Common Methods
Not every method works equally for all knives. Here is a quick look at how these methods compare for effectiveness and safety.
| Method | Best For | Ease | Edge Quality | Risk of Damage |
|---|---|---|---|---|
| Mug | Kitchen knives | Easy | Good | Low |
| Plate | Kitchen knives | Easy | Good | Low |
| Nail File | Pocket/small knives | Medium | Fair | Medium |
| Car Window | All-purpose | Medium | Good | Low |
| Rock | Outdoor knives | Medium | Fair | Medium |
| Sandpaper | All knives | Easy | Good | Medium |
| Another Knife | Quick honing | Easy | Low | Low |
| Brick | Very dull knives | Hard | Rough | High |
| Leather Belt | Polishing | Easy | Excellent | None |
| Metal Rod/Spoon | Edge straightening | Easy | Low | Low |
How To Test Knife Sharpness
After sharpening, check your progress. Don’t just look—test the edge safely. Here are a few popular ways:
- Paper test: Hold a piece of paper vertically and try to slice through it. A sharp knife will cut cleanly.
- Tomato test: Try slicing a tomato. If the blade pierces the skin easily, it’s sharp.
- Arm hair test: Carefully try to shave a few hairs from your arm. Only use this if you’re confident.
- Thumbnail test: Gently rest the edge on your thumbnail. If it “bites” in and doesn’t slide off, it’s sharp.
Never test sharpness by running your finger along the edge.
The Science Behind Household Sharpening
Many people wonder why these everyday items work. It’s about material hardness. Knife blades are usually made of carbon or stainless steel. Ceramic, stone, glass, and even some metals are harder than steel. When you drag the blade across these materials at the right angle, tiny bits of steel are ground away, forming a new edge.
Professional sharpeners use stones with known grit (like 1000 or 6000). Household items are less predictable, so results vary. But with good technique, you can get a functional edge.
When To Use Each Method
Not every method is best in every situation. Here’s a quick guide:
| Situation | Recommended Method | Why |
|---|---|---|
| At home, no tools | Mug or Plate | Safe and effective |
| Camping/outdoors | Flat Rock | Easy to find natural stones |
| Quick touch-up | Leather Belt | Polishes and aligns edge |
| Very dull knife | Brick or Sandpaper | Removes more metal |
| No flat surfaces | Car Window | Unfinished glass is hard |
| Pocket knife | Nail File | Fine for small blades |
Credit: www.redlabelabrasives.com
Tips For Better Sharpening Results
Getting a sharp edge without a sharpener takes practice. Here are some tips that most beginners miss:
- Consistent angle is more important than speed or pressure. Use a coin or matchstick to help set the angle.
- Sharpen both sides equally. Count your strokes.
- Clean the blade after each session to remove metal filings.
- If possible, finish with a leather belt to polish and remove burrs.
- For very dull knives, start with a rougher surface (like a brick), then finish with a smoother one (like a plate or belt).
- Never use these methods on ceramic knives—these require special tools.
How Often Should You Sharpen?
How often you sharpen depends on how much you use your knives. A home cook might need to sharpen every 1–2 weeks. For heavy use, check sharpness daily. You can hone with a belt or steel more often, and do a real sharpening every few weeks.
Avoid over-sharpening, which wears the blade.
Knife Types And Special Considerations
Not all knives are the same. Some need special care:
- Serrated knives: Do not use these methods. Serrated edges need special sharpeners.
- Japanese knives: Use gentle methods (like mugs or sandpaper), as the steel is harder and more brittle.
- Cheap knives: Can handle rougher methods (like bricks).
- Antique or collector knives: Avoid household methods; use professional sharpening.
Pay attention to the blade material and thickness. Thicker or softer blades need more work.
Cleaning And Maintaining Your Knife After Sharpening
After sharpening, always clean your knife. Metal filings can be harmful if left on the blade. Wash with soapy water and dry completely. Oil the blade lightly if you live in a humid area. Store knives in a block or on a magnetic strip to protect the edge.
Avoid tossing knives in a drawer, which dulls the edge quickly.
When To Seek Professional Help
If your knife is chipped, badly bent, or extremely dull, household methods might not be enough. Professional sharpeners use special stones and machines to reshape the edge. If you have an expensive or favorite knife, consider getting it serviced once a year. For more on professional sharpening, visit the Wikipedia Knife Sharpening page.
Key Differences: Honing Vs. Sharpening
Many people confuse honing and sharpening. Honing straightens the edge without removing metal, while sharpening grinds away metal to create a new edge. A dull knife needs sharpening; a slightly misaligned edge only needs honing. Most household methods do a little of both.
Credit: blog.knife-depot.com
Real-world Examples
Many professional chefs use mugs or plates in restaurant kitchens for quick fixes. Campers often use river stones or car windows. These tricks are used globally—proof that you don’t need fancy tools to keep your knives sharp.
A chef once shared that during a busy service, he used the back of a spoon to hone his knife after slicing through cardboard boxes. It wasn’t perfect, but it kept the edge until he could use a proper stone.
Frequently Asked Questions
How Can I Tell If My Knife Needs Sharpening?
If your knife smashes tomatoes instead of slicing or slips off onions, it’s time to sharpen. Try the paper test: if the knife struggles to cut clean paper, it’s dull.
Is It Safe To Use Household Items For Sharpening?
Yes, if you follow safety rules. Use slow, controlled movements. Avoid methods that feel unstable or unsafe for your skill level.
Can I Use These Methods For All Knives?
Most regular kitchen knives are fine. Do not use these methods on serrated or ceramic knives, which need special tools.
How Long Does It Take To Sharpen A Knife Without A Sharpener?
It depends on the method and how dull the knife is. With practice, you can sharpen a dull knife in 5–10 minutes using a mug or plate.
What Is The Best Household Item For Sharpening Knives?
A ceramic mug or plate works best for most people. It’s safe, effective, and gives a good edge without much risk.
Keeping your knives sharp doesn’t require fancy tools. With the right technique and a bit of creativity, you can use everyday items to restore your knife’s edge. Focus on safety, angle, and even strokes. With practice, you’ll find that a sharp knife is always within reach—even without a sharpener.