
Transforming a space in your home into a pantry can make daily life much easier and more organized. But what if you don’t have a walk-in pantry or a closet to spare? The answer may be right on your wall: stacking wall cabinets can create a pantry that looks built-in, maximizes vertical space, and keeps your kitchen or utility area clutter-free. If you’re ready to take on this project, you’ll find that with good planning and the right steps, almost anyone can create a custom pantry—even with limited DIY experience.
This guide will walk you through everything you need to know to stack wall cabinets to make a pantry. You’ll learn how to plan, choose materials, prepare your space, install the cabinets safely, and finish your new pantry so it’s both beautiful and functional.
Along the way, you’ll discover tips and advice that even many experienced DIYers miss.
Why Stack Wall Cabinets To Create A Pantry?
When you stack wall cabinets, you’re using space that’s often wasted. Unlike traditional pantries, which can take up valuable floor area, wall cabinets let you build up, not out. This approach is popular for a few reasons:
- Budget-friendly: Wall cabinets are often less expensive than custom pantry units.
- Customizable: You control the height, width, and depth to fit your space and needs.
- Flexible: Works in kitchens, laundry rooms, garages, basements, or even hallways.
- Easier installation: Wall cabinets are lighter and simpler to handle than tall pantry cabinets.
Stacking cabinets also makes it easier to keep items within reach, group similar foods, and see what you have at a glance.
Planning Your Stacked Cabinet Pantry
Building a pantry from wall cabinets starts with smart planning. Rushing into installation without a clear plan is one of the biggest mistakes people make. Here’s how to start right:
Measure Your Space Carefully
Before you buy anything, measure the width, height, and depth of your available wall space. Write down:
- Floor-to-ceiling height
- Wall width (between obstacles like doors, windows, or outlets)
- Depth available (standard wall cabinets are 12”-15” deep)
Don’t forget to consider baseboards, vents, and light switches. Use a laser level or tape measure for accuracy.
Decide On Pantry Size And Shape
Will your pantry be a single column of cabinets, or a wider bank? Think about:
- Number of cabinets: How many can you fit vertically and horizontally?
- Cabinet height: Most wall cabinets come in 12”, 15”, 18”, 24”, and 30” heights.
- Total pantry height: Try to use as much vertical space as possible, but leave room at the top for crown molding or easier cleaning.
- Accessibility: Can everyone in your household reach the top shelves?
Drawing a simple sketch helps visualize the final look.
Choose Cabinet Style And Finish
You want your pantry to match (or at least complement) your kitchen or room. Wall cabinets come in many styles—shaker, slab, raised panel, glass-front, and more. Consider:
- Color: White brightens a space and looks clean, but wood finishes hide dirt better.
- Door style: Flat doors are modern; raised panels are classic.
- Hardware: Simple knobs or pulls keep things easy to open.
If your kitchen has existing cabinets, try to match them for a seamless look.
Set A Realistic Budget
Costs add up fast if you don’t plan. Here’s what to budget for:
- Cabinets (new, pre-owned, or ready-to-assemble)
- Wall anchors and screws
- Filler strips or side panels (if needed)
- Paint or finish (if repainting)
- Tools (drill, stud finder, level, etc.)
- Trim or molding
A basic stacked pantry using RTA (ready-to-assemble) cabinets can cost $300-$900. Going custom or buying high-end cabinets may cost more.
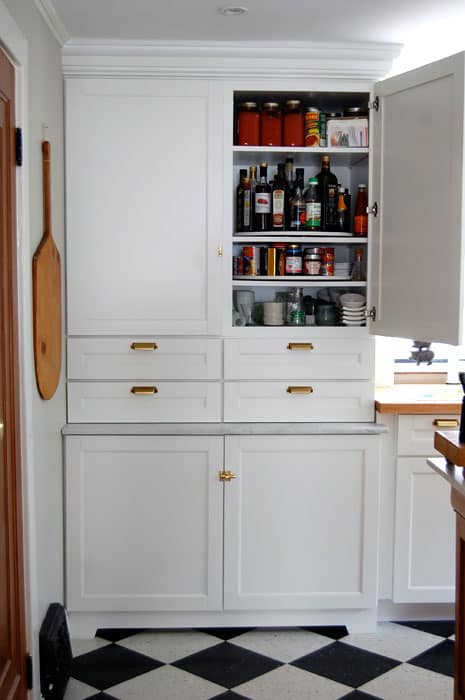
Credit: www.theartofdoingstuff.com
Choosing The Right Wall Cabinets
Not all wall cabinets are created equal. The right choice depends on how you’ll use your pantry and the space you have.
Standard Sizes And What They Mean
Wall cabinets are typically 12” deep and 30”-42” tall, but you’ll find shorter heights too. For pantries, consider these common sizes:
| Cabinet Height | Best Use | Typical Shelves |
|---|---|---|
| 12” | Top rows or under soffits | 1 |
| 18”-24” | Middle rows, accessible storage | 2 |
| 30”-36” | Main pantry, bulk storage | 2-3 |
| 42” | Maximum height, tall ceilings | 3-4 |
Deeper cabinets (15”-18”) provide more storage but can stick out too far in small rooms.
Material Choices: What Lasts And What Doesn’t
- Plywood: Strong, resists sagging, and lasts for years. Best for heavy items.
- MDF: Smooth finish, less expensive, but weaker if it gets wet.
- Particleboard: Most budget cabinets use this. It’s light and cheap but can warp over time.
- Solid wood: Beautiful but costly. Rare in wall cabinets except for doors.
If you plan to store heavy items (canned goods, small appliances), avoid particleboard.
New, Used, Or Diy Cabinets?
- New cabinets: Available at home centers, often in stock.
- Used cabinets: Check classifieds or reuse stores. You may need to repaint or modify them.
- DIY cabinets: Build to exact size, but need woodworking skills.
Don’t mix different materials in one pantry for a uniform look.
Tools And Materials You’ll Need
Having the right tools makes installation safer and faster. Here’s a list you’ll likely need:
Tools
- Stud finder: For safe, secure mounting.
- Level: At least 4 feet long for straight lines.
- Drill/driver: Cordless is easiest.
- Screwdriver: Manual for final tightening.
- Tape measure: For all measurements.
- Pencil/marker: Marking lines and holes.
- Clamps: To hold cabinets together when joining.
- Ladder or step stool: For upper cabinets.
Materials
- Wall cabinets (as chosen)
- Cabinet screws (2.5”–3”)
- Wall anchors (for locations without studs)
- Filler strips or scribe molding (if needed)
- Shims (for leveling)
- Wood glue (optional, for joining)
- Finishing nails (for trim)
Don’t forget safety glasses and gloves.
Preparing Your Wall For Stacking Cabinets
A safe, sturdy pantry starts with a solid wall. Many people skip this step, but prepping the wall is key for long-lasting cabinets.
Clear The Area
Remove any pictures, shelves, switch covers, or existing cabinetry from the wall. Clean the surface so nothing gets trapped behind the cabinets.
Check For Studs
Use a stud finder to locate all vertical studs in your wall. Mark their positions from floor to ceiling with pencil marks. You’ll need these for securely attaching cabinets.
Fix Wall Issues
- Patch holes, cracks, or damage.
- If your wall is uneven, use shims during installation.
- For very old drywall or plaster, reinforce weak spots with a plywood backer board.
Plan Electrical And Plumbing
If there are outlets, switches, or pipes in your chosen wall, make a plan. You may need to cut holes in the cabinets, reroute wiring, or pick a different spot.
How To Stack Wall Cabinets For A Pantry: Step-by-step
Now comes the most important part: putting it all together. Here’s how to stack wall cabinets to make a pantry that’s safe, sturdy, and looks professional.
1. Lay Out Your Pantry On The Wall
Use your measurements to mark where each cabinet will go. Draw the bottom line for the lowest cabinet first—this is your reference point. Use a level to keep lines straight.
- For floor-to-ceiling pantries, start about 1”-2” above the baseboard.
- Mark each cabinet’s top and bottom edges on the wall.
- Mark stud locations through each cabinet zone.
2. Install A Support Ledge (optional But Recommended)
Screwing a temporary 1×4 wood ledger to the wall at the base of your lowest cabinet supports weight and keeps cabinets level during installation.
- Attach ledger to wall studs with screws.
- Remove ledger after all cabinets are attached.
This step is often skipped, but it prevents sagging or crooked cabinets.
3. Attach The First (bottom) Row Of Cabinets
- Drill holes through the cabinet’s hanging rail (the thick strip inside the back).
- Hold the cabinet in place, lining up with your marks.
- Screw through the back and into wall studs. Use cabinet screws (not drywall screws).
- Check for level and adjust with shims if needed.
- For wider pantries, clamp adjacent cabinets together and screw through the sides to join them.
Tip: Always screw into at least two studs per cabinet, and use at least three screws per cabinet.
4. Stack The Next Cabinet(s) Above
- Place the next cabinet on top of the first.
- Clamp the face frames together (if two-wide).
- Screw the upper cabinet to the lower one through the face frame or side panels.
- Drive screws through the back of the upper cabinet into wall studs.
- Continue stacking and securing each cabinet until you reach the top.
Pro insight: For extra strength, use wood glue between cabinets before screwing them together.
5. Secure And Join Side-by-side Cabinets
- If your pantry is more than one cabinet wide, join them side-by-side using screws through the face frames.
- Make sure all doors and drawers open freely before final tightening.
6. Fill Gaps With Filler Strips Or Panels
Walls are rarely perfectly straight. If there’s a gap between your pantry and the wall, install a filler strip or scribe molding.
- Measure the gap width.
- Cut the filler to size and attach to the cabinet side, then to the wall.
- Caulk or paint for a smooth look.
7. Add Trim, Crown Molding, Or Toe Kicks
For a finished, built-in look:
- Add crown molding at the top of the pantry.
- Install side panels to cover raw edges.
- For floor-level pantries, add a toe kick panel.
8. Paint Or Finish As Needed
If cabinets need painting, do it before installing doors and hardware. Use kitchen-grade paint for durability.
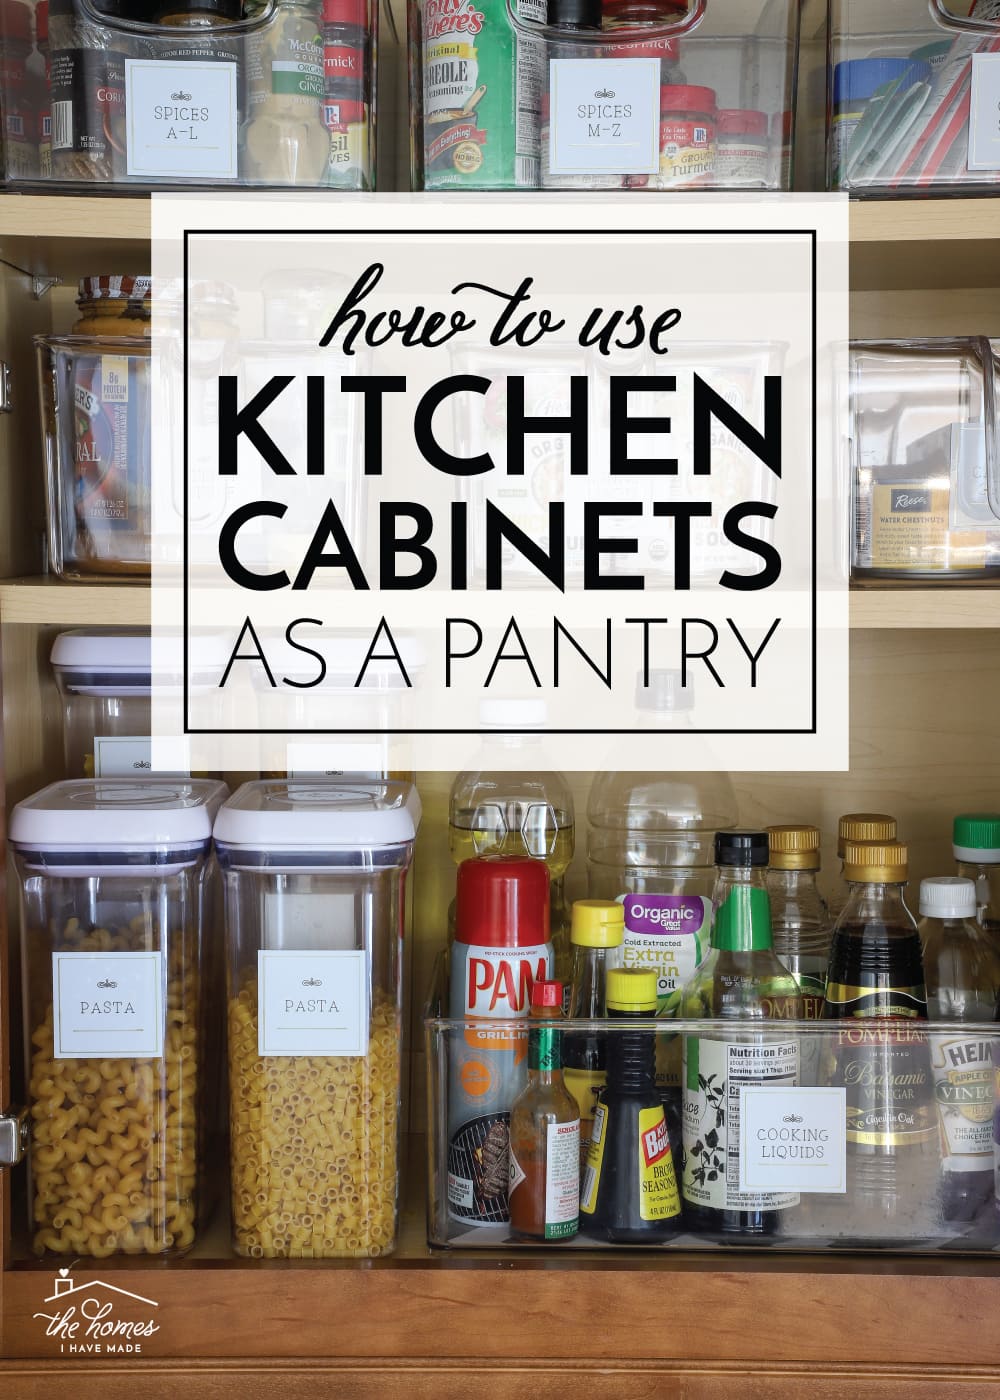
Credit: thehomesihavemade.com
Organizing Your New Pantry For Maximum Storage
A stacked cabinet pantry is only as good as its organization. Here’s how to make the most of your new space:
Use Adjustable Shelves
Most cabinets have adjustable shelves. Set heights to fit your tallest items—cereal boxes, bottles, or appliances.
Add Pull-out Drawers Or Bins
Pull-out shelves or wire baskets make deep cabinets more usable. You can buy pre-made kits or install simple plastic bins.
Label Everything
Especially for deep or high shelves, labels help everyone find what they need quickly.
Store By Frequency
- Place everyday items (snacks, canned goods) at eye level.
- Store rarely used items (holiday dishes, bulk items) on the highest shelves.
Use Clear Containers
Transfer dry goods to clear containers to see what you have and keep food fresh.
Safety And Stability: Avoiding Common Mistakes
Even many handy homeowners make mistakes with stacked cabinets. Here’s how to avoid the most common issues:
Mistake 1: Not Screwing Into Studs
Cabinets full of food are heavy. Always anchor each cabinet into at least two wall studs. If studs don’t line up, use heavy-duty wall anchors rated for at least 75 lbs each.
Mistake 2: Skipping Support Between Cabinets
Stacked cabinets can tip if only attached to the wall. Always screw through the face frames or sides to join cabinets together.
Mistake 3: Overloading Shelves
Standard cabinet shelves hold about 35-50 lbs. For heavy items, reinforce shelves with extra supports or limit weight.
Mistake 4: Ignoring Level
Stacked cabinets only look good if they’re perfectly level. Use a long level for every row. Shim as needed before final screws.
Mistake 5: Blocking Outlets Or Switches
Plan for electrical needs. Don’t trap outlets behind cabinets you’ll need later.
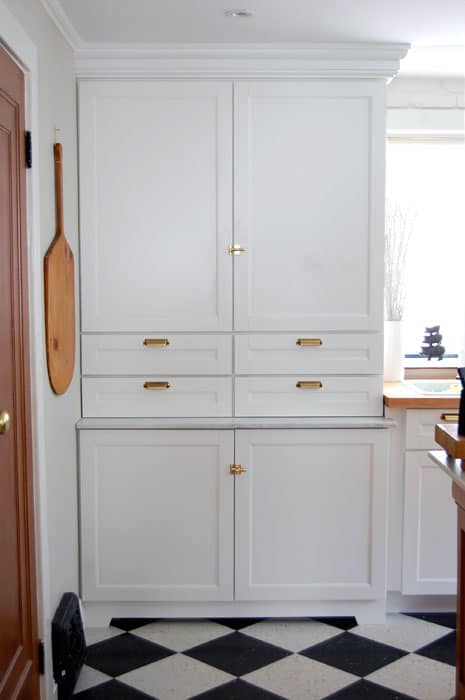
Credit: www.theartofdoingstuff.com
Comparing Stacked Cabinet Pantries To Other Pantry Solutions
How does a stacked wall cabinet pantry compare to other common options?
| Solution | Cost | Space Used | Pros | Cons |
|---|---|---|---|---|
| Stacked Wall Cabinets | Low–Medium | Vertical, little floor area | Custom height; blends in; reuses space | Some DIY skills needed |
| Free-standing Pantry Cabinet | Medium | Floor space needed | Easy install; portable | Less stable; less custom |
| Wire Shelving | Low | Open wall | Cheap; easy to install | Messy look; dust collects |
| Built-in Pantry Closet | High | Large area | Ultimate storage | Expensive; may need contractor |
For most homes, stacking wall cabinets is the best mix of price, space, and style.
Maintenance Tips For Your Pantry Cabinets
To keep your new pantry looking great and working well:
- Clean doors and handles weekly.
- Check screws and anchors every few months.
- Avoid overloading shelves.
- Touch up paint as needed.
- Use shelf liners for easy cleaning.
If a door sags, tighten the hinge screws or adjust the hinge position.
Creative Customizations To Make Your Pantry Unique
Want to go beyond the basics? Here are some ways to personalize your stacked cabinet pantry:
Add Lighting
Install LED strip lights under shelves or inside cabinets for better visibility.
Use Glass Doors For Display
Show off pretty dishes or glass jars by swapping some doors for glass fronts.
Paint A Bold Color
Don’t be afraid to use a pop of color for a fun, modern look.
Install A Rolling Ladder
For very tall pantries, a mini rolling ladder can make top shelves accessible and stylish.
Add A Chalkboard Or Whiteboard Panel
Great for shopping lists or reminders right on your pantry door.
Example: A Real-world Wall Cabinet Pantry Transformation
Consider this example: A couple in a small urban apartment wanted a pantry but had only a 7-foot stretch of wall in their kitchen. They bought three 30” x 30” white shaker wall cabinets and stacked them to reach almost to the ceiling.
- Total cost: $450 (cabinets, screws, paint, trim)
- Time spent: About 6 hours (including painting and organizing)
- Result: Gained over 18 cubic feet of storage, matching their kitchen style perfectly.
They noted that using a ledger board during installation was the key step to getting everything perfectly straight—a detail often skipped in quick online guides.
Frequently Asked Questions
How Much Weight Can Stacked Wall Cabinets Hold?
Most wall cabinets hold 35-50 pounds per shelf if properly anchored to studs. For heavy pantry items, reinforce shelves and avoid overloading. Always follow the cabinet manufacturer’s guidelines.
Can I Stack Base Cabinets Instead Of Wall Cabinets For A Pantry?
You can, but base cabinets are deeper (24”) and may stick out too far, making the pantry feel bulky. Wall cabinets (12”-15” deep) are better for vertical stacking and save space.
Is It Safe To Stack Cabinets All The Way To The Ceiling?
Yes, as long as each cabinet is securely anchored to wall studs and joined to the cabinet below. For ceilings over 9 feet, consider leaving a gap at the top or using a rolling ladder for access.
What’s The Best Way To Organize A Stacked Cabinet Pantry?
Use adjustable shelves, clear bins, and labels. Store everyday items at eye level and rarely used items up high. Pull-out baskets or lazy Susans help for deep or hard-to-reach shelves.
Where Can I Find Good Instructions Or Inspiration For Stacked Cabinet Pantries?
You can find excellent step-by-step guides and visual inspiration on DIY forums, home improvement channels, and sites like Family Handyman.
Creating a pantry by stacking wall cabinets is a project that delivers big results with a moderate investment of time and money. It’s a flexible solution that works in many spaces, and with good planning and careful installation, you’ll gain organized, attractive storage for years to come.
Don’t rush—measure twice, anchor carefully, and add your own creative touches. Your new pantry will quickly become one of your favorite features at home.