
Shower drain rough-in plumbing is one of those parts of bathroom construction that most people never see, but it’s absolutely critical for a safe and leak-free shower. If you get it wrong, you can have water damage, musty smells, or even a shower that never drains right.
Yet, with a bit of planning and the right knowledge, you can set a solid foundation for your entire shower system. Let’s walk through what shower drain rough-in plumbing involves, why it matters, and how you can get it right—even if you’re not a plumbing professional.
What Is Shower Drain Rough-in Plumbing?
When you hear the term rough-in plumbing, it refers to the first phase of the plumbing process. This is when all the pipes, drains, and vents are installed, but before any fixtures, tiles, or finishes are added. For a shower, the drain rough-in means placing the drain pipe in the correct position and at the correct height, making sure it connects to the main drain line, and ensuring proper venting for smooth water flow.
Many homeowners and even DIYers think the shower drain is just about the visible grate on the floor. In reality, the rough-in is the hidden part that decides if your shower drains well for years.
Why Shower Drain Rough-in Matters
A well-done shower drain rough-in ensures:
- Proper drainage: Water moves quickly away, preventing standing water.
- No leaks: Seals and pipe placement reduce the risk of slow leaks behind walls or under floors.
- Easy inspection and repair: Good layout makes future maintenance less painful.
- Building code compliance: Most cities have strict rules about plumbing rough-ins.
If you skip steps or guess measurements, you can face expensive repairs later. Water damage is often slow and hidden, so getting the rough-in right from the start is worth the effort.
Key Shower Drain Rough-in Measurements
Getting your measurements right is the backbone of good plumbing. Here are the most important dimensions to know:
Standard Shower Drain Location
For most showers, the drain is centered in the shower pan. The usual distance is:
- 12 inches from the finished wall (measured from the framing, not the drywall)
- 12 inches from the opposite wall if the shower is a square
But shower sizes vary. For rectangular pans or custom showers, measure carefully based on the pan’s design.
Drain Pipe Size
The drain pipe diameter is also critical. For most residential showers:
- 2-inch PVC or ABS pipe is required by code
- Some older homes may have 1.5-inch pipes, but this is not recommended for new installs
A 2-inch pipe handles more water flow and is less likely to clog.
Drain Height
The vertical position of the drain pipe (how high it sits above the subfloor) is also essential:
- The center of the drain pipe should be 1 1/2 to 2 inches below the finished shower floor level
- This allows space for the drain body, a trap, and proper slope
Slope Of Drain Pipe
The pipe must slope so that water flows by gravity:
- 1/4 inch per foot is the standard slope for shower drains
- Never make the slope too steep—water can outrun solids, leading to clogs
Shower P-trap Position
The P-trap must be directly under the shower drain, with no horizontal pipes between the drain and trap. This design prevents sewer gases from coming up into the shower.
Minimum Distance To Vent
Vents help air move through the pipes. The code requires a vent within a certain distance from the trap:
- For a 2-inch pipe, the vent must be within 8 feet of the P-trap
If your shower is far from the main vent stack, you may need to add a dedicated vent.
Tools And Materials Needed
Before starting, gather all the necessary tools and materials. This saves time and helps you avoid mistakes.
Tools
- Tape measure
- Level
- Pipe cutter or saw
- Adjustable wrench
- Pipe wrench
- Screwdriver set
- Chalk line or marker
- Drill with hole saw
Materials
- 2-inch PVC or ABS pipe (length depends on distance to main drain)
- P-trap (matching pipe material)
- Shower drain assembly (with strainer)
- Pipe hangers or clamps
- PVC or ABS primer and cement
- Pipe insulation (optional, for noise reduction)
- Plumber’s putty or silicone
- Vent pipe (if required)
Having the right tools and materials ensures the rough-in phase goes smoothly.
Step-by-step Shower Drain Rough-in Process
Setting up a shower drain rough-in is a process that requires precision. Here’s a practical guide for most standard showers:
1. Planning And Marking
First, review your shower design and the manufacturer’s instructions for the shower pan or base. Mark the center point for the drain on the subfloor, based on your measurements.
Use a tape measure and chalk line to double-check that the drain location is centered and not blocked by joists or other obstructions.
2. Cutting The Subfloor
Cut a hole in the subfloor where the drain will go. The hole should be slightly larger than the outer diameter of your drain body, usually about 4 to 5 inches.
Be careful not to cut into any joists or wiring below.
3. Running The Drain Pipe
From the main drain stack, run a 2-inch pipe to the shower location. Make sure every joint is securely glued (for PVC or ABS) and that the pipe is sloped at 1/4 inch per foot toward the main drain.
If you must navigate around obstacles, use elbows and couplings. Try to keep bends gentle—sharp turns can cause clogs.
4. Installing The P-trap
Install the P-trap directly below the drain hole. The straight part of the trap must line up perfectly with the drain opening above.
Secure the trap in place with pipe hangers to prevent movement.
5. Connecting The Vent
If your shower needs a new vent, run a vent pipe from just past the P-trap to the nearest vent stack or through the roof, following local code.
Seal all joints and support pipes every 4 feet horizontally and 10 feet vertically.
6. Test Fitting The Shower Drain
Dry-fit the shower drain assembly to make sure everything aligns. The top of the drain body should sit flush with the finished floor once tile or the shower base is installed.
If the fit is off, adjust the pipe height or reposition the trap as needed.
7. Gluing And Sealing
Once you’re satisfied with the fit, glue all joints using the correct primer and cement. Seal the drain assembly to the pipe and the subfloor using plumber’s putty or silicone to prevent leaks.
8. Pressure Test
Before closing the floor, test the system. Plug the drain, fill the pipe with water, and check for leaks at every joint. If you see drips or moisture, fix the connection before covering up.
9. Preparing For Inspection
Most cities require a plumbing inspection before you install the shower base or tile. Have the inspector check your work to ensure it meets code.
10. Final Adjustments
After inspection, you can install the shower base or mud pan. The visible part of the drain should screw into the rough-in so you can adjust the height for perfect alignment with the final floor.
Common Mistakes In Shower Drain Rough-in
Many problems with showers start with hidden mistakes during rough-in. Here are the most common issues and how to avoid them:
1. Incorrect Pipe Slope
If the pipe is too flat, water pools and drains slowly. Too steep, and solids don’t move with the water. Always use a level to check the 1/4 inch per foot slope.
2. Using The Wrong Pipe Size
A 1.5-inch drain may seem easier to install, but it can’t handle modern shower flow rates. Stick to 2-inch pipe.
3. Poor P-trap Placement
If the trap is not directly under the drain, you risk clogs and sewer gas leaks. Never install the trap far from the drain.
4. Not Enough Venting
Without a vent, water can gurgle or drain slowly. Always follow code for vent distance and pipe size.
5. Leaky Joints
Rushing glue jobs or using the wrong cement leads to leaks that are hard to fix later. Take your time and check every connection.
6. Ignoring Local Building Code
Building codes exist for a reason. Always check the latest requirements for your area—they can change, and inspectors will notice.
7. Not Testing Before Covering
Never close up the floor or walls before you’ve pressure tested your plumbing. Water damage from leaks can destroy floors and framing.
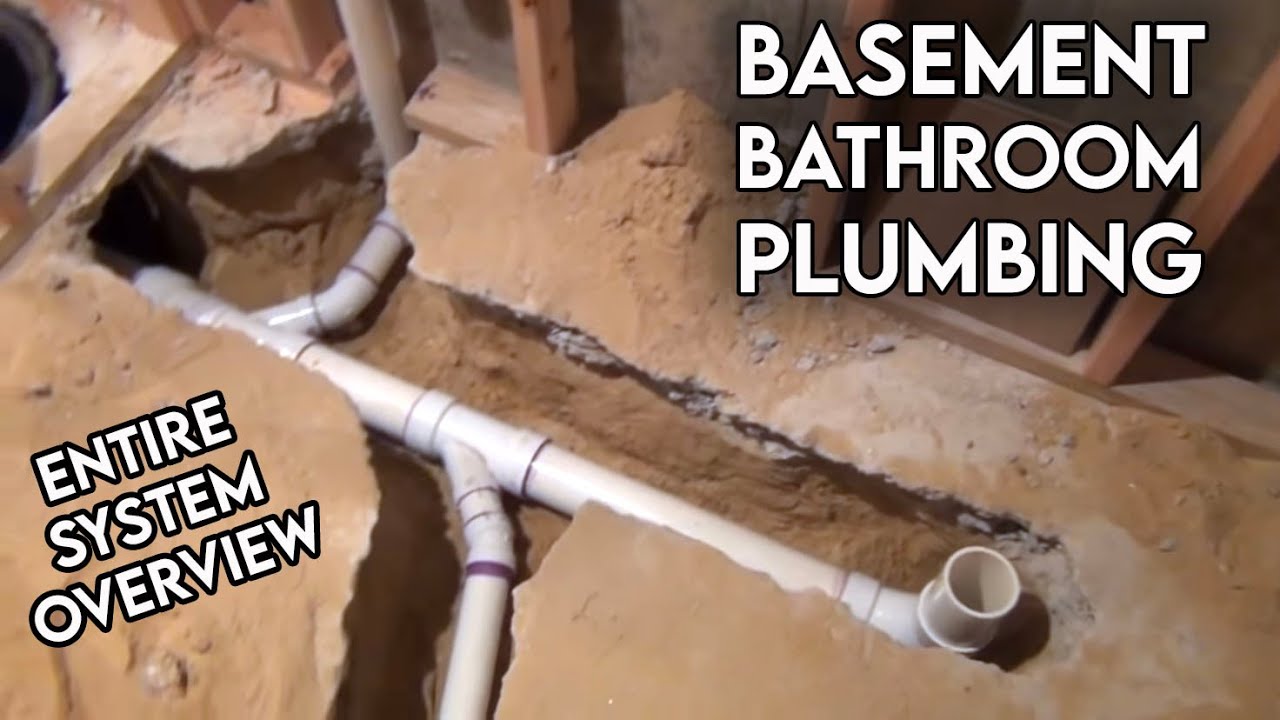
Credit: www.youtube.com
Different Shower Drain Types And Their Rough-in Requirements
Not all showers use the same drain. Here’s how rough-in requirements can change based on the type of drain you choose:
Standard Center Drain
This is the most common. The drain is centered in the shower and uses a 2-inch pipe with a simple P-trap.
Linear Drain
Linear or trench drains are long and narrow, often placed at one end of the shower. They require:
- More precise placement (usually against a wall)
- Careful measurement to match the drain body to the shower slope
- Sometimes multiple drain connections for large showers
Tile-in Drain
These drains allow tile to sit inside the drain grate for a seamless look. They need:
- Exact alignment with the finished tile height
- Careful waterproofing around the drain
Barrier-free/curbless Shower Drains
These showers sit flush with the bathroom floor. The rough-in must be:
- Very precise in height (no step up or down)
- Extra care to waterproof the area around the drain
Pre-sloped Shower Bases
Some modern showers use a pre-sloped base. You’ll need to:
- Match the drain location exactly to the base’s design
- Use the manufacturer’s drain assembly for a leak-proof fit
Shower Drain Rough-in Codes And Regulations
Codes exist to keep your shower safe and functional. Here are the main code requirements for shower drain rough-ins in the United States (always check your local code for details):
- Drain pipe size: Minimum 2 inches
- P-trap required: Must be under the drain, no exceptions
- Trap to vent distance: Maximum 8 feet for 2-inch pipe
- Slope: 1/4 inch per foot minimum
- Trap arm length: Not more than 6 feet from drain to vent (some areas stricter)
- Accessibility: Cleanouts required in some cases
These codes are based on the International Residential Code (IRC) and Uniform Plumbing Code (UPC). Codes can be stricter in some cities, so always check before you start.
Shower Drain Rough-in For Different Floor Types
The process can change depending on your floor structure.
Concrete Slab
Rough-ins in concrete are the toughest to change later. You must:
- Cut or break the concrete to install the drain and trap
- Run all pipes before pouring new concrete
- Use a sleeve around the pipe to allow for movement and adjustment
Wood Subfloor
This is more common in houses with basements or crawlspaces. You can:
- Cut holes in the subfloor for the drain
- Run pipes below in the joist space
- Access pipes for repairs in the future
Second-floor Or Above
Extra care is needed to prevent leaks:
- Use pipe insulation to reduce drain noise
- Double-check for proper slope—gravity flow is critical
- Waterproof the floor around the drain
Waterproofing And The Shower Drain Rough-in
Waterproofing is the silent partner of good plumbing. Even the best rough-in can fail if water seeps around the drain. Here’s what you need to know:
Shower Pan Liners
Most tile showers require a vinyl or PVC liner that sits below the mortar bed and wraps up the walls. The liner must be:
- Sealed tightly to the drain body (usually with a clamping ring)
- Sloped gently toward the drain (1/4 inch per foot)
- Extended up the wall at least 6 inches
Preformed Bases
These come with built-in waterproofing, but you still need to:
- Seal the drain connection with the manufacturer’s gasket or sealant
- Test for leaks before tiling
Liquid Waterproofing Membranes
Some showers use brush-on membranes over the mortar bed. Be sure to:
- Overlap the membrane onto the drain flange
- Use compatible products for a watertight seal
Cost And Time Estimates For Shower Drain Rough-in
Knowing what to expect can help you budget your time and money.
Material Costs
- 2-inch PVC pipe (10 feet): $8–$15
- P-trap: $5–$10
- Shower drain assembly: $15–$40
- Primer and cement: $10
- Miscellaneous fittings: $10–$20
Total materials: $50–$100 for a typical shower
Labor Costs
- Professional plumber: $300–$700 for rough-in (varies by region)
- DIY: Free, but can take more time if you’re learning
Time Required
- Planning and marking: 1–2 hours
- Cutting and fitting: 2–4 hours
- Testing and inspection: 1–2 hours
Total time: 1 full day for experienced DIYers, 2 days if learning
Real-world Example: A Common Rough-in Scenario
Suppose you have a 36”x36” shower pan for a remodel. You check the manufacturer’s cut sheet and see the drain should be 18 inches from each wall. You mark the subfloor, check for joists, and find the old drain is off-center.
- You cut back the old pipe, add elbows and a new 2-inch pipe, and set the P-trap right under the new hole.
- You check the slope with a level, glue all joints, and dry-fit the drain.
- After a quick water test, you call for inspection.
- Once approved, you install the shower pan, connect the drain, and waterproof the area.
This process gives you a reliable, code-approved drain that will last for years.
Data Comparison: Common Shower Drain Types
To help you choose the right drain for your project, here’s a comparison of the main types:
| Drain Type | Typical Placement | Rough-In Complexity | Best For |
|---|---|---|---|
| Standard Center | Center of shower pan | Easy | Most standard showers |
| Linear | Against one wall | Moderate to difficult | Modern, curbless, or large showers |
| Tile-In | Center or edge | Moderate | Custom tile showers |
| Barrier-Free | Flush with floor | Difficult | Accessible showers |
Shower Drain Rough-in: Code Vs. Best Practice
Sometimes, the minimum code isn’t the best choice. Here’s a quick comparison:
| Feature | Code Minimum | Best Practice |
|---|---|---|
| Pipe Size | 2 inches | 2 inches (never smaller) |
| Slope | 1/4 inch per foot | Check with a level to avoid dips |
| Trap to Vent Distance | 8 feet max | Vent as close as possible |
| Waterproofing | Not always specified | Use liner or membrane for all tile showers |
Advanced Tips And Non-obvious Insights
1. Check For Joist Placement Early
One common beginner mistake is not checking the location of floor joists before marking the drain. If the joist is in the way, you’ll need to adjust your plan or reinforce the structure, which can slow down the project.
2. Use A Test Plug, Not Just Tape
When pressure testing, use a dedicated pipe test plug, not duct tape or makeshift covers. This ensures the system holds water and reveals leaks that tape might hide.
3. Adjust For Finished Floor Height
If you plan to add thick tile or a mortar bed, raise the drain assembly slightly during rough-in. This avoids having the finished drain sit below the tile, which can lead to water pooling.
4. Pre-plan For Accessibility
If you ever want a barrier-free (curbless) shower, set the drain and trap as low as possible during rough-in. It’s much harder to lower the drain later.
5. Double-check Local Code Updates
Some cities have very specific rules—like requiring a certain type of vent or a special trap primer. Always call your local building department to confirm before starting.
When To Call A Professional
While DIYers can often handle shower drain rough-ins, there are times to call in a licensed plumber:
- If you’re unsure about code requirements
- If the drain is in a slab and you need to cut concrete
- If moving the main drain line or vent stack
- When time is critical and mistakes are costly
A professional can also help you pass inspection the first time, saving time and stress.
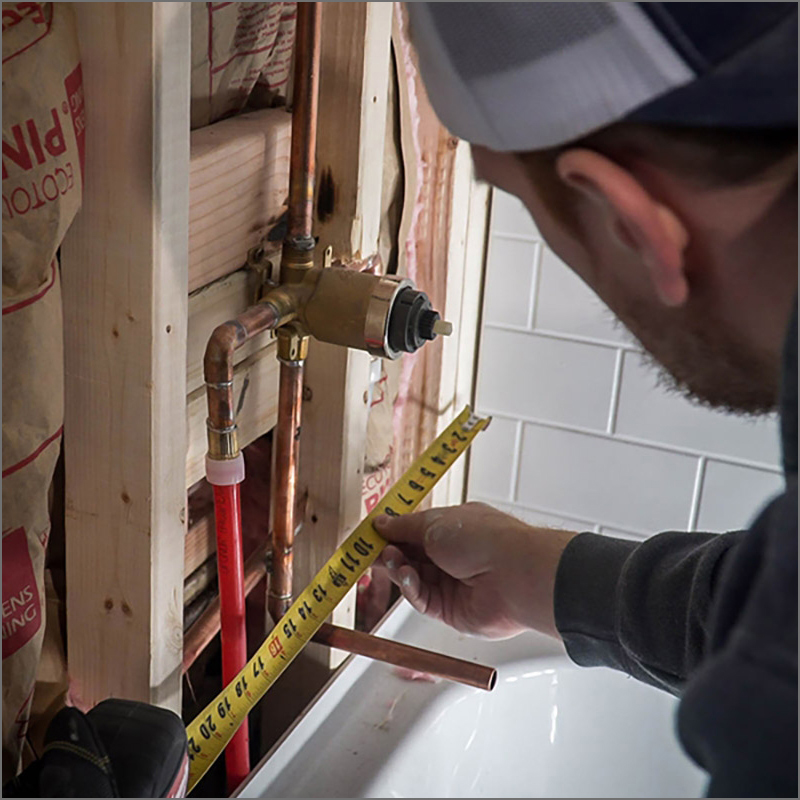
Credit: www.homedepot.com
Additional Resources
Learning more about plumbing codes and best practices helps avoid mistakes. The International Association of Plumbing and Mechanical Officials provides detailed code documents and guides.
Frequently Asked Questions
What Is The Standard Rough-in Height For A Shower Drain?
The typical rough-in height for a shower drain is 1 1/2 to 2 inches below the finished floor. This allows space for the drain body and proper connection to the P-trap. Always check the shower pan or base instructions for exact measurements.
Can I Use A 1.5-inch Drain Pipe For A New Shower?
No, the current plumbing code requires a 2-inch drain pipe for new showers. A 1.5-inch pipe may not handle modern shower flow rates and is only found in older homes.
How Close Does The Vent Need To Be To The Shower Drain?
For a 2-inch drain pipe, the vent should be within 8 feet of the P-trap. It’s best to keep the vent as close as possible for the best drainage and to avoid gurgling sounds.
How Do I Rough-in A Shower Drain In A Concrete Slab?
You must cut or break the concrete to install the drain and P-trap. Place a sleeve around the pipe for adjustment, and make all connections before pouring new concrete. Test for leaks and check alignment before finishing.

Credit: www.lowes.com
Do I Need A Permit For A Shower Drain Rough-in?
In most areas, yes. A permit is required for any new or relocated plumbing. This ensures the work is inspected and meets building codes, protecting your home from leaks and code violations.
Getting the shower drain rough-in right is the foundation of a leak-free, worry-free bathroom. A careful plan, the right materials, and attention to detail will help your shower drain smoothly for years to come.